Introduction
The Nokia Lumia 2520 is a tablet manufactured in 2013 and has a Microsoft based software. The tablet display has a 10 inch display size while producing a resolution of 1920x1080 pixels. If the screen on the Lumia 2520 is clean and not broken and the display on the tablet is pixelated or faded; the display assembly inside the tablet needs to be replaced.
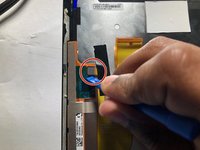
This guide will demonstrate the steps needed to safely remove the display assembly for replacement.
Ce dont vous avez besoin


To reassemble your device, follow these instructions in reverse order.
Équipe

Gateway, Team S1-G4, Luster Fall 2018 Membre de l'équipe Gateway, Team S1-G4, Luster Fall 2018
GCC-LUSTER-F18S1G4
5 membres
5 tutoriels rédigés