Aller au contenu principal

Nokia Lumia 920 Screen Replacement

Ce dont vous avez besoin

  1. Nokia Lumia 920 Screen Replacement, Display: étape 1, image 1 de 2 Nokia Lumia 920 Screen Replacement, Display: étape 1, image 2 de 2
    • Today i will explain how to replace the screen from a Nokia Lumia 920

    • Specs:

    • Storage: 32GB

    • Camera Resolution: 8.7 megapixel

    • Battery talk time: a little more than 18 and a half hours

    • Screen resolution: 1280 X 768

    • CPU: Dual core 1.5 GHz Krait chip

  2. Nokia Lumia 920 Screen Replacement, Bottom screws & sim card reader: étape 2, image 1 de 3 Nokia Lumia 920 Screen Replacement, Bottom screws & sim card reader: étape 2, image 2 de 3 Nokia Lumia 920 Screen Replacement, Bottom screws & sim card reader: étape 2, image 3 de 3
    • Turn off your device BEFORE STARTING disassembly!

    • Remove the SIM tray on the top of the Lumia 920.

    • Remove both Torx T5 screws on the bottom

  3. Nokia Lumia 920 Screen Replacement, Back cover: étape 3, image 1 de 3 Nokia Lumia 920 Screen Replacement, Back cover: étape 3, image 2 de 3 Nokia Lumia 920 Screen Replacement, Back cover: étape 3, image 3 de 3
    • Try to make a little gap between the screen and the back cover. If needed, use the iSesamo Opening Tool.

    • Once there's a gap, put your plastic opening tool between the screen and the back cover and then slowly slide to the bottom. This way you should be able to pry off the back cover without using too much force.

  4. Nokia Lumia 920 Screen Replacement, Connectors: étape 4, image 1 de 3 Nokia Lumia 920 Screen Replacement, Connectors: étape 4, image 2 de 3 Nokia Lumia 920 Screen Replacement, Connectors: étape 4, image 3 de 3
    • Don't remove the back cover completely yet because it's still attached with a ribbon cable which you can easily rip apart.

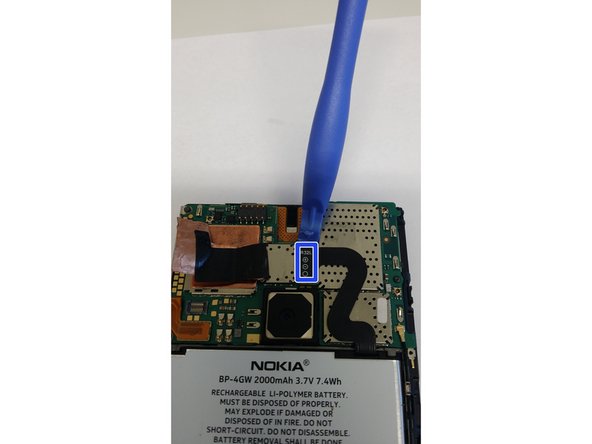
    • First remove the metal shield holding the cable in place, then disconnect the connector that attaches the back cover to the motherboard. Then remove the cable. This works best using a plastic tool or a spudger.

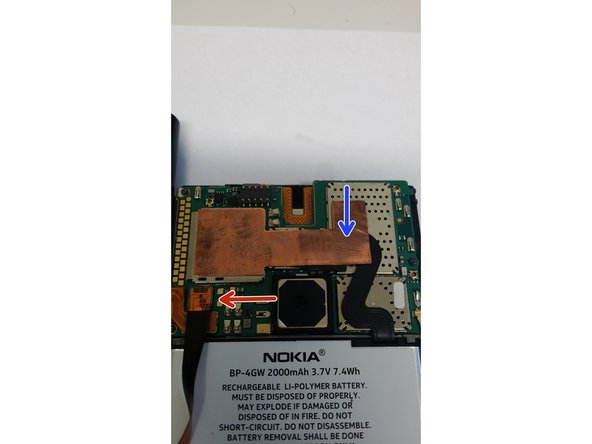
    • Remove the copper tape and disconnect the battery.

  5. Nokia Lumia 920 Screen Replacement, Screws: étape 5, image 1 de 3 Nokia Lumia 920 Screen Replacement, Screws: étape 5, image 2 de 3 Nokia Lumia 920 Screen Replacement, Screws: étape 5, image 3 de 3
    • We're going to remove all screws in one step now. Please make sure to place them in a way that you know how to screw them back in place when reassembling the device. If you interchange the screws this might cause damage to your device.

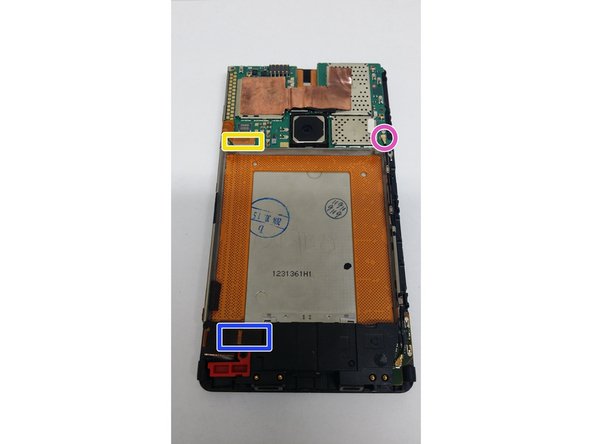
    • First, remove the 3 torx screws holding down the logic board. Keep these apart so as to prevent damage to the motherboard.

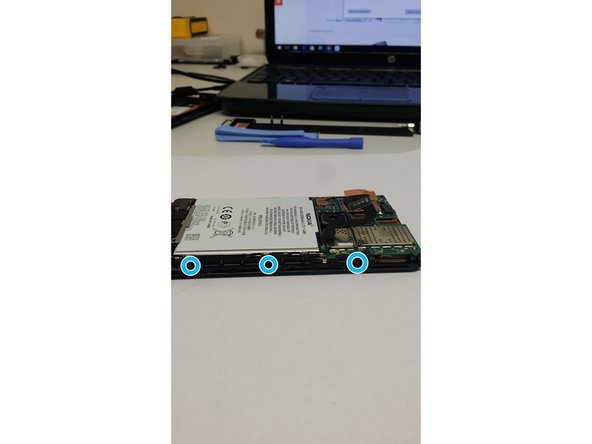
    • Remove all 3 torx screws at the right side of the device. (They're all the same size)

    • Remove the last torx screw located at the bottom left of the device.

    • Once again, when you lay the screws aside, please make sure that you know how to screw them back in place.

  6. Nokia Lumia 920 Screen Replacement: étape 6, image 1 de 3 Nokia Lumia 920 Screen Replacement: étape 6, image 2 de 3 Nokia Lumia 920 Screen Replacement: étape 6, image 3 de 3
    • Remove the metal plate at the bottom of the battery.

    • Disconnect the volume / power switch.

    • Carefully disconnect the RF cable from the motherboard.

    • And disconnect the digitizer cable (Touch / LCD connector).

  7. Nokia Lumia 920 Screen Replacement, Touch connector: étape 7, image 1 de 3 Nokia Lumia 920 Screen Replacement, Touch connector: étape 7, image 2 de 3 Nokia Lumia 920 Screen Replacement, Touch connector: étape 7, image 3 de 3
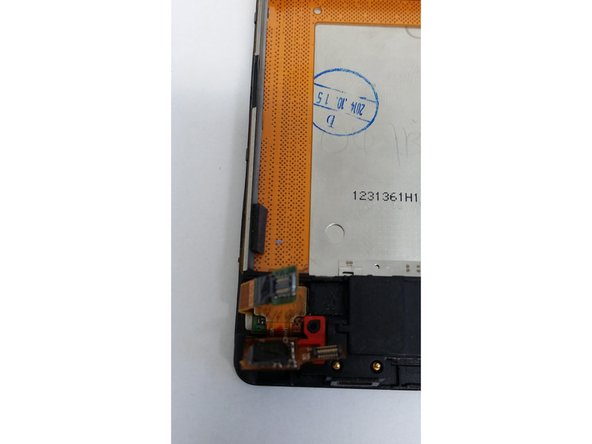
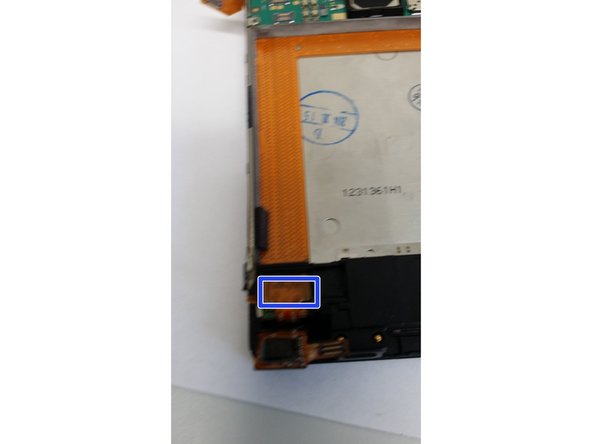
    • Push up the touch array cable to disconnect it.

    • Don't use brute force to remove it, just wiggle it lose with a plastic tool. If this is difficult, use a heathen (a hair dryer should also work).

    • Disconnect the LCD connector using a plastic tool.

  8. Nokia Lumia 920 Screen Replacement, Remove the cover of the motherboard: étape 8, image 1 de 3 Nokia Lumia 920 Screen Replacement, Remove the cover of the motherboard: étape 8, image 2 de 3 Nokia Lumia 920 Screen Replacement, Remove the cover of the motherboard: étape 8, image 3 de 3
    • During this step, some components may fall out of their place, such as the speaker or SIM card cover, but you can easily put them back by slightly lifting up the logic board.

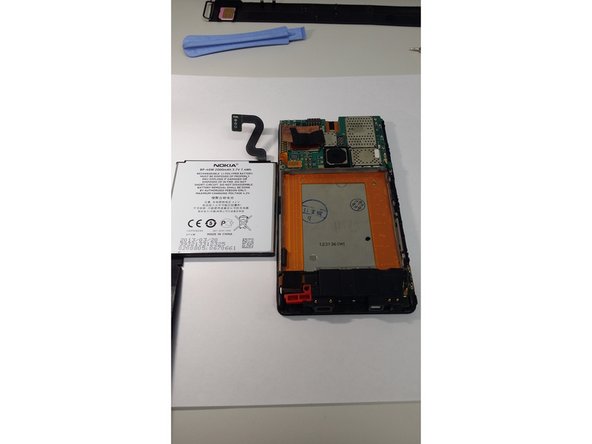
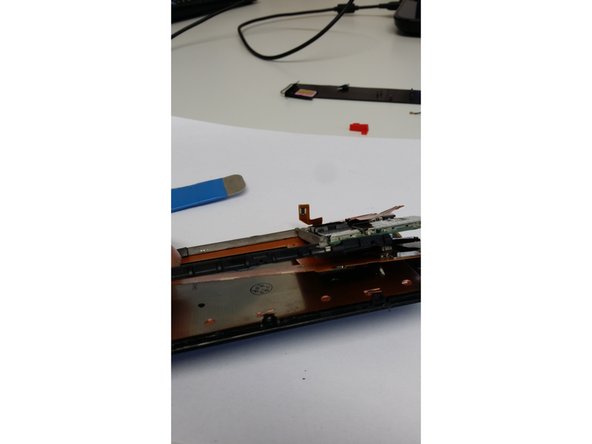
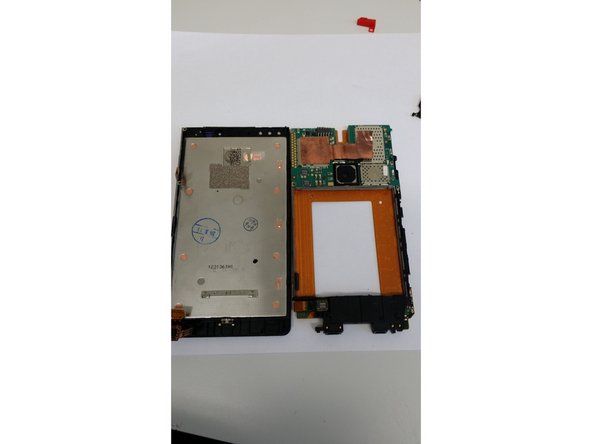
    • Insert your iSesamo between the cover of the motherboard and the cover of the LCD which is very brittle.

    • Unclick the cover of the motherboard (which should be very easy to do).

    • On picture 3 you can see that you also have to remove the camera AND the proximity sensor.

Conclusion

To reassemble the phone, follow the instructions in reverse order

7 autres ont terminé cette réparation.

Merci à ces traducteurs :

nl en

100%

Ces traducteurs nous aident réparer le monde ! Vous voulez contribuer ?
Commencez à traduire ›

Brian ifikske

Membre depuis le 09/10/15

696 Réputation

1 tutoriel rédigé

Équipe

OPEN Membre de l'équipe OPEN

Community

82 membres

25 tutoriels rédigés

Un commentaire

Touch screen not working Nokia lumia 920

Sankar Muthaiyan - Réponse

Ajouter un commentaire

Nombre de vues :

Dernières 24 heures : 0

7 derniers jours : 3

30 derniers jours : 15

Total : 5,752