Aller au contenu principal

Nostalgia Electrics RHP-310 Replacing Housing Replacement

Ce dont vous avez besoin

  1. Nostalgia Electrics RHP-310 Replacing Housing Replacement, Power Switch: étape 1, image 1 de 1
    • Unplug the popper.

    • Lift the lid up to remove it.

  2. Nostalgia Electrics RHP-310 Replacing Housing Replacement: étape 2, image 1 de 1
    • Lay the popper on its side.

    • Remove the five 12mm Philips #2 screws around the perimeter of the base with the Phillips #2 screwdriver.

    • Remove the two 15mm Philips #2 screws in the center of the base with the Phillips #2 screwdriver.

    • Put the removed screws in a safe place, they will be needed later to reattach the housing to the base.

  3. Nostalgia Electrics RHP-310 Replacing Housing Replacement: étape 3, image 1 de 1
    • Flip the base over to view the interior of the base panel.

    • Unscrew the two 10 mm Philips #2 screws from the base panel.

    • Remove the base and set it aside.

  4. Nostalgia Electrics RHP-310 Replacing Housing Replacement: étape 4, image 1 de 2 Nostalgia Electrics RHP-310 Replacing Housing Replacement: étape 4, image 2 de 2
    • Locate the power switch connected to the side of the housing.

    • Pinch the sides of the power switch.

    • Push the power button up and out of the housing.

  5. Nostalgia Electrics RHP-310 Replacing Housing Replacement: étape 5, image 1 de 1
    • Remove the wires connected to the power switch that should be detached from the housing.

    • Gently pry the wires loose from the power switch with the plastic opening tool.

    • The wires should easily pop out from the power switch.

  6. Nostalgia Electrics RHP-310 Replacing Housing Replacement: étape 6, image 1 de 1
    • Remove the power switch from the housing unit.

    • You can now replace the power switch, if necessary.

  7. Nostalgia Electrics RHP-310 Replacing Housing Replacement, Replacing Housing: étape 7, image 1 de 2 Nostalgia Electrics RHP-310 Replacing Housing Replacement, Replacing Housing: étape 7, image 2 de 2
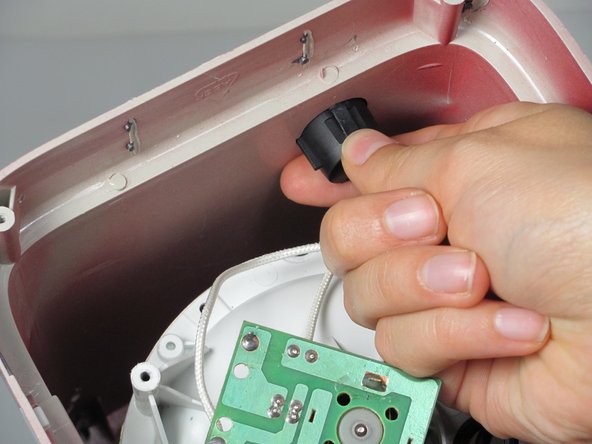
    • Gently remove the heating component from the popper.

    • Unscrew the four screws (11mm Philips #2 screws) that connect the white top to the housing.

    • Save the screws from this step. You will need them to connect the new housing to the white top.

  8. Nostalgia Electrics RHP-310 Replacing Housing Replacement: étape 8, image 1 de 1
    • Remove the white top from the housing.

Conclusion

To reassemble your device, follow these instructions in reverse order.

Dana Clarke

Membre depuis le 09/26/12

50 Réputation

6 tutoriels rédigés

Équipe

Cal Poly, Team 16-57, Forte Fall 2012 Membre de l'équipe Cal Poly, Team 16-57, Forte Fall 2012

CPSU-FORTE-F12S16G57

5 membres

6 tutoriels rédigés

0 commentaires

Ajouter un commentaire

Nombre de vues :

Dernières 24 heures : 0

7 derniers jours : 1

30 derniers jours : 1

Total : 502