Aller au contenu principal

Olympus Stylus 1030 SW LCD and Button Replacement

Ce dont vous avez besoin

  1. Olympus Stylus 1030 SW LCD and Button Replacement, Olympus Stylus 1030 SW Camera Disassembly: étape 1, image 1 de 3 Olympus Stylus 1030 SW LCD and Button Replacement, Olympus Stylus 1030 SW Camera Disassembly: étape 1, image 2 de 3 Olympus Stylus 1030 SW LCD and Button Replacement, Olympus Stylus 1030 SW Camera Disassembly: étape 1, image 3 de 3
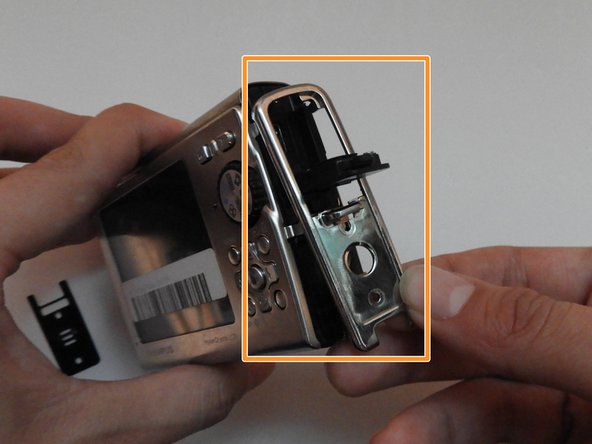
    • Using the iFixit Opening Tool, pry off the plastic part of the lens.

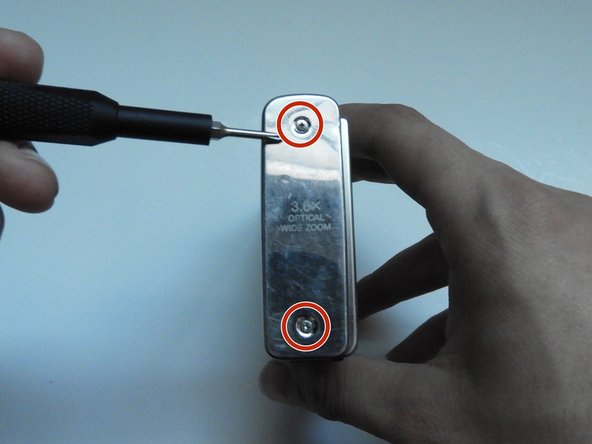
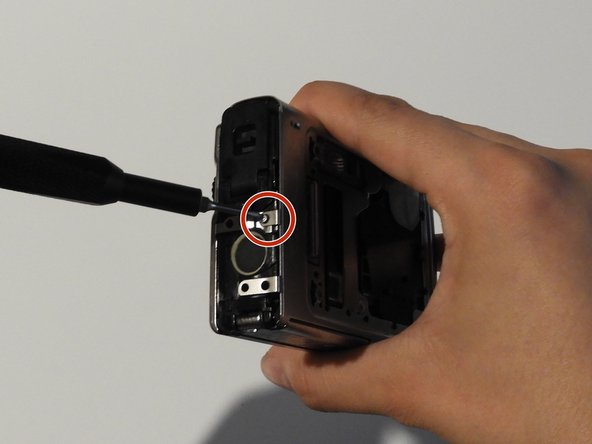
    • Using the T6 Torx screwdriver, unscrew the three screws.

  2. Olympus Stylus 1030 SW LCD and Button Replacement: étape 2, image 1 de 3 Olympus Stylus 1030 SW LCD and Button Replacement: étape 2, image 2 de 3 Olympus Stylus 1030 SW LCD and Button Replacement: étape 2, image 3 de 3
    • Using the Phillips #00 screwdriver, unscrew the three screws.

    • Carefully swivel the metal cover out towards you.

    • Using tweezers, remove the metal washer.

  3. Olympus Stylus 1030 SW LCD and Button Replacement: étape 3, image 1 de 2 Olympus Stylus 1030 SW LCD and Button Replacement: étape 3, image 2 de 2
    • Using the tweezers, slowly peel off the plate.

  4. Olympus Stylus 1030 SW LCD and Button Replacement: étape 4, image 1 de 3 Olympus Stylus 1030 SW LCD and Button Replacement: étape 4, image 2 de 3 Olympus Stylus 1030 SW LCD and Button Replacement: étape 4, image 3 de 3
    • Using the Phillips #00 screwdriver, unscrew the two screws on the side of the camera.

  5. Olympus Stylus 1030 SW LCD and Button Replacement: étape 5, image 1 de 3 Olympus Stylus 1030 SW LCD and Button Replacement: étape 5, image 2 de 3 Olympus Stylus 1030 SW LCD and Button Replacement: étape 5, image 3 de 3
    • On the opposite side, use the Phillips #00 screwdriver to unscrew both screws.

    • Take out the speaker plate.

    • Open the multi-connector cover and slide off the side panel.

  6. Olympus Stylus 1030 SW LCD and Button Replacement: étape 6, image 1 de 3 Olympus Stylus 1030 SW LCD and Button Replacement: étape 6, image 2 de 3 Olympus Stylus 1030 SW LCD and Button Replacement: étape 6, image 3 de 3
    • Using the Phillips #00 screwdriver, unscrew the screw above the speaker.

    • On the bottom side of the camera, unscrew the two screws.

  7. Olympus Stylus 1030 SW LCD and Button Replacement: étape 7, image 1 de 3 Olympus Stylus 1030 SW LCD and Button Replacement: étape 7, image 2 de 3 Olympus Stylus 1030 SW LCD and Button Replacement: étape 7, image 3 de 3
    • Open the battery compartment cover.

    • Use the Phillips #00 screwdriver to unscrew the screw in the battery compartment.

  8. Olympus Stylus 1030 SW LCD and Button Replacement: étape 8, image 1 de 3 Olympus Stylus 1030 SW LCD and Button Replacement: étape 8, image 2 de 3 Olympus Stylus 1030 SW LCD and Button Replacement: étape 8, image 3 de 3
    • On the front of the camera, unscrew the two screws shown.

    • Gently pull on the side until the camera is separated from the back panel.

    • Remove the shutter and power button.

  9. Olympus Stylus 1030 SW LCD and Button Replacement: étape 9, image 1 de 3 Olympus Stylus 1030 SW LCD and Button Replacement: étape 9, image 2 de 3 Olympus Stylus 1030 SW LCD and Button Replacement: étape 9, image 3 de 3
    • Use the Phillips #00 screwdriver to unscrew the four screws on the front of the camera.

    • Unscrew the shutter using the Phillips #00 screwdriver.

  10. Olympus Stylus 1030 SW LCD and Button Replacement: étape 10, image 1 de 2 Olympus Stylus 1030 SW LCD and Button Replacement: étape 10, image 2 de 2
    • Release the top holding using a spudger.

    • Slowly and carefully separate the front and back of the camera, exposing the electrical ribbons.

  11. Olympus Stylus 1030 SW LCD and Button Replacement: étape 11, image 1 de 3 Olympus Stylus 1030 SW LCD and Button Replacement: étape 11, image 2 de 3 Olympus Stylus 1030 SW LCD and Button Replacement: étape 11, image 3 de 3
    • Using the spudger and tweezers if needed, remove the ribbons from the computer chips.

  12. Olympus Stylus 1030 SW LCD and Button Replacement, LCD and Buttons: étape 12, image 1 de 3 Olympus Stylus 1030 SW LCD and Button Replacement, LCD and Buttons: étape 12, image 2 de 3 Olympus Stylus 1030 SW LCD and Button Replacement, LCD and Buttons: étape 12, image 3 de 3
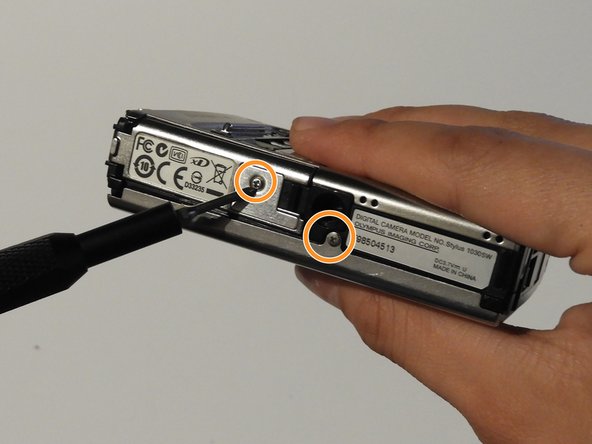
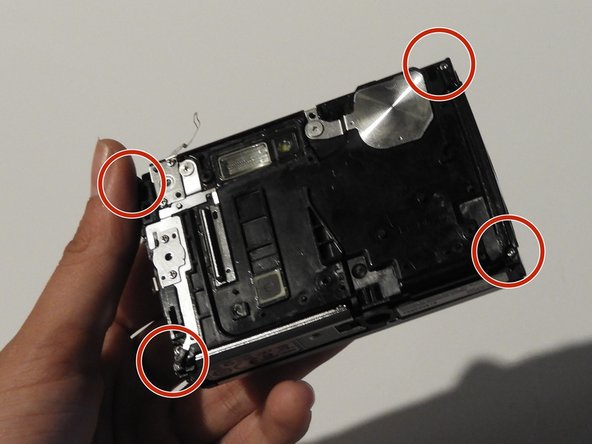
    • Unscrew the two screws found on the left side of the screen using the PH#00 head.

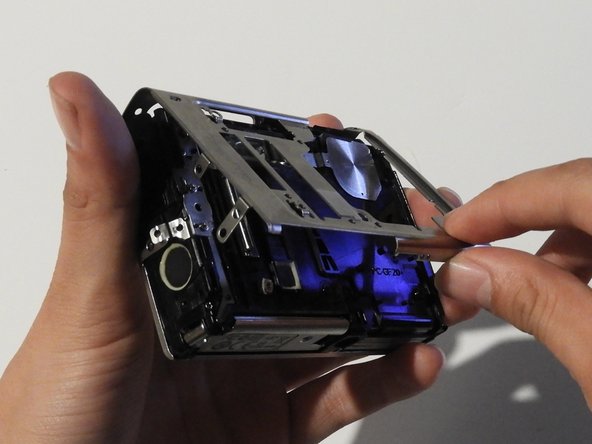
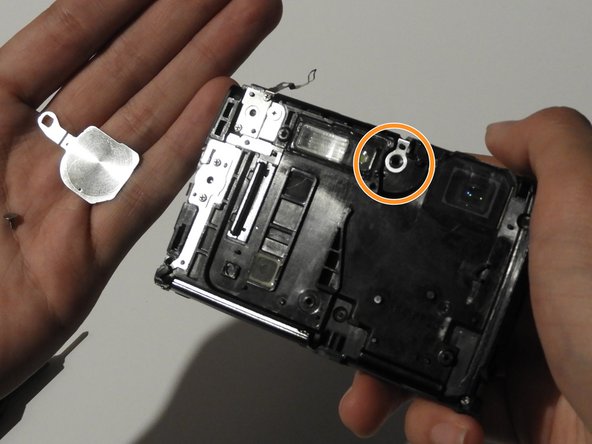
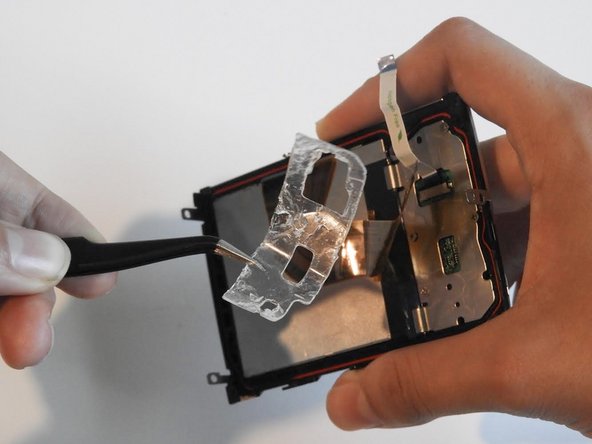
    • Peel off the gel tape using tweezers.

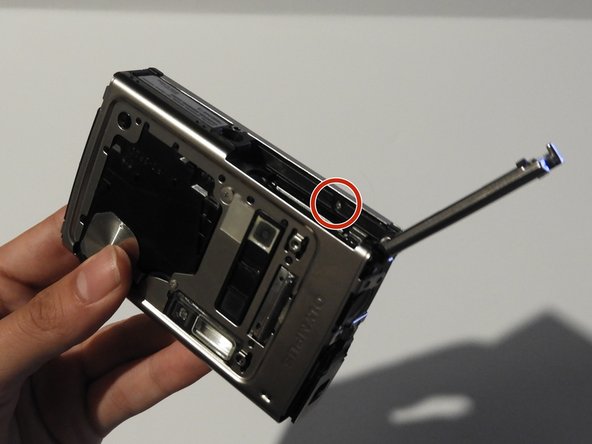
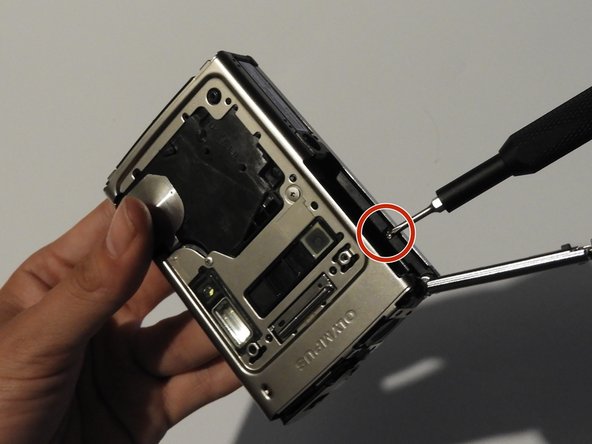
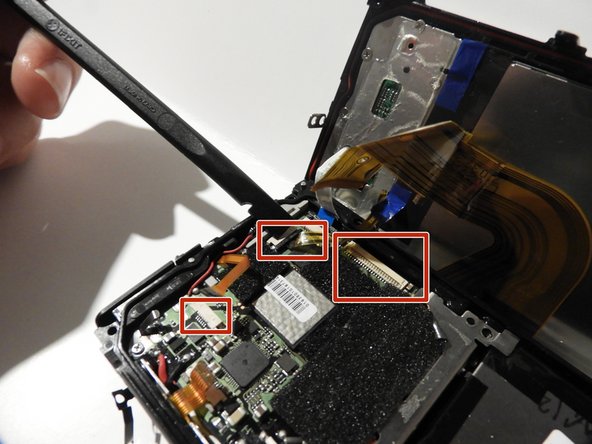
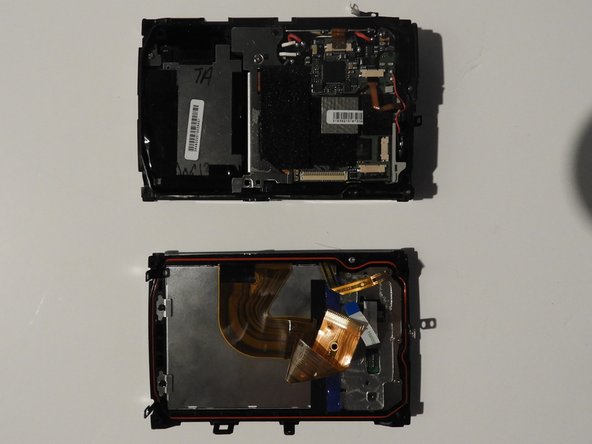
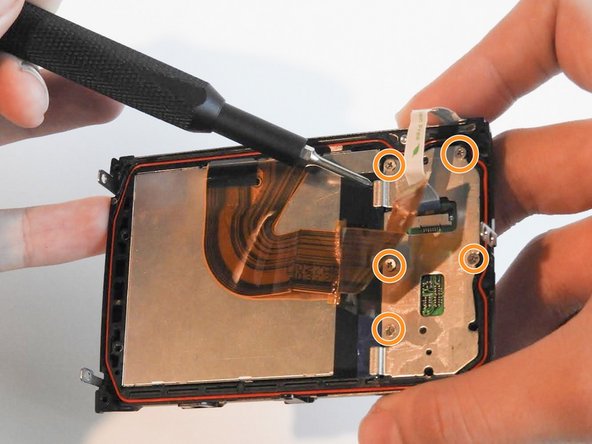
    • Unscrew the five 0.6 mm screws using the Phillips #00 screwdriver.

  13. Olympus Stylus 1030 SW LCD and Button Replacement: étape 13, image 1 de 2 Olympus Stylus 1030 SW LCD and Button Replacement: étape 13, image 2 de 2
    • Use the spudger to carefully pry off the LCD screen.

  14. Olympus Stylus 1030 SW LCD and Button Replacement: étape 14, image 1 de 3 Olympus Stylus 1030 SW LCD and Button Replacement: étape 14, image 2 de 3 Olympus Stylus 1030 SW LCD and Button Replacement: étape 14, image 3 de 3
    • Use the tweezers to take out the rubber button holder and its buttons.

Conclusion

To reassemble your device, follow these instructions in reverse order.

0 commentaires

Ajouter un commentaire

Nombre de vues :

Dernières 24 heures : 2

7 derniers jours : 2

30 derniers jours : 3

Total : 1,239