Aller au contenu principal

Olympus Stylus Tough TG-2 iHS Display Assembly Replacement

Conditions préalables uniquement
Ce tutoriel est uniquement destiné à être utilisé comme prérequis d'autres tutoriels. Il ne se suffit pas à lui-même.

Ce dont vous avez besoin

  1. Olympus Stylus Tough TG-2 iHS Display Assembly Replacement, Display Assembly: étape 1, image 1 de 3 Olympus Stylus Tough TG-2 iHS Display Assembly Replacement, Display Assembly: étape 1, image 2 de 3 Olympus Stylus Tough TG-2 iHS Display Assembly Replacement, Display Assembly: étape 1, image 3 de 3
    • To detach the monitor screen, remove the following 7 screws:

    • Locate the flash and remove the 2 Phillips #00 9.23mm & 14.87mm screws.

    • Locate the battery door and remove the single Phillips #00 3.37mm screw.

    • On the bottom of the camera, remove the single Phillips 3.58mm screw near the tripod socket.

  2. Olympus Stylus Tough TG-2 iHS Display Assembly Replacement: étape 2, image 1 de 3 Olympus Stylus Tough TG-2 iHS Display Assembly Replacement: étape 2, image 2 de 3 Olympus Stylus Tough TG-2 iHS Display Assembly Replacement: étape 2, image 3 de 3
    • On the face plate, locate and remove the 2 eyelet strap side Phillips #00 9.2mm corner screws and the lower battery corner Phillips #00 14.87mm screw.

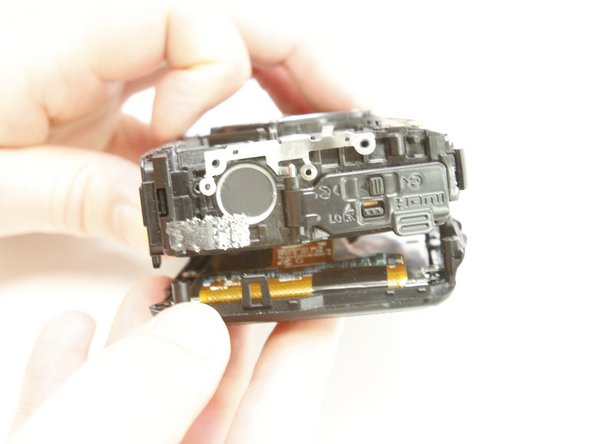
    • Use your fingers to unclasp the casing clips on either side of the camera and pull down the monitor casing.

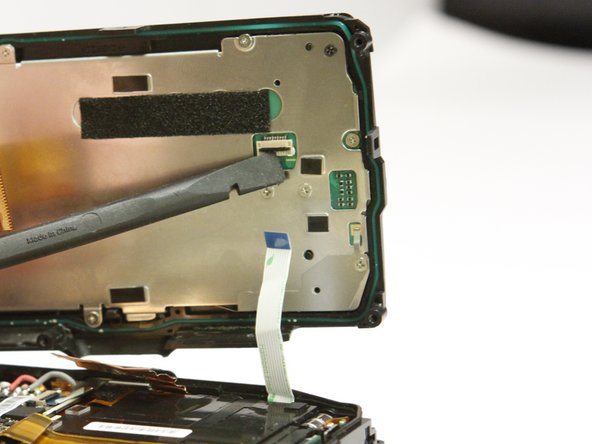
    • Using the spudger to gently pry the screen away from the body of the camera.

  3. Olympus Stylus Tough TG-2 iHS Display Assembly Replacement: étape 3, image 1 de 2 Olympus Stylus Tough TG-2 iHS Display Assembly Replacement: étape 3, image 2 de 2
    • Locate the clasp for the white ribbon.

    • Use the spudger to lift the clasp releasing the ribbon

  4. Olympus Stylus Tough TG-2 iHS Display Assembly Replacement: étape 4, image 1 de 2 Olympus Stylus Tough TG-2 iHS Display Assembly Replacement: étape 4, image 2 de 2
    • Locate the clasp for the orange ribbon in between the motherboard and lens box.

    • Use the spudger to lift the clasp releasing the ribbon.

  5. Olympus Stylus Tough TG-2 iHS Display Assembly Replacement: étape 5, image 1 de 2 Olympus Stylus Tough TG-2 iHS Display Assembly Replacement: étape 5, image 2 de 2
    • Next pry up on the white connector using the spudger to free the screen from the device.

    • The housing and monitor will be separated.

Conclusion

To reassemble your device, follow these instructions in reverse order.

Amanda

Membre depuis le 07/20/15

933 Réputation

8 tutoriels rédigés

Équipe

0 commentaires

Ajouter un commentaire

Nombre de vues :

Dernières 24 heures : 0

7 derniers jours : 0

30 derniers jours : 0

Total : 70