Aller au contenu principal

OnHub Speaker Replacement

Ce dont vous avez besoin

  1. OnHub Speaker Replacement, Speaker Grille: étape 1, image 1 de 2 OnHub Speaker Replacement, Speaker Grille: étape 1, image 2 de 2
    • Make sure the device is unplugged before proceeding with the disassembly.

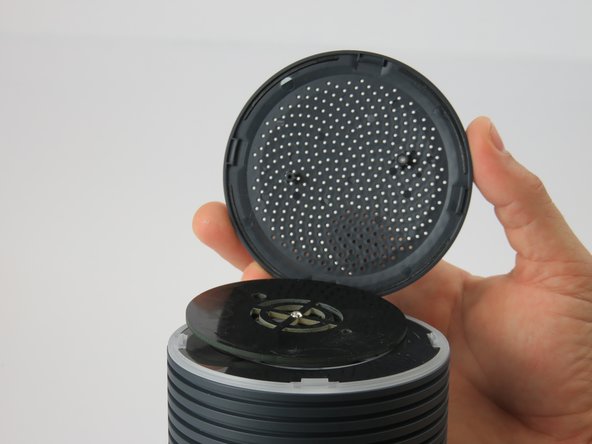
    • While holding the base firmly using the palm of one hand, remove the cowl (cover) by turning the cowl counterclockwise until a snap is heard. Once disengaged, pull upwards.

  2. OnHub Speaker Replacement: étape 2, image 1 de 1
    • Place the plastic opening tool under the speaker grille, and just above the light ring.

    • Move the plastic opening tool around the groove while applying upward force to pry loose the 4 clips holding the grille in place.

  3. OnHub Speaker Replacement: étape 3, image 1 de 2 OnHub Speaker Replacement: étape 3, image 2 de 2
    • Using a metal spudger, carefully remove the congestion-sensor antenna by undoing the two clips.

    • There is a delicate wire connection to the antenna that is easily broken if not careful.

  4. OnHub Speaker Replacement, Congestion-sensing Antenna: étape 4, image 1 de 2 OnHub Speaker Replacement, Congestion-sensing Antenna: étape 4, image 2 de 2
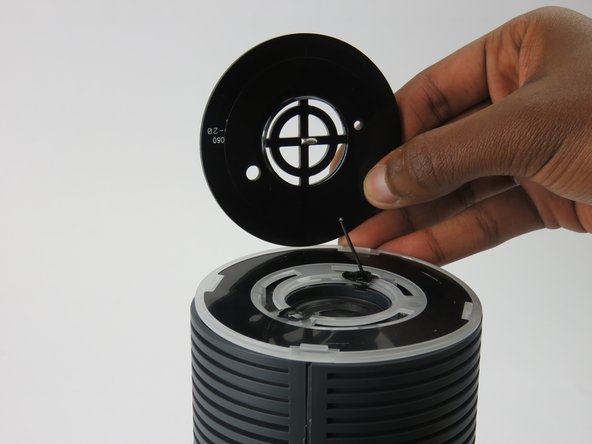
    • Remove the wire connection to the antenna by soldering it off.

    • For help with soldering and de-soldering check out the iFixit Soldering Guide

  5. OnHub Speaker Replacement, Outer Casing: étape 5, image 1 de 2 OnHub Speaker Replacement, Outer Casing: étape 5, image 2 de 2
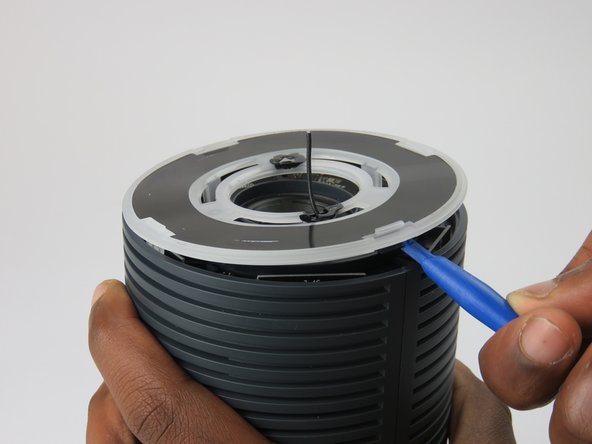
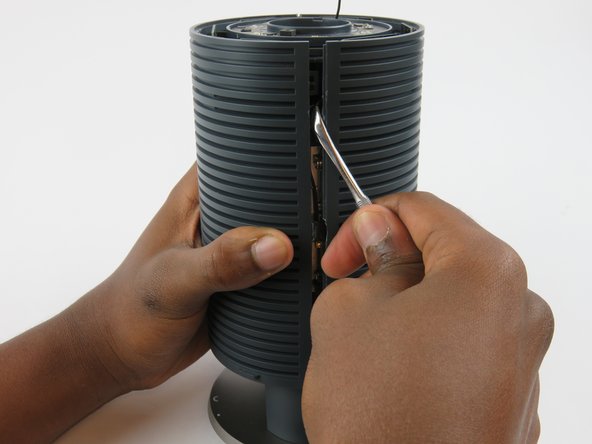
    • You must remove the plastic cover found just above the speaker.

    • Wedge the plastic opening tool under the cover and apply pressure in an upward direction.

    • There are four clips that you are removing. When disengaged, these clips will make a snapping noise.

    • Though the snapping noise is normal, take care not to break these clips.

  6. OnHub Speaker Replacement: étape 6, image 1 de 1
    • Upon removing the cover, four screws and the speaker housing will be exposed.

    • Unscrew the four 12mm screws using a #1 Phillips head screwdriver.

    • This unlocks the speaker housing and antenna array from the casing.

  7. OnHub Speaker Replacement: étape 7, image 1 de 2 OnHub Speaker Replacement: étape 7, image 2 de 2
    • On the bottom of the OnHub is two screws holding the casing to the base.

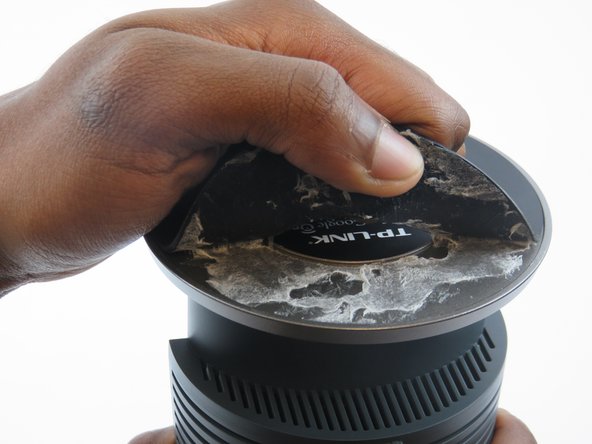
    • To access these screws, you must remove the rubber pad that is glued to the base.

    • To remove the pad, slide a metal spudger under the edge of the pad. Pry the pad away from the base, removing the glue.

    • Once the pad is pulled up enough to grab, peel it the rest of the way exposing the screws.

    • The rubber pad is thin and fragile; be careful not to tear when removing.

  8. OnHub Speaker Replacement: étape 8, image 1 de 1
    • Remove the two 12mm screws under the base of the OnHub by using a #1 Phillips head screwdriver.

  9. OnHub Speaker Replacement: étape 9, image 1 de 2 OnHub Speaker Replacement: étape 9, image 2 de 2
    • Once the two screws are removed from the base, it is time to split the casing apart.

    • It is okay if a couple clips break. It will still hold together with a few remaining.

    • Wedge a spudger between the two casing halves, and pry the clips apart starting from the top

    • There are three hooking style clips in total.

  10. OnHub Speaker Replacement: étape 10, image 1 de 1
    • Once unclipped, you can slide the two casing halves apart, and remove the casing.

  11. OnHub Speaker Replacement, Speaker: étape 11, image 1 de 2 OnHub Speaker Replacement, Speaker: étape 11, image 2 de 2
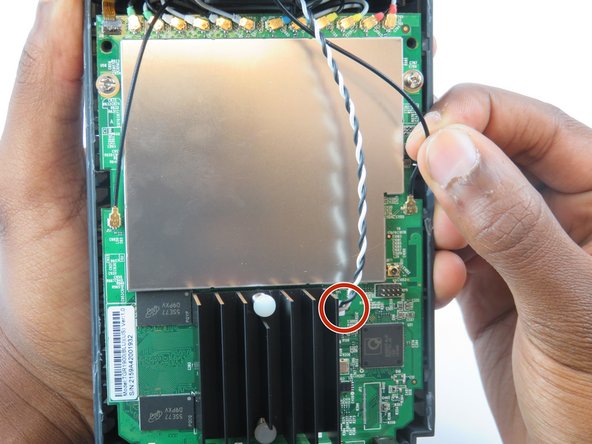
    • Underneath the speaker is an intertwined black and white wire.

    • Disconnect the wire from its connection to the motherboard.

  12. OnHub Speaker Replacement: étape 12, image 1 de 1
    • The speaker should now easily come off with a firm grip on the OnHub device and pull.

Conclusion

To reassemble your device, follow these instructions in reverse order.

3 autres ont terminé cette réparation.

Mahir Abdella

Membre depuis le 02/10/16

331 Réputation

2 tutoriels rédigés

Équipe

USF Tampa, Team 3-3, Sullivan Spring 2016 Membre de l'équipe USF Tampa, Team 3-3, Sullivan Spring 2016

USFT-SULLIVAN-S16S3G3

3 membres

10 tutoriels rédigés

0 commentaires

Ajouter un commentaire

Nombre de vues :

Dernières 24 heures : 0

7 derniers jours : 0

30 derniers jours : 1

Total : 800