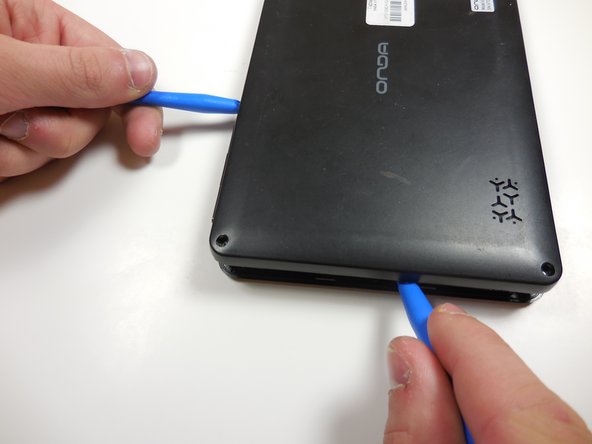
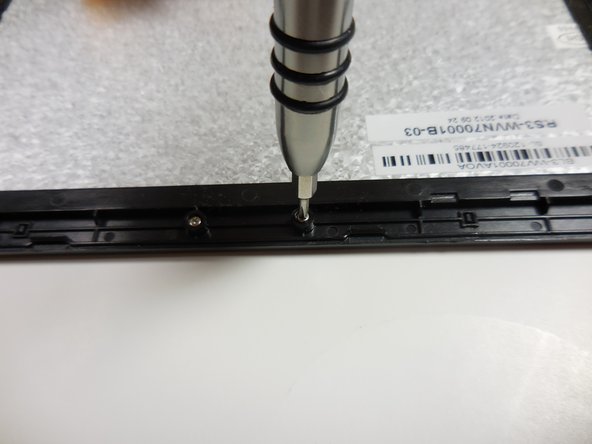
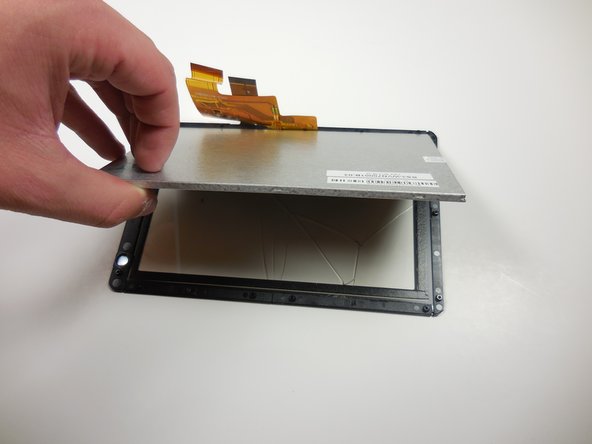
Aller au contenu principal

Onda V701 Screen Replacement

Ce dont vous avez besoin

  1. Onda V701 Screen Replacement, Back Panel: étape 1, image 1 de 3 Onda V701 Screen Replacement, Back Panel: étape 1, image 2 de 3 Onda V701 Screen Replacement, Back Panel: étape 1, image 3 de 3
    • Ensure device is powered off before disassembly.

    • Remove the 4 rubber screw plugs using a spudger.

  2. Onda V701 Screen Replacement: étape 2, image 1 de 3 Onda V701 Screen Replacement: étape 2, image 2 de 3 Onda V701 Screen Replacement: étape 2, image 3 de 3
    • Remove the four 4.8mm mounting screws using a PH00 screwdriver.

  3. Onda V701 Screen Replacement: étape 3, image 1 de 2 Onda V701 Screen Replacement: étape 3, image 2 de 2
    • Starting at one corner, gently pry the back panel assembly from the screen assembly using two plastic opening tools.

    • Slide the opening tools around the perimeter of the device to separate the back panel assembly from the screen assembly.

  4. Onda V701 Screen Replacement: étape 4, image 1 de 2 Onda V701 Screen Replacement: étape 4, image 2 de 2
    • Gently lift the screen assembly away from the back cover assembly.

    • Be careful when separating the two pieces as the screen assembly is still connected to the mother board by two ribbon cables.

  5. Onda V701 Screen Replacement: étape 5, image 1 de 3 Onda V701 Screen Replacement: étape 5, image 2 de 3 Onda V701 Screen Replacement: étape 5, image 3 de 3
    • Disconnect the two ribbon connectors by flipping the gray tabs up with a fingernail or a spudger.

    • Remove the ribbon cables.

  6. Onda V701 Screen Replacement, Screen: étape 6, image 1 de 3 Onda V701 Screen Replacement, Screen: étape 6, image 2 de 3 Onda V701 Screen Replacement, Screen: étape 6, image 3 de 3
    • Remove all 14 of the 3.6mm screws using a PH00 screwdriver.

  7. Onda V701 Screen Replacement: étape 7, image 1 de 3 Onda V701 Screen Replacement: étape 7, image 2 de 3 Onda V701 Screen Replacement: étape 7, image 3 de 3
    • Gently separate the screen from the plastic border/screen holder by pulling it off with your hands.

  8. Onda V701 Screen Replacement: étape 8, image 1 de 3 Onda V701 Screen Replacement: étape 8, image 2 de 3 Onda V701 Screen Replacement: étape 8, image 3 de 3
    • Remove the grey monitor from the glass screen cover by gently lifting it up.

Conclusion

To reassemble your device, follow these instructions in reverse order.

Une autre personne a terminé cette réparation.

William Sioholm

Membre depuis le 03/11/15

104 Réputation

1 tutoriel rédigé

Équipe

Colorado Springs, Team 4-6, Panko Spring 2015 Membre de l'équipe Colorado Springs, Team 4-6, Panko Spring 2015

UCCS-PANKO-S15S4G6

3 membres

10 tutoriels rédigés

Un commentaire

بدي من هي الشاشة وين بلاقي

abdurrhman khrrat - Réponse

Ajouter un commentaire

Nombre de vues :

Dernières 24 heures : 0

7 derniers jours : 2

30 derniers jours : 11

Total : 458