Aller au contenu principal

OnePlus 2 Screen Replacement

Ce dont vous avez besoin

  1. OnePlus 2 Screen Replacement, SIM Card: étape 1, image 1 de 3 OnePlus 2 Screen Replacement, SIM Card: étape 1, image 2 de 3 OnePlus 2 Screen Replacement, SIM Card: étape 1, image 3 de 3
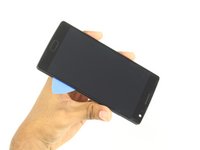
    • Make sure that your phone is turned off before proceeding

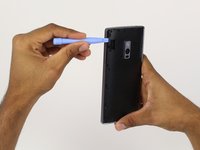
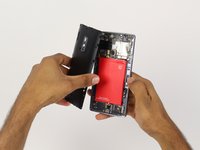
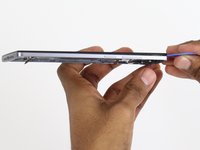
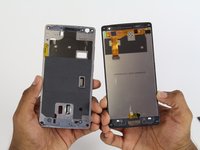
    • Use an opening pick, your thumbnail, or a spudger to gently pry off the external casing

  2. OnePlus 2 Screen Replacement: étape 2, image 1 de 3 OnePlus 2 Screen Replacement: étape 2, image 2 de 3 OnePlus 2 Screen Replacement: étape 2, image 3 de 3
    • Locate the SIM card tray on the back of the phone

    • Use your thumb to gently slide out the tray

  3. OnePlus 2 Screen Replacement: étape 3, image 1 de 1
    • Remove the SIM card tray

  4. OnePlus 2 Screen Replacement, Battery: étape 4, image 1 de 3 OnePlus 2 Screen Replacement, Battery: étape 4, image 2 de 3 OnePlus 2 Screen Replacement, Battery: étape 4, image 3 de 3
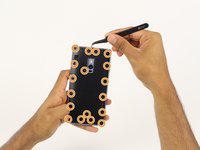
    • Find and carefully remove all 6 rubber screw covers with the tweezers.

    • Unscrew all 18 screws from the mid frame.

  5. OnePlus 2 Screen Replacement: étape 5, image 1 de 3 OnePlus 2 Screen Replacement: étape 5, image 2 de 3 OnePlus 2 Screen Replacement: étape 5, image 3 de 3
    • Carefully pry up the mid frame from the back of the phone with the plastic opening tools.

    • Slowly work your way around the phone releasing all the clips that hold the frame in place.

  6. OnePlus 2 Screen Replacement: étape 6, image 1 de 3 OnePlus 2 Screen Replacement: étape 6, image 2 de 3 OnePlus 2 Screen Replacement: étape 6, image 3 de 3
    • Using the spudger tool, pry the battery up from the adhesive.

    • Once the battery is loose from the adhesive holding it down, use the spudger tool to pry up the connection from the battery to the phone on the top right hand side.

  7. OnePlus 2 Screen Replacement, Charging Port: étape 7, image 1 de 2 OnePlus 2 Screen Replacement, Charging Port: étape 7, image 2 de 2
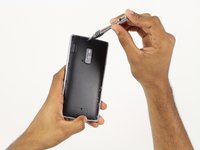
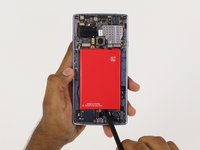
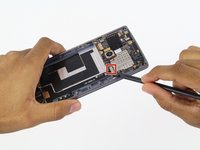
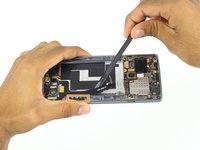
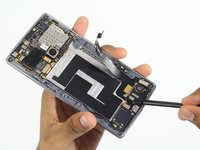
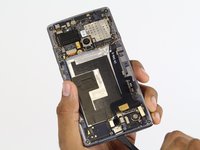
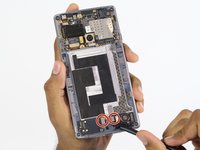
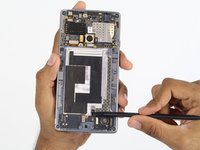
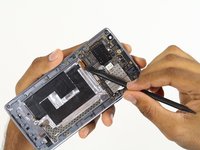
    • Use the spudger tool to pry up the top connection of the charging port.

    • Follow the cable with the spudger and slowly pry it up from the adhesive holding it down.

    • Stop at the next connection.

  8. OnePlus 2 Screen Replacement: étape 8, image 1 de 3 OnePlus 2 Screen Replacement: étape 8, image 2 de 3 OnePlus 2 Screen Replacement: étape 8, image 3 de 3
    • Again, using the spudger tool, pry up the final 4 connections on the charging port

    • Again, just like before, slowly follow the cable with the spudger tool lifting it up from the adhesive backing.

  9. OnePlus 2 Screen Replacement: étape 9, image 1 de 3 OnePlus 2 Screen Replacement: étape 9, image 2 de 3 OnePlus 2 Screen Replacement: étape 9, image 3 de 3
    • Using the spudger tool on the bottom of the phone, push the charging part inward.

    • Once the charging port is free from the frame, use your fingers to remove the charging port the rest of the way.

  10. OnePlus 2 Screen Replacement, Screen: étape 10, image 1 de 3 OnePlus 2 Screen Replacement, Screen: étape 10, image 2 de 3 OnePlus 2 Screen Replacement, Screen: étape 10, image 3 de 3
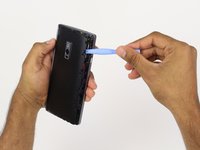
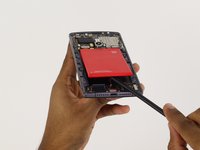
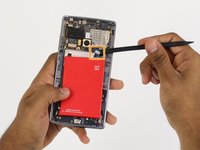
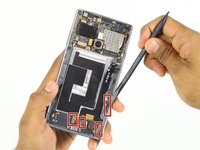
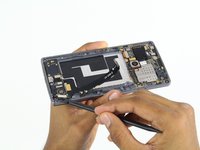
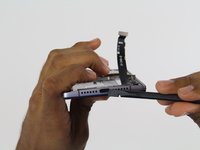
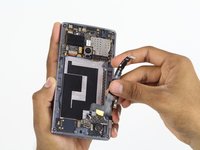
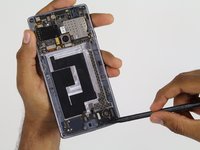
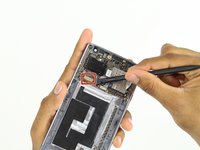
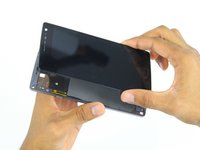
    • Locate two connections at the bottom of the phone.

    • Using a spudger, carefully bend the connections up and towards the top of the phone.

  11. OnePlus 2 Screen Replacement: étape 11, image 1 de 2 OnePlus 2 Screen Replacement: étape 11, image 2 de 2
    • Locate connection left of the rear facing camera.

    • If black tape covers the connector, use tweezers to carefully peel it back.

    • Using a spudger, carefully pry the connector out and bend it towards the bottom of the phone.

  12. OnePlus 2 Screen Replacement: étape 12, image 1 de 1
    • Flip your phone so that the screen is facing up

    • Place a warm iOpener on the screen to heat up the adhesive holding the screen in place

    • Leave on for one minute

  13. OnePlus 2 Screen Replacement: étape 13, image 1 de 2 OnePlus 2 Screen Replacement: étape 13, image 2 de 2
    • Use a pick to carefully separate the screen and the rest of the phone.

    • Make sure to go around every edge and corner.

  14. OnePlus 2 Screen Replacement: étape 14, image 1 de 2 OnePlus 2 Screen Replacement: étape 14, image 2 de 2
    • Slowly separate the screen from the rest of the phone.

Conclusion

To reassemble your device, follow these instructions in reverse order.

65 autres ont terminé cette réparation.

Kayla Williams

Membre depuis le 10/01/15

1 541 Réputation

6 tutoriels rédigés

Équipe

Cal Poly, Team 4-5, Maness Fall 2015 Membre de l'équipe Cal Poly, Team 4-5, Maness Fall 2015

CPSU-MANESS-F15S4G5

4 membres

19 tutoriels rédigés

29 commentaires

Screen is available on internet but without frame and buttons. I bought one of those so the only pb i had was to separate capacitive buttons and fingerprint scanner from the screen. i had to separate the black plastic frame from the screen too. It takes me around 2 hours to do it but now my OP2 works with a brand new screen. Changing screen on OnePlus2 is doable and cost around 100€ but you have to be careful and patient.

cperverie - Réponse

Is the screen working properly??

Jagadeesh Sp -

It's the glue on the back of the screen or on the frame? Do you need to apply new glue?

krugern -

Hi, can you recommend the place where you bought your screen?

Tamara Diez -

You need glue when installing a new digitizer?

Steven - Réponse

Ajouter un commentaire

Nombre de vues :

Dernières 24 heures : 2

7 derniers jours : 9

30 derniers jours : 37

Total : 58,518