Introduction
Les brosses à dents électriques sont alimentées par une batterie rechargeable, qui permet le mouvement alternatif de la brosse. Si votre brosse à dents électrique perd rapidement de la puissance ou ne tient pas la charge, il est fort probable que la batterie rechargeable doive être remplacée.
Ce dont vous avez besoin
-
-
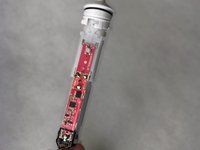
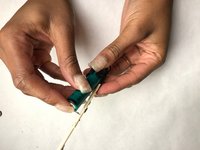
Retirez la tête de brossage et servez-vous d'une pince pour retirer le haut blanc de la brosse à dents.
-
-


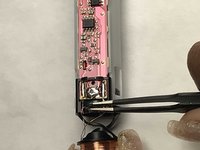


Pour le remontage, suives les étapes en sens inverse. Utilisez juste la quantité de soudure nécessaire pour ressouder la batterie.
Pour le remontage, suives les étapes en sens inverse. Utilisez juste la quantité de soudure nécessaire pour ressouder la batterie.
Annulation : je n'ai pas terminé ce tutoriel.
18 autres ont terminé cette réparation.
Merci à ces traducteurs :
100%
jc67 nous aide à réparer le monde ! Vous voulez contribuer ?
Commencez à traduire ›
Équipe

IUPUI, Team S2-G1, Harley Fall 2017 Membre de l'équipe IUPUI, Team S2-G1, Harley Fall 2017
IUPUI-HARLEY-F17S2G1
3 membres
9 tutoriels rédigés
9 commentaires
This is very easy to do. I had no problems following your instructions.
Thanks.
Is this a regular rechargeable AA?
Thanks again.
The original battery is a NiCd with tabs. I just spot welded tabs onto a standard AA NiMH battery and it worked fine.
T C -
@stephen Shaw These batteries worked for me: https://www.amazon.com/dp/B00CR0R8KQ/ref...