Aller au contenu principal
Pour réparer ensemble - Je crée un compte

Oster 3905 Retractable Cord Replacement

Ce dont vous avez besoin

    1. Oster 3905 Retractable Cord Replacement, Slot Levers: étape 1, image 1 de 1
      • Firmly grip your hand around the slot lever.

      Demander à FixBot

      Ajouter un commentaire

    2. Oster 3905 Retractable Cord Replacement: étape 2, image 1 de 1
      • Stabilize the toaster by placing your hand on top.

      Demander à FixBot

      Ajouter un commentaire

    3. Oster 3905 Retractable Cord Replacement: étape 3, image 1 de 2 Oster 3905 Retractable Cord Replacement: étape 3, image 2 de 2
      • Forcefully pull the slot lever away from the toaster by keeping parallel to the table.

      Demander à FixBot

      Ajouter un commentaire

    4. Oster 3905 Retractable Cord Replacement: étape 4, image 1 de 1
      • Both slot levers can be removed.

      Demander à FixBot

      Ajouter un commentaire

    1. Oster 3905 Retractable Cord Replacement, Outer Shell: étape 5, image 1 de 1
      • Place the toaster upside down so the bottom is facing the ceiling.

      Demander à FixBot

      Ajouter un commentaire

    2. Oster 3905 Retractable Cord Replacement: étape 6, image 1 de 2 Oster 3905 Retractable Cord Replacement: étape 6, image 2 de 2
      • Take off both rubber feet using a small metal spudger.

      • Wedge a spudger under the feet and pull up to pop off.

      Demander à FixBot

      Ajouter un commentaire

    3. Oster 3905 Retractable Cord Replacement: étape 7, image 1 de 1
      • Use a PH#2 screw bit to remove eight 12mm screws that are located around the perimeter.

      • There are two screws under the rubber feet.

      Demander à FixBot

      Ajouter un commentaire

    4. Oster 3905 Retractable Cord Replacement: étape 8, image 1 de 1
      • Place the toaster right side up.

      Demander à FixBot

      Ajouter un commentaire

    5. Oster 3905 Retractable Cord Replacement: étape 9, image 1 de 2 Oster 3905 Retractable Cord Replacement: étape 9, image 2 de 2
      • Grab the outer shell firmly and pull up towards the face of the toaster.

      Demander à FixBot

      Ajouter un commentaire

    6. Oster 3905 Retractable Cord Replacement: étape 10, image 1 de 1
      • For this part, you might need to wiggle the toaster to get the outer shell off.

      • The shell will not completely come off until the motherboard is removed in the next step.

      Demander à FixBot

      Ajouter un commentaire

    7. Oster 3905 Retractable Cord Replacement: étape 11, image 1 de 3 Oster 3905 Retractable Cord Replacement: étape 11, image 2 de 3 Oster 3905 Retractable Cord Replacement: étape 11, image 3 de 3
      • Use a J1 screw bit to unscrew eight 8mm screws from the motherboard.

      Demander à FixBot

      Ajouter un commentaire

    8. Oster 3905 Retractable Cord Replacement: étape 12, image 1 de 2 Oster 3905 Retractable Cord Replacement: étape 12, image 2 de 2
      • Take out the grey “cancel” and “bagel” buttons from the shell.

      Demander à FixBot

      Ajouter un commentaire

    1. Oster 3905 Retractable Cord Replacement, Retractable Cord: étape 13, image 1 de 1
      • Rotate the toaster so that the back is facing towards you.

      Demander à FixBot

      Ajouter un commentaire

    2. Oster 3905 Retractable Cord Replacement: étape 14, image 1 de 2 Oster 3905 Retractable Cord Replacement: étape 14, image 2 de 2
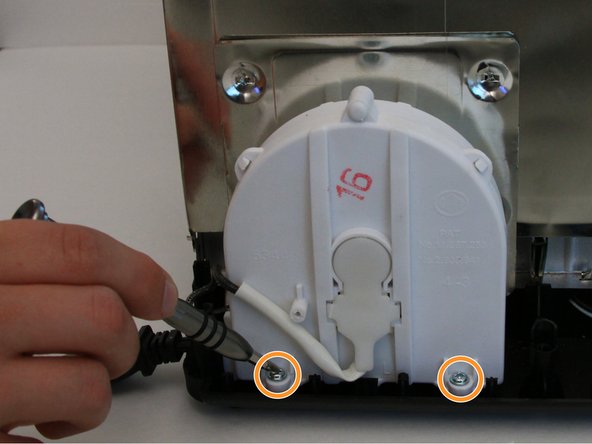
      • Use the PH#1 bit to remove one 8mm screw located above the wire on the casing.

      • Then use the same screw bit to remove two 10mm screws found at the bottom.

      Demander à FixBot

      Ajouter un commentaire

    3. Oster 3905 Retractable Cord Replacement: étape 15, image 1 de 2 Oster 3905 Retractable Cord Replacement: étape 15, image 2 de 2
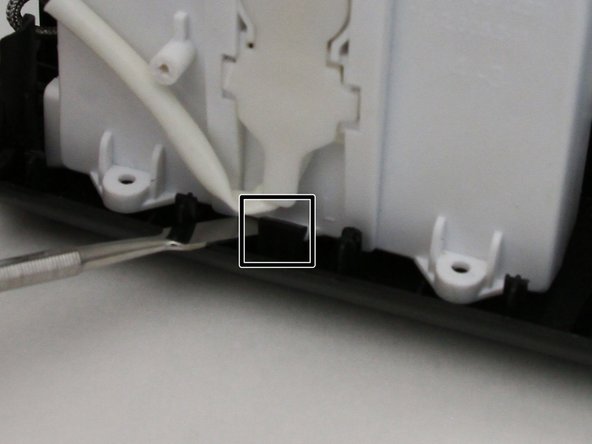
      • Using the metal spudger, pry next to the black clip found at the base of the toaster and the casing.

      • Push down to separate the casing from the toaster.

      Demander à FixBot

      Ajouter un commentaire

    4. Oster 3905 Retractable Cord Replacement: étape 16, image 1 de 2 Oster 3905 Retractable Cord Replacement: étape 16, image 2 de 2
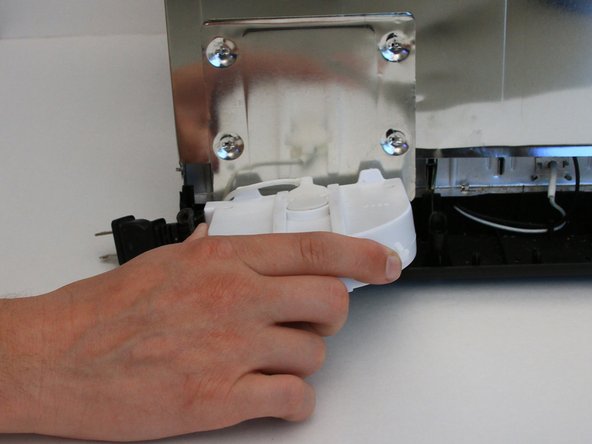
      • Gently tilt the casing towards the toaster as you pull up from the base.

      Demander à FixBot

      Ajouter un commentaire

    5. Oster 3905 Retractable Cord Replacement: étape 17, image 1 de 1
      • Use the PH#1 bit to remove the three 8mm screws located on the back side of the casing.

      Demander à FixBot

      Ajouter un commentaire

    6. Oster 3905 Retractable Cord Replacement: étape 18, image 1 de 2 Oster 3905 Retractable Cord Replacement: étape 18, image 2 de 2
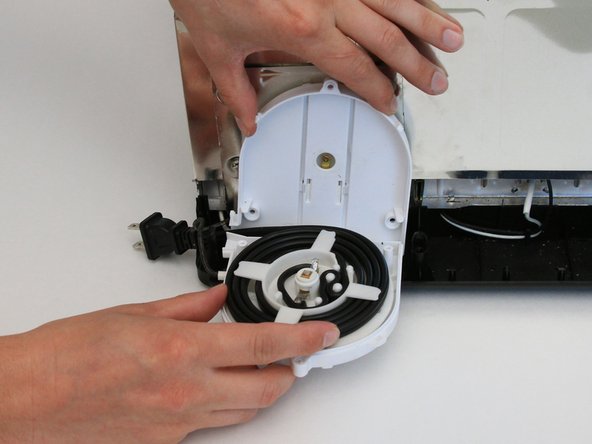
      • When opening the casing a metal spring may suddenly pop out.

      • Use the metal spudger to pry open the two halves of the casing.

      • If you are having some trouble only using the metal spudger do not be afraid of using your fingers to pry the casing apart.

      Demander à FixBot

      Ajouter un commentaire

    7. Oster 3905 Retractable Cord Replacement: étape 19, image 1 de 3 Oster 3905 Retractable Cord Replacement: étape 19, image 2 de 3 Oster 3905 Retractable Cord Replacement: étape 19, image 3 de 3
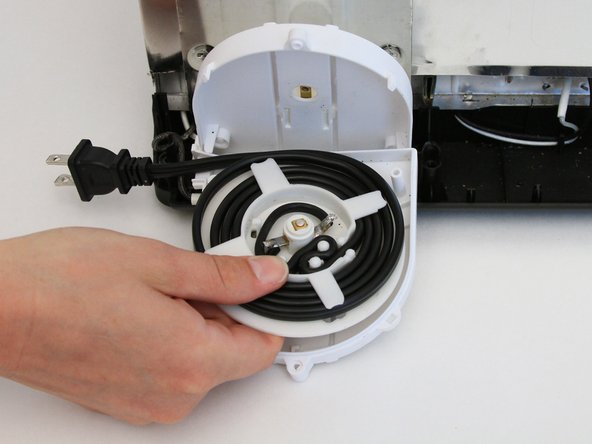
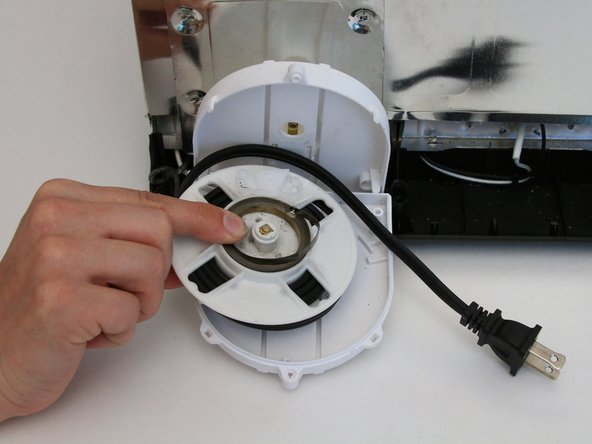
      • Carefully remove the spool keeping your fingers on either side of the casing.

      • Tape down the metal spring to keep it from unraveling out of place.

      Demander à FixBot

      Ajouter un commentaire

    8. Oster 3905 Retractable Cord Replacement: étape 20, image 1 de 3 Oster 3905 Retractable Cord Replacement: étape 20, image 2 de 3 Oster 3905 Retractable Cord Replacement: étape 20, image 3 de 3
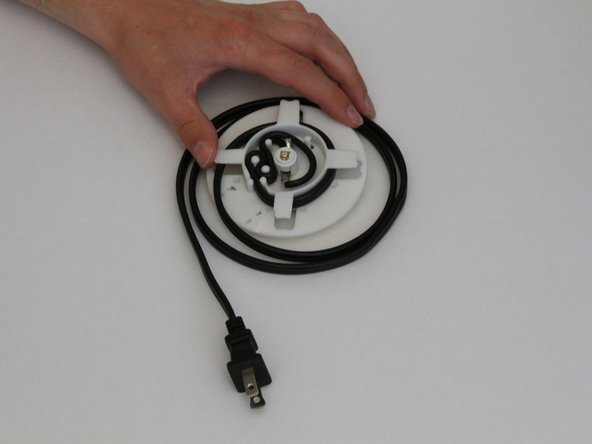
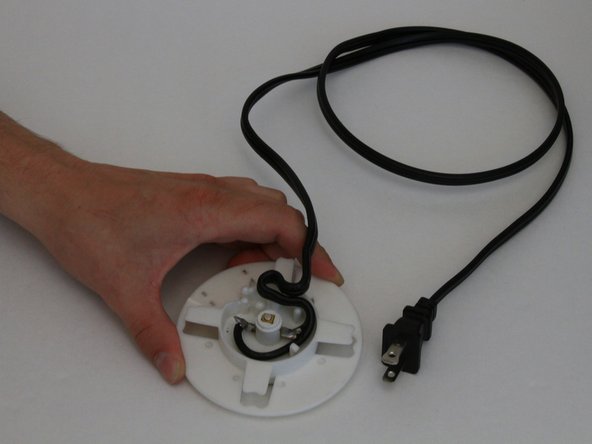
      • Carefully unwind the power cord from the spool.

      Demander à FixBot

      Ajouter un commentaire

Conclusion

To reassemble your device, follow these instructions in reverse order.

Annulation : je n'ai pas terminé ce tutoriel.

Une autre personne a terminé cette réparation.

Adam Dierkes

Membre depuis le 09/12/16

140 Réputation

1 tutoriel rédigé

Équipe

CSU Fullerton, Team 2-1, Bruce Fall 2016 Membre de l'équipe CSU Fullerton, Team 2-1, Bruce Fall 2016

CSUF-BRUCE-F16S2G1

5 membres

60 tutoriels rédigés

0 commentaires de tutoriel

Ajouter un commentaire

Nombre de vues :

Dernières 24 heures : 1

7 derniers jours : 5

30 derniers jours : 34

Total : 939