Aller au contenu principal
Pour réparer ensemble - Je crée un compte

Oster CKSTSTMD5-W Disassembly

Ce dont vous avez besoin

    1. Oster CKSTSTMD5-W Disassembly, Oster CKSTSTMD5-W Disassembly: étape 1, image 1 de 1
      • Remove the plastic steamer tiers and make sure the device is unplugged.

      Demander à FixBot

      Ajouter un commentaire

    2. Oster CKSTSTMD5-W Disassembly: étape 2, image 1 de 3 Oster CKSTSTMD5-W Disassembly: étape 2, image 2 de 3 Oster CKSTSTMD5-W Disassembly: étape 2, image 3 de 3
      • Flip the device upside down so that the sticker is facing upwards.

      • Using your hands, carefully pry out the four rubber feet from each of the corners.

      Demander à FixBot

      Ajouter un commentaire

    3. Oster CKSTSTMD5-W Disassembly: étape 3, image 1 de 2 Oster CKSTSTMD5-W Disassembly: étape 3, image 2 de 2
      • Using the JIS #1 screwdriver, remove four 12 mm screws from the four holes.

      Demander à FixBot

      Ajouter un commentaire

    4. Oster CKSTSTMD5-W Disassembly: étape 4, image 1 de 1
      • Once the four screws are removed, lift the bottom of the device off of the frame.

      Demander à FixBot

      Ajouter un commentaire

    5. Oster CKSTSTMD5-W Disassembly: étape 5, image 1 de 2 Oster CKSTSTMD5-W Disassembly: étape 5, image 2 de 2
      • Use a pair of scissors to cut the zip tie binding the blue and brown wires together.

      Demander à FixBot

      Ajouter un commentaire

    6. Oster CKSTSTMD5-W Disassembly: étape 6, image 1 de 3 Oster CKSTSTMD5-W Disassembly: étape 6, image 2 de 3 Oster CKSTSTMD5-W Disassembly: étape 6, image 3 de 3
      • Using a socket wrench with a 7 mm bit, unscrew the nut from the center of the metal ring.

      Demander à FixBot

      Ajouter un commentaire

    7. Oster CKSTSTMD5-W Disassembly: étape 7, image 1 de 1
      • Remove the nut and the two washers from the center bolt.

      Demander à FixBot

      Ajouter un commentaire

    8. Oster CKSTSTMD5-W Disassembly: étape 8, image 1 de 2 Oster CKSTSTMD5-W Disassembly: étape 8, image 2 de 2
      • Lift off the metal brace from the bolt in the center of the device.

      Demander à FixBot

      Ajouter un commentaire

    9. Oster CKSTSTMD5-W Disassembly: étape 9, image 1 de 2 Oster CKSTSTMD5-W Disassembly: étape 9, image 2 de 2
      • From the center of the device, carefully grab the blue wire and lift the thermal fuse from its socket.

      Demander à FixBot

      Ajouter un commentaire

    10. Oster CKSTSTMD5-W Disassembly: étape 10, image 1 de 3 Oster CKSTSTMD5-W Disassembly: étape 10, image 2 de 3 Oster CKSTSTMD5-W Disassembly: étape 10, image 3 de 3
      • Using your hands, carefully lift the wires over the center bolt so that they are out of the way.

      Demander à FixBot

      Ajouter un commentaire

    11. Oster CKSTSTMD5-W Disassembly: étape 11, image 1 de 2 Oster CKSTSTMD5-W Disassembly: étape 11, image 2 de 2
      • Using your index finger, carefully pry the metal sheeting out from under the wires.

      Demander à FixBot

      Ajouter un commentaire

    12. Oster CKSTSTMD5-W Disassembly: étape 12, image 1 de 3 Oster CKSTSTMD5-W Disassembly: étape 12, image 2 de 3 Oster CKSTSTMD5-W Disassembly: étape 12, image 3 de 3
      • Using the JIS #1 screwdriver, remove the two 12 mm screws from the left side of the device.

      • Lift off the white plastic brace.

      Demander à FixBot

      Ajouter un commentaire

    13. Oster CKSTSTMD5-W Disassembly: étape 13, image 1 de 1
      • Lift the white power cord out of its socket.

      Demander à FixBot

      Ajouter un commentaire

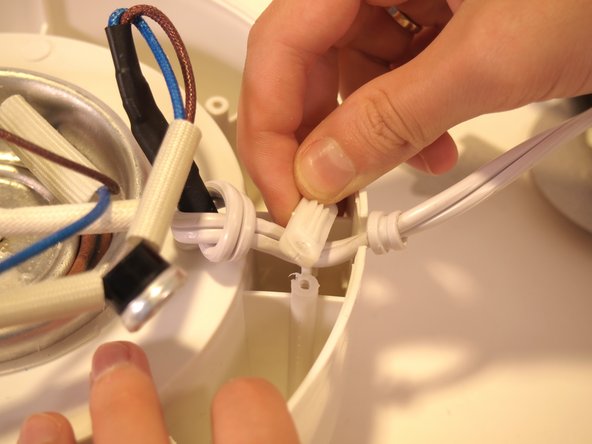
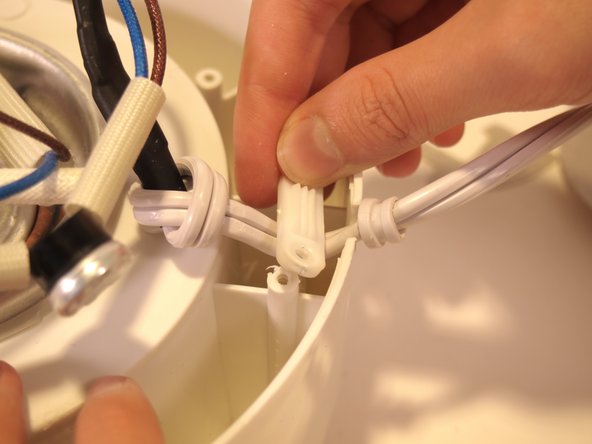
    14. Oster CKSTSTMD5-W Disassembly: étape 14, image 1 de 3 Oster CKSTSTMD5-W Disassembly: étape 14, image 2 de 3 Oster CKSTSTMD5-W Disassembly: étape 14, image 3 de 3
      • On the left-hand side of the device, carefully remove the indicator light from its place next to the timer by pulling on the heat protector covering the brown wire.

      • Be careful to ensure the bulb stays attached to the wire.

      Demander à FixBot

      Ajouter un commentaire

    15. Oster CKSTSTMD5-W Disassembly: étape 15, image 1 de 2 Oster CKSTSTMD5-W Disassembly: étape 15, image 2 de 2
      • Using the JIS #1 screwdriver, remove the two 12 mm screws attached on each side of the timer.

      Demander à FixBot

      Ajouter un commentaire

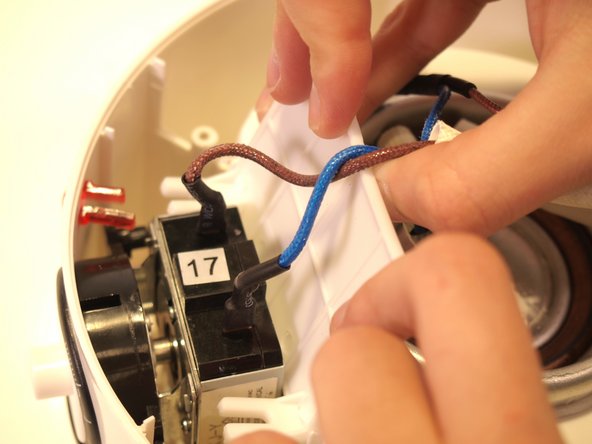
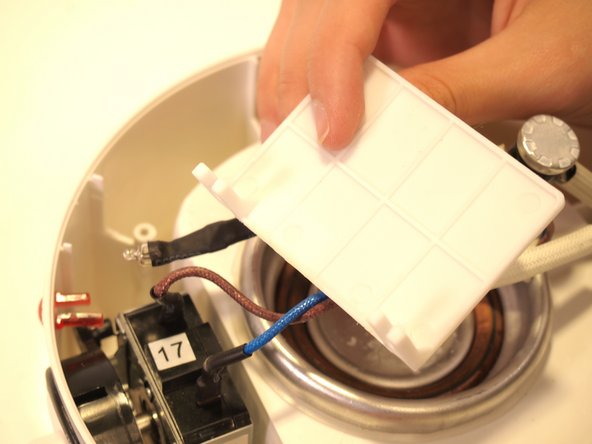
    16. Oster CKSTSTMD5-W Disassembly: étape 16, image 1 de 3 Oster CKSTSTMD5-W Disassembly: étape 16, image 2 de 3 Oster CKSTSTMD5-W Disassembly: étape 16, image 3 de 3
      • Using your hands, carefully lift the white plastic barrier out of the device from the right side of the timer.

      • Be careful not to impede the blue and brown wires connecting the heating element to the timer.

      Demander à FixBot

      Ajouter un commentaire

    17. Oster CKSTSTMD5-W Disassembly: étape 17, image 1 de 2 Oster CKSTSTMD5-W Disassembly: étape 17, image 2 de 2
      • Rotate the device so that the dial faces you.

      • Using the plastic opening tool, pry the white dial out of the timer socket.

      Demander à FixBot

      Ajouter un commentaire

    18. Oster CKSTSTMD5-W Disassembly: étape 18, image 1 de 1
      • Pull the white dial the rest of the way out of the socket.

      Demander à FixBot

      Ajouter un commentaire

    19. Oster CKSTSTMD5-W Disassembly: étape 19, image 1 de 2 Oster CKSTSTMD5-W Disassembly: étape 19, image 2 de 2
      • Using the JIS #1 screwdriver, remove the two 12 mm screws from the top and bottom of the timer socket.

      Demander à FixBot

      Ajouter un commentaire

    20. Oster CKSTSTMD5-W Disassembly: étape 20, image 1 de 1
      • Using your fingers, pry out the black timer socket from the front hole.

      Demander à FixBot

      Ajouter un commentaire

    21. Oster CKSTSTMD5-W Disassembly: étape 21, image 1 de 2 Oster CKSTSTMD5-W Disassembly: étape 21, image 2 de 2
      • Using your hands, carefully lift the timer out of the socket and away from the device.

      • Be careful not to pull too hard as to not break the wire connection.

      Demander à FixBot

      Ajouter un commentaire

    22. Oster CKSTSTMD5-W Disassembly: étape 22, image 1 de 2 Oster CKSTSTMD5-W Disassembly: étape 22, image 2 de 2
      • Using the JIS #1 screwdriver, remove the two 4.3 mm screws from the right and left side of the timer.

      • Using your hands, lift off the black plastic cover.

      Demander à FixBot

      Ajouter un commentaire

    23. Oster CKSTSTMD5-W Disassembly: étape 23, image 1 de 3 Oster CKSTSTMD5-W Disassembly: étape 23, image 2 de 3 Oster CKSTSTMD5-W Disassembly: étape 23, image 3 de 3
      • Using the JIS #1 screwdriver, remove the two 4.3 mm screws from the right and left side of the timer.

      Demander à FixBot

      Ajouter un commentaire

    24. Oster CKSTSTMD5-W Disassembly: étape 24, image 1 de 2 Oster CKSTSTMD5-W Disassembly: étape 24, image 2 de 2
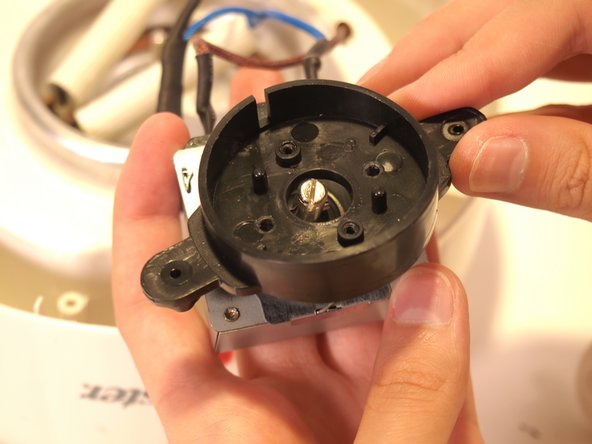
      • Using the plastic opening tool, bend the 3 metal braces towards the outside of the timer so that the metal fits through the slots.

      Demander à FixBot

      Ajouter un commentaire

    25. Oster CKSTSTMD5-W Disassembly: étape 25, image 1 de 2 Oster CKSTSTMD5-W Disassembly: étape 25, image 2 de 2
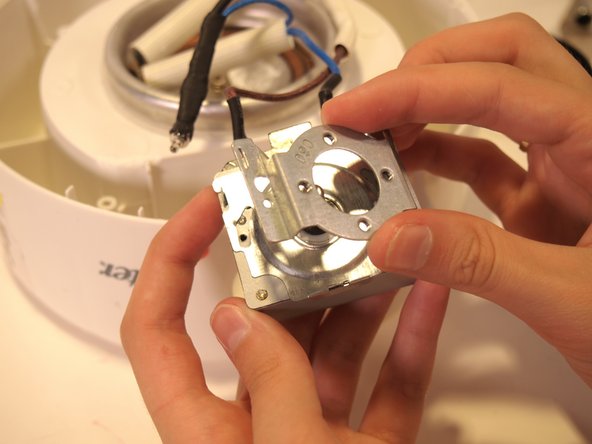
      • Lift the silver cover off of the timer.

      Demander à FixBot

      Ajouter un commentaire

    26. Oster CKSTSTMD5-W Disassembly: étape 26, image 1 de 1
      • Lift the metal silver plate off of the timer.

      Demander à FixBot

      Ajouter un commentaire

    27. Oster CKSTSTMD5-W Disassembly: étape 27, image 1 de 2 Oster CKSTSTMD5-W Disassembly: étape 27, image 2 de 2
      • Using the JIS #1 screwdriver, remove the single 4.3mm screw from the top center of the timer.

      Demander à FixBot

      Ajouter un commentaire

    28. Oster CKSTSTMD5-W Disassembly: étape 28, image 1 de 3 Oster CKSTSTMD5-W Disassembly: étape 28, image 2 de 3 Oster CKSTSTMD5-W Disassembly: étape 28, image 3 de 3
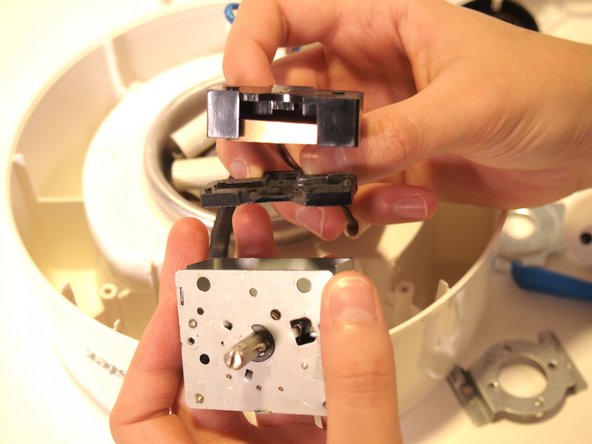
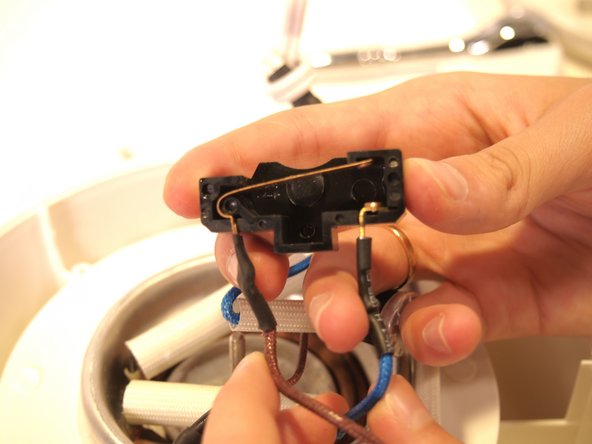
      • Lift the black plastic casing out from in between the front and back of the timer.

      Demander à FixBot

      Ajouter un commentaire

    29. Oster CKSTSTMD5-W Disassembly: étape 29, image 1 de 2 Oster CKSTSTMD5-W Disassembly: étape 29, image 2 de 2
      • Rotate the timer 90 degrees to the left so that you can see it from the side.

      • Lift the silver back casing off of the timer.

      Demander à FixBot

      Ajouter un commentaire

Conclusion

To reassemble your device, follow these instructions in reverse order.

Annulation : je n'ai pas terminé ce tutoriel.

Pièces jointes

0 commentaires de tutoriel

Ajouter un commentaire

Nombre de vues :

Dernières 24 heures : 4

7 derniers jours : 14

30 derniers jours : 60

Total : 855