Aller au contenu principal
Pour réparer ensemble - Je crée un compte

Overalls Buckle Replacement

Ce dont vous avez besoin

  1. Overalls Buckle Replacement, Overalls Buckle: étape 1, image 1 de 1
    • Lay the overalls on a flat surface with the straps folded forward.

    Demander à FixBot

    Ajouter un commentaire

  2. Overalls Buckle Replacement: étape 2, image 1 de 1
    • Seam rippers or similar tools are sharp and can cause injury. Use with caution.

    • Only complete this step if previous buckles are currently sewn on in any fashion. If the strap has no buckle, skip this step.

    • Use a seam ripper to cut the existing seam on the strap near the buckle.

    Demander à FixBot

    Ajouter un commentaire

  3. Overalls Buckle Replacement: étape 3, image 1 de 1
    • Unthread the strap by pulling the now-freed end through the loops in the buckle and adjuster.

    Demander à FixBot

    Ajouter un commentaire

  4. Overalls Buckle Replacement: étape 4, image 1 de 3 Overalls Buckle Replacement: étape 4, image 2 de 3 Overalls Buckle Replacement: étape 4, image 3 de 3
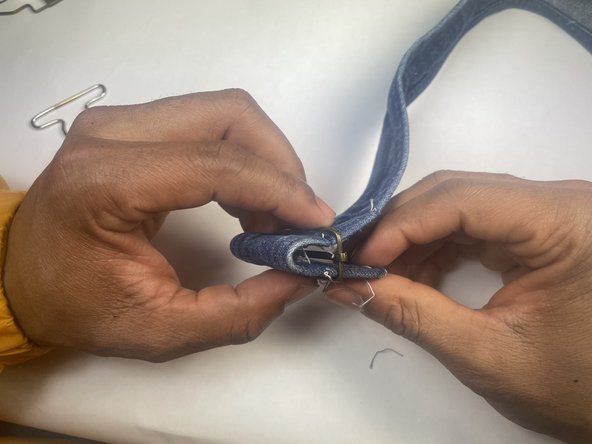
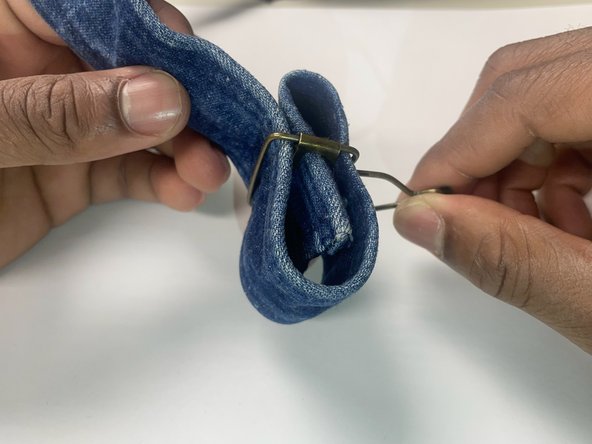
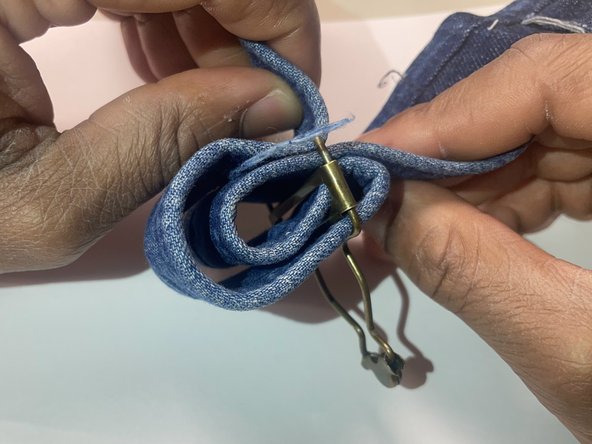
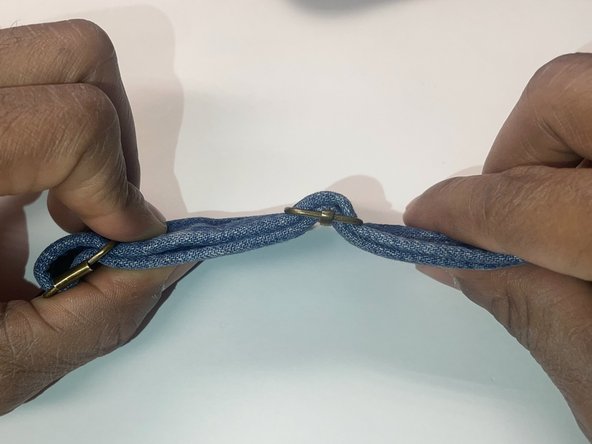
    • With the new buckle set (clip and adjuster), thread the strap first, around the center bar of the adjuster.

    • Be sure the strap wraps up through the back of the adjuster, then down through the front (relative to the overalls), this way the adjuster will be the correct orientation when this step is complete.

    Demander à FixBot

    Ajouter un commentaire

  5. Overalls Buckle Replacement: étape 5, image 1 de 3 Overalls Buckle Replacement: étape 5, image 2 de 3 Overalls Buckle Replacement: étape 5, image 3 de 3
    • Thread the strap through the buckle. Wrap the strap around the center slider, similar to the previous step.

    • Next thread the strap up through the center slider and then out the remaining hole.

    Demander à FixBot

    Ajouter un commentaire

  6. Overalls Buckle Replacement: étape 6, image 1 de 2 Overalls Buckle Replacement: étape 6, image 2 de 2
    • Thread the strap through the adjuster as in step 4, although now backwards and underneath the existing strap.

    Demander à FixBot

    Ajouter un commentaire

  7. Overalls Buckle Replacement: étape 7, image 1 de 2 Overalls Buckle Replacement: étape 7, image 2 de 2
    • Needles are sharp and can cause injury, particularly when sewing tough materials like denim. Use with caution.

    • With about an inch of slack, fold the strap end back onto itself. This should create a small loop containing the center slider of the adjuster.

    • Using a needle and thread, hand sew across the strap, permanently closing this loop.

    • The stitches do not have to be perfect. When the overalls are worn, these stitches will not be visible.

    Demander à FixBot

    Ajouter un commentaire

  8. Overalls Buckle Replacement: étape 8, image 1 de 1
    • Using the needle, tie two to three simple, overhand knots to secure the stitching and cut off remaining slack.

    Demander à FixBot

    Ajouter un commentaire

Ligne d'arrivée

Annulation : je n'ai pas terminé ce tutoriel.

Une autre personne a terminé cette réparation.

Max Waldorf

Membre depuis le 01/26/23

189 Réputation

1 tutoriel rédigé

Équipe

UC Davis, Team 2-12, Morris Winter 2023 Membre de l'équipe UC Davis, Team 2-12, Morris Winter 2023

UCD-MORRIS-W23S2G12

2 membres

1 tutoriel rédigé

0 commentaires de tutoriel

Ajouter un commentaire

Nombre de vues :

Dernières 24 heures : 9

7 derniers jours : 53

30 derniers jours : 217

Total : 7,389