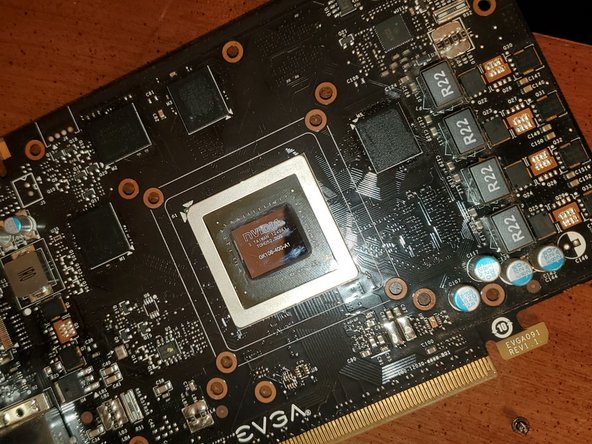
Aller au contenu principal

Overheating Graphics Card Thermal Paste Replacement

Ce dont vous avez besoin

  1. Overheating Graphics Card Thermal Paste Replacement, GPU Thermal Paste: étape 1, image 1 de 1
    • Make sure to turn your computer off first, then disconnect the power supply cable. Ground yourself with metal or a strap to prevent the anti-static electric shock from damaging your computer.

    • Before proceeding, be sure that the thermal paste is not electrically conductive.

    • Discharge any remaining energy stored in your system by pressing the power button, even after disconnecting the power supply, so this can prevent the risk of static electricity damage.

  2. Overheating Graphics Card Thermal Paste Replacement: étape 2, image 1 de 3 Overheating Graphics Card Thermal Paste Replacement: étape 2, image 2 de 3 Overheating Graphics Card Thermal Paste Replacement: étape 2, image 3 de 3
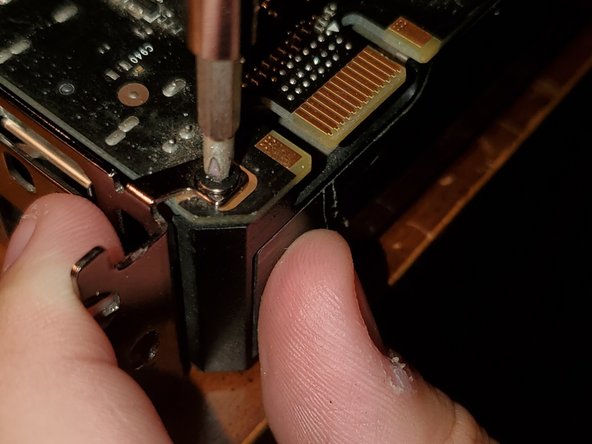
    • Using a Philips #00 screwdriver, unscrew the two screws holding the video card in place.

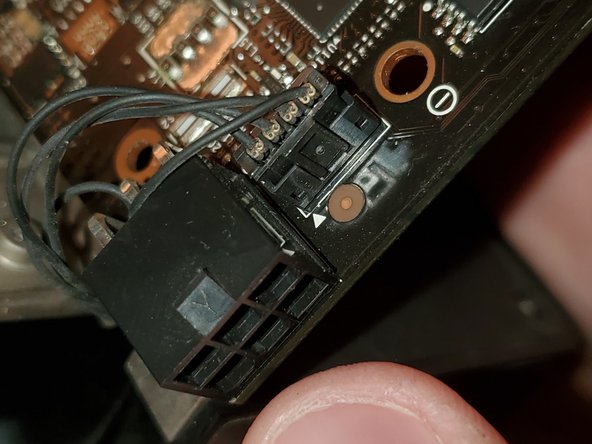
    • Remove the 6-pin PCIe power connector. This is a cable that supplies your GPU with extra power from your power supply.

    • Underneath the heatsink, there is an additional 4-pin connector next to the 6-pin PCIe connector. This is for the fan; you will need to disconnect this when you separate the heat sink from the Printed Circuit Board (PCB).

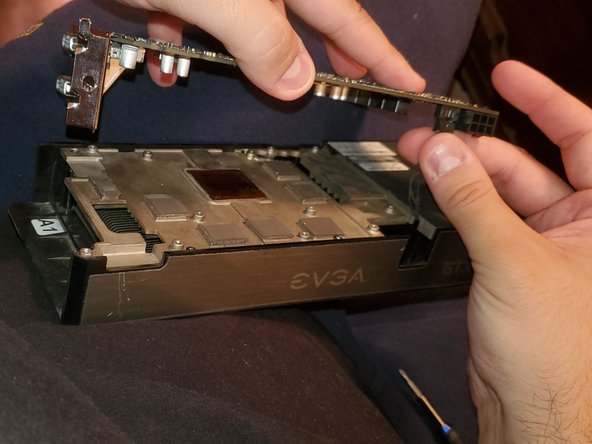
    • On the motherboard, press the tab on the side of the PCI Express slot (the port the GPU is connected to) and pull on the graphics card to remove it from your system.

  3. Overheating Graphics Card Thermal Paste Replacement: étape 3, image 1 de 3 Overheating Graphics Card Thermal Paste Replacement: étape 3, image 2 de 3 Overheating Graphics Card Thermal Paste Replacement: étape 3, image 3 de 3
    • Unscrew all screws on the bottom of the graphics card. This will allow you to remove the heatsink from the graphics card.

    • Remove all screws of the heat sink, and do not forget to remove the screw located in the back corner of the graphic card.

    • You do not need to remove the screws for the extra cooling fan, but you must remove the screws fixing the PCB board with the heat sink together.

  4. Overheating Graphics Card Thermal Paste Replacement: étape 4, image 1 de 3 Overheating Graphics Card Thermal Paste Replacement: étape 4, image 2 de 3 Overheating Graphics Card Thermal Paste Replacement: étape 4, image 3 de 3
    • Gently pull on the heatsink to remove the heatsink from the graphics card.

    • Do not pull it too hard, as you will need to remove the cable from the heat sink's fan to separate the two pieces completely.

    • Next to where the 6-pin power connector is, is the fan connector. Handling the heat sink's fan cable from the sides, gently remove the cable from the slot.

    • If you pull the fan cable from the cable itself, you will likely destroy the fan cable.

    • When reassembling, do not make any adjustments when seating the cooler to the PCB, as this can affect the seal of the thermal paste, and reduce its effectiveness.

  5. Overheating Graphics Card Thermal Paste Replacement: étape 5, image 1 de 3 Overheating Graphics Card Thermal Paste Replacement: étape 5, image 2 de 3 Overheating Graphics Card Thermal Paste Replacement: étape 5, image 3 de 3
    • Wipe the top of the graphics chip gently with 91% isopropyl alcohol to remove the old thermal paste, avoid being too rough to prevent scratching the chip.

  6. Overheating Graphics Card Thermal Paste Replacement: étape 6, image 1 de 3 Overheating Graphics Card Thermal Paste Replacement: étape 6, image 2 de 3 Overheating Graphics Card Thermal Paste Replacement: étape 6, image 3 de 3
    • Repeat that process on the heatsink. This will allow for even distribution of the thermal paste to fill properly.

  7. Overheating Graphics Card Thermal Paste Replacement: étape 7, image 1 de 3 Overheating Graphics Card Thermal Paste Replacement: étape 7, image 2 de 3 Overheating Graphics Card Thermal Paste Replacement: étape 7, image 3 de 3
    • Place a small pea-sized drop of your new thermal paste on the graphic chip center.

    • Do not apply too much Thermal Paste, it can spill over the sides of the Graphic chip which can cause issues and it will be a mess to clean up.

    • Do not spread the paste before reassembling the graphic card with the cooler, the cooler pressure will evenly distribute the thermal paste.

Conclusion

To reassemble your device, begin with Step 4, then work backwards from there.

Be sure to reconnect the fan to the graphics card before you begin to screw the heat sink down.

Be sure to tighten the screws in a star pattern. This will evenly distribute the force between the heat sink and graphics card, making the thermal paste work better.

3 autres ont terminé cette réparation.

Chris Imperiale

Membre depuis le 05/26/19

199 Réputation

1 tutoriel rédigé

Équipe

Pasco Hernando, Team S8-G23, Prince Summer 2019 Membre de l'équipe Pasco Hernando, Team S8-G23, Prince Summer 2019

PHSC-PRINCE-SU19S8G23

1 membre

1 tutoriel rédigé

0 commentaires

Ajouter un commentaire

Nombre de vues :

Dernières 24 heures : 1

7 derniers jours : 9

30 derniers jours : 58

Total : 5,466