Aller au contenu principal

PSP E1000 UMD switch Replacement

Ce dont vous avez besoin

Vidéo d'introduction

  1. PSP E1000 UMD switch Replacement, UMD switch: étape 1, image 1 de 3 PSP E1000 UMD switch Replacement, UMD switch: étape 1, image 2 de 3 PSP E1000 UMD switch Replacement, UMD switch: étape 1, image 3 de 3
    • If you haven't indication for inserted disk the problem probably is in UMD switch.

  2. PSP E1000 UMD switch Replacement: étape 2, image 1 de 3 PSP E1000 UMD switch Replacement: étape 2, image 2 de 3 PSP E1000 UMD switch Replacement: étape 2, image 3 de 3
    • Unhook the door metal plate and disassemble UMD door.

  3. PSP E1000 UMD switch Replacement: étape 3, image 1 de 2 PSP E1000 UMD switch Replacement: étape 3, image 2 de 2
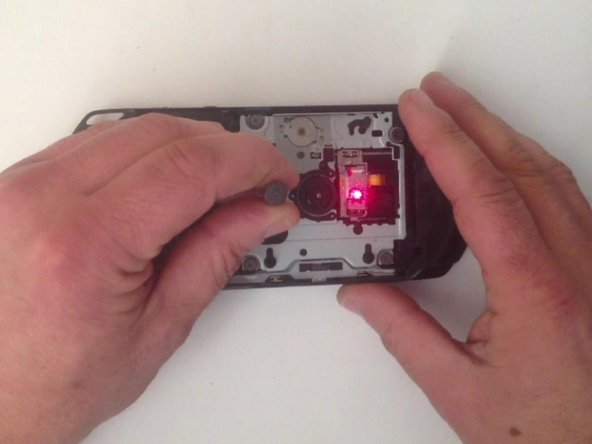
    • With a screwdriver I short the UMD switch to test the laser.

  4. PSP E1000 UMD switch Replacement: étape 4, image 1 de 3 PSP E1000 UMD switch Replacement: étape 4, image 2 de 3 PSP E1000 UMD switch Replacement: étape 4, image 3 de 3
    • Now let's disassemble it.

  5. PSP E1000 UMD switch Replacement: étape 5, image 1 de 3 PSP E1000 UMD switch Replacement: étape 5, image 2 de 3 PSP E1000 UMD switch Replacement: étape 5, image 3 de 3
    • Disconnect and remove the display.

  6. PSP E1000 UMD switch Replacement: étape 6, image 1 de 2 PSP E1000 UMD switch Replacement: étape 6, image 2 de 2
    • I must disconnect 7x cables and unscrew a screw.

  7. PSP E1000 UMD switch Replacement: étape 7, image 1 de 3 PSP E1000 UMD switch Replacement: étape 7, image 2 de 3 PSP E1000 UMD switch Replacement: étape 7, image 3 de 3
    • Now I disconnect the battery connector and here is the mainboard.

  8. PSP E1000 UMD switch Replacement: étape 8, image 1 de 2 PSP E1000 UMD switch Replacement: étape 8, image 2 de 2
    • I used soldering station to remove the old one and put the new one (UMD switch).

  9. PSP E1000 UMD switch Replacement: étape 9, image 1 de 3 PSP E1000 UMD switch Replacement: étape 9, image 2 de 3 PSP E1000 UMD switch Replacement: étape 9, image 3 de 3
    • Let's assemble and test it.

  10. PSP E1000 UMD switch Replacement: étape 10, image 1 de 1
    • And it works!

Conclusion

To reassemble your device, follow these instructions in reverse order.

5 autres ont terminé cette réparation.

ZFix

Membre depuis le 12/09/13

191 182 Réputation

330 tutoriels rédigés

Équipe

Master Techs Membre de l'équipe Master Techs

Community

322 membres

2 521 tutoriels rédigés

Un commentaire

Step 2 - picture number 3 is wrong, I broke off a little part of my PSP E1004. The left arrow points up but you have to pull it down, while trying to pry gently to the right. I learned the hard way after I managed to take it off.

Dukefazon - Réponse

Ajouter un commentaire

Nombre de vues :

Dernières 24 heures : 1

7 derniers jours : 17

30 derniers jours : 110

Total : 12,921