Aller au contenu principal

Palm Pre Keyboard Replacement

Ce dont vous avez besoin

  1. Palm Pre Keyboard Replacement, Battery: étape 1, image 1 de 1
    • Make sure your Palm Pre is turned off before disassembling the phone.

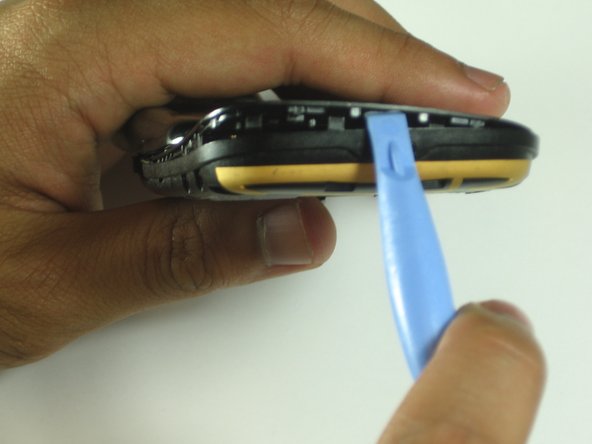
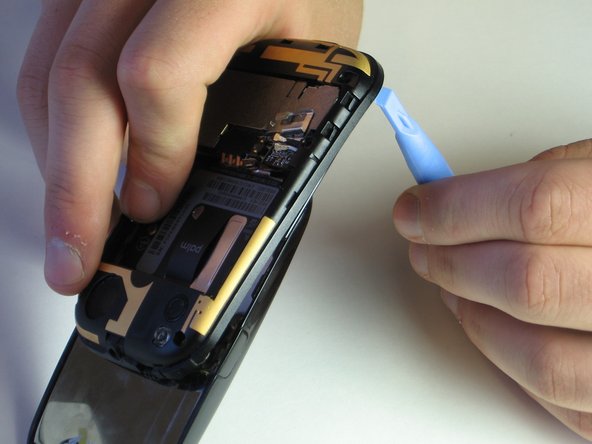
    • Snap off the back panel to reveal the battery.

  2. Palm Pre Keyboard Replacement: étape 2, image 1 de 1
    • Carefully pull up on the tab to remove the current battery.

  3. Palm Pre Keyboard Replacement, Antenna: étape 3, image 1 de 2 Palm Pre Keyboard Replacement, Antenna: étape 3, image 2 de 2
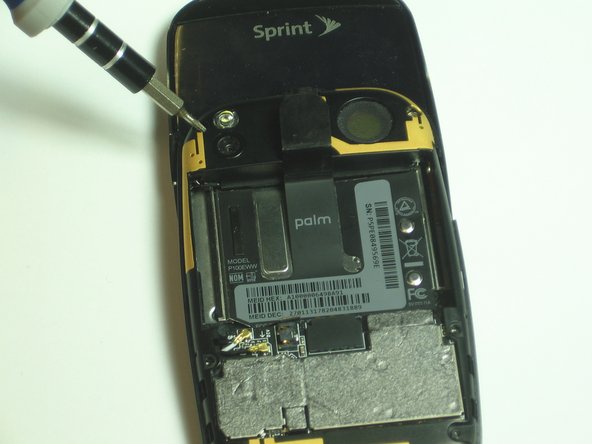
    • Use the T5 Torx Screwdriver to remove the six screws holding the backing frame in place.

  4. Palm Pre Keyboard Replacement: étape 4, image 1 de 1
    • Locate the hinge that covers the black and white GPS and DIV antennas. (The hinge will be located in the red box as portrayed in the picture.)

    • Use a spudger to pry open the hinge.

    • Use tweezers to disconnect the antennas from the keypad control board.

  5. Palm Pre Keyboard Replacement: étape 5, image 1 de 2 Palm Pre Keyboard Replacement: étape 5, image 2 de 2
    • Use a spudger to pry off the (black and yellow) back frame.

    • Disregard the main part of the phone at this point and look only at the inside of the removed back frame. (You will need the main part of the phone for access to the keyboard and motherboard)

  6. Palm Pre Keyboard Replacement: étape 6, image 1 de 1
    • Find the small circuit board at the top right and desolder the wires that are connected to it.

    • This step is only necessary for antenna removal.

  7. Palm Pre Keyboard Replacement, Keypad Control Board: étape 7, image 1 de 1
    • Remove the two ribbon cable connectors using tweezers.

  8. Palm Pre Keyboard Replacement: étape 8, image 1 de 2 Palm Pre Keyboard Replacement: étape 8, image 2 de 2
    • Use a spudger to remove the keypad control board.

    • There is heavy adhesive connecting this part to the keypad sensors.

  9. Palm Pre Keyboard Replacement, Keyboard: étape 9, image 1 de 1
    • Slide the keyboard away from the phone.

    • Use tweezers to separate the keyboard from the phone if adhesive is inhibiting removal.

Conclusion

To reassemble your device, follow these instructions in reverse order.

noha

Membre depuis le 04/12/12

139 Réputation

6 tutoriels rédigés

Équipe

Cal Poly, Team 7-31, Maness Spring 2012 Membre de l'équipe Cal Poly, Team 7-31, Maness Spring 2012

CPSU-MANESS-S12S7G31

3 membres

16 tutoriels rédigés

0 commentaires

Ajouter un commentaire

Nombre de vues :

Dernières 24 heures : 0

7 derniers jours : 1

30 derniers jours : 2

Total : 1,275