Aller au contenu principal

Palm Pre PCB (Phone Circuit Board) Replacement

Tutoriel Archivé
Ce tutoriel est conservé uniquement à des fins de suivis historiques. Utilisez la version actuelle du tutoriel pour effectuer votre réparation.

Ce dont vous avez besoin

  1. Palm Pre PCB (Phone Circuit Board) Replacement, Antenna: étape 1, image 1 de 2 Palm Pre PCB (Phone Circuit Board) Replacement, Antenna: étape 1, image 2 de 2
    • First the back panel must be removed to reveal the battery.

    • Remove the battery pack.

  2. Palm Pre PCB (Phone Circuit Board) Replacement: étape 2, image 1 de 2 Palm Pre PCB (Phone Circuit Board) Replacement: étape 2, image 2 de 2
    • Remove the six T5 screws necessary to separate the backplate from the phone.

    • There is one screw in the upper right that is concealed by a small sticker labeled "Palm."

    • Additionally, there are interlocking tabs securing the back plate around the edges.

    • Use the opening tool to carefully go around the phone releasing these tabs.

  3. Palm Pre PCB (Phone Circuit Board) Replacement: étape 3, image 1 de 2 Palm Pre PCB (Phone Circuit Board) Replacement: étape 3, image 2 de 2
    • Lift the metal flap marked in red to reveal the antenna connectors.

    • Carefully pry these the antennas from their connections, this can be done quite easily.

    • Take note of which colored wire is attached to each connection. The white wire corresponds to GPS, while the black wire corresponds to DIV, or diversity antenna.

  4. Palm Pre PCB (Phone Circuit Board) Replacement, PCB (Phone Circuit Board): étape 4, image 1 de 3 Palm Pre PCB (Phone Circuit Board) Replacement, PCB (Phone Circuit Board): étape 4, image 2 de 3 Palm Pre PCB (Phone Circuit Board) Replacement, PCB (Phone Circuit Board): étape 4, image 3 de 3
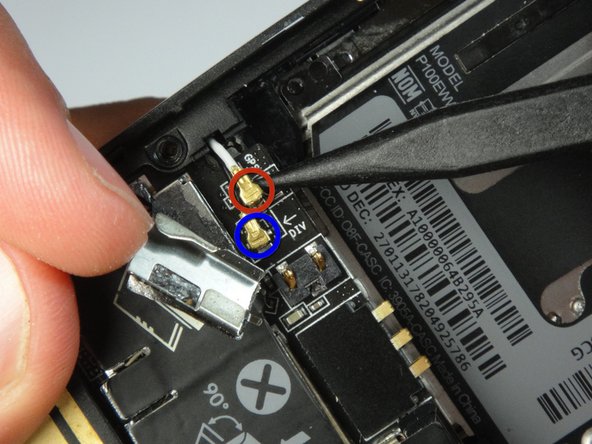
    • With the backplate removed, we have easy access to the PCB.

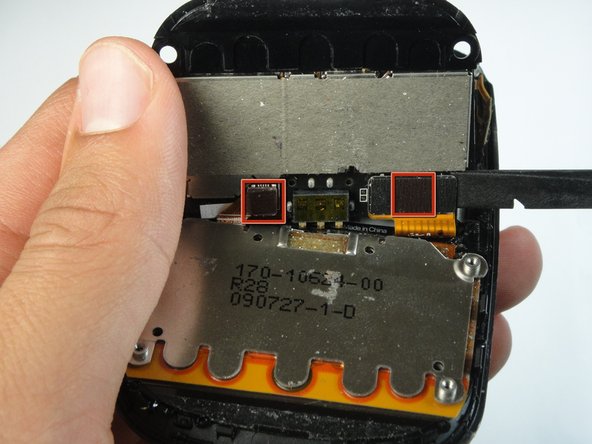
    • Two connectors must be disconnected so that we can remove the PCB.

    • Gentle prying with the opening tool should easily separate the glued PCB from the rest of the phone.
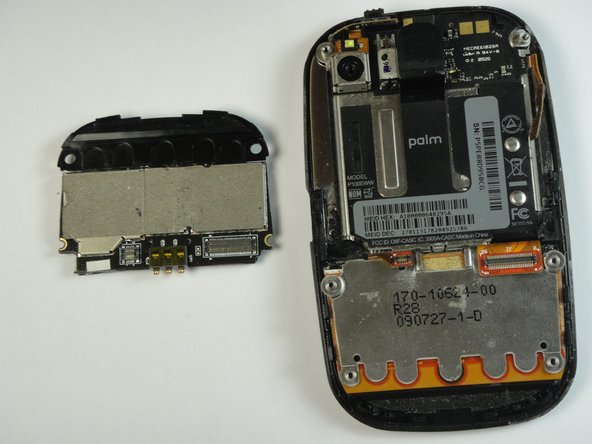
Conclusion

To reassemble your device, follow these instructions in reverse order.

iDeleted

Membre depuis le 07/07/10

2 101 Réputation

39 tutoriels rédigés

0 commentaires

Ajouter un commentaire

Nombre de vues :

Dernières 24 heures : 0

7 derniers jours : 0

30 derniers jours : 0

Total : 411