Aller au contenu principal
Pour réparer ensemble - Je crée un compte
Panasonic Lumix DMC-G7 Flash Capacitor/Fuse Replacement

Ce dont vous avez besoin

    1. Panasonic Lumix DMC-G7 Flash Capacitor/Fuse Replacement, Mainboard: étape 1, image 1 de 2 Panasonic Lumix DMC-G7 Flash Capacitor/Fuse Replacement, Mainboard: étape 1, image 2 de 2
      • Unlock and open the battery compartment on the bottom of the camera.

      • Remove both the battery and SD card.

      Demander à FixBot

      Ajouter un commentaire

    2. Panasonic Lumix DMC-G7 Flash Capacitor/Fuse Replacement: étape 2, image 1 de 3 Panasonic Lumix DMC-G7 Flash Capacitor/Fuse Replacement: étape 2, image 2 de 3 Panasonic Lumix DMC-G7 Flash Capacitor/Fuse Replacement: étape 2, image 3 de 3
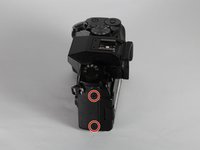
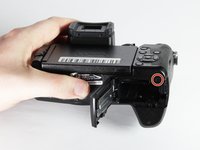
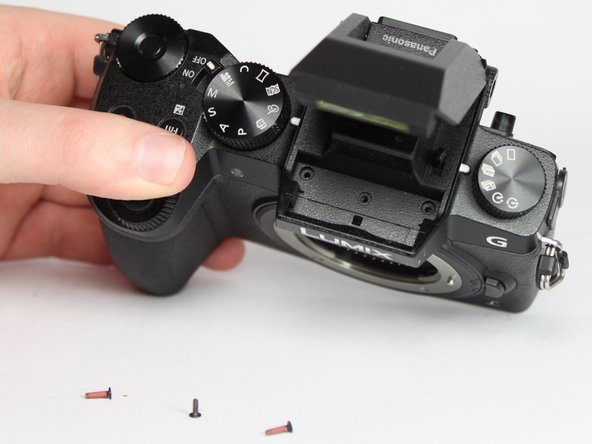
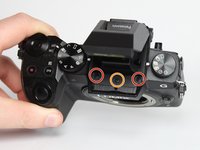
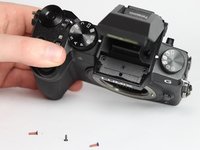
      • Remove the four indicated 3.0mm long black screws from the bottom of the camera and the viewfinder housing using a PH0 Phillips screwdriver.

      • There are four screws on the bottom of the camera. Only remove the two nearest to the screen.

      Demander à FixBot

      Ajouter un commentaire

    3. Panasonic Lumix DMC-G7 Flash Capacitor/Fuse Replacement: étape 3, image 1 de 3 Panasonic Lumix DMC-G7 Flash Capacitor/Fuse Replacement: étape 3, image 2 de 3 Panasonic Lumix DMC-G7 Flash Capacitor/Fuse Replacement: étape 3, image 3 de 3
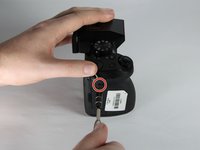
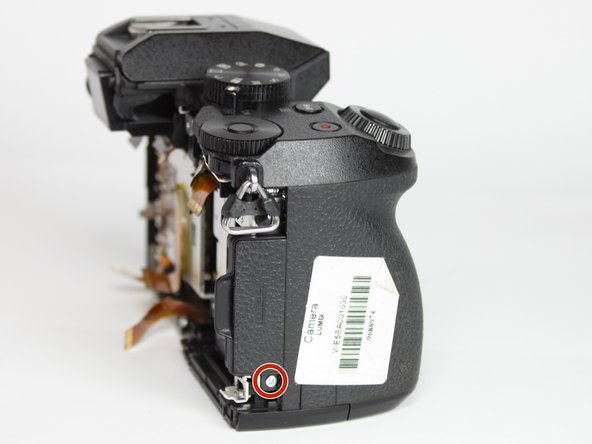
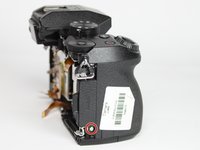
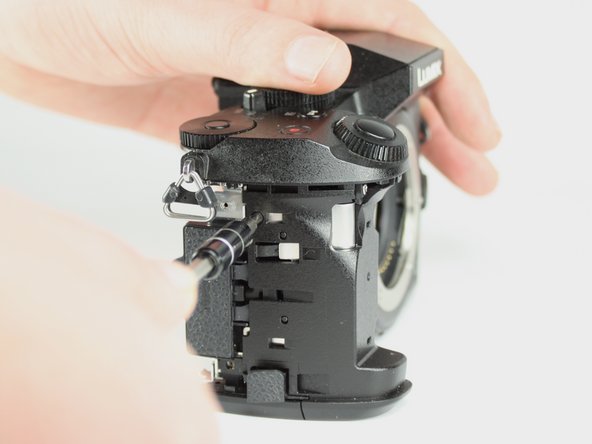
      • Remove the four indicated 6.0mm long black screws using a PH0 Phillips screwdriver.

      • Three of the screws are located on the sides of the chassis and one is directly underneath the battery compartment lid.

      Demander à FixBot

      Ajouter un commentaire

    4. Panasonic Lumix DMC-G7 Flash Capacitor/Fuse Replacement: étape 4, image 1 de 3 Panasonic Lumix DMC-G7 Flash Capacitor/Fuse Replacement: étape 4, image 2 de 3 Panasonic Lumix DMC-G7 Flash Capacitor/Fuse Replacement: étape 4, image 3 de 3
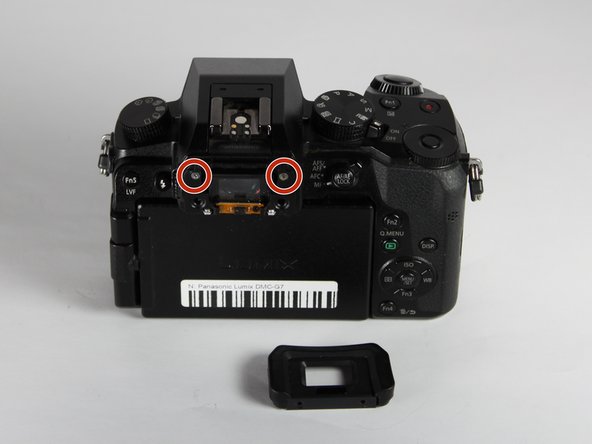
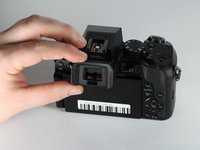
      • Remove the viewfinder eye cup by pulling up and out from the bottom to separate the locking clips from the camera.

      • Do not flex the eye cup too aggressively as it may lose its shape.

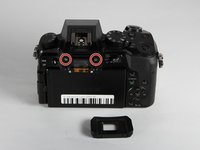
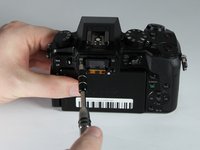
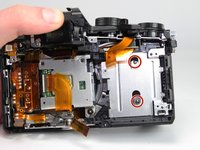
      • Remove the two indicated silver 3.5mm long screws adjacent to the viewfinder screen using a PH0 Phillips screwdriver.

      Demander à FixBot

      Ajouter un commentaire

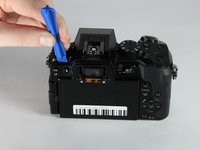
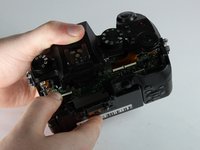
    5. Panasonic Lumix DMC-G7 Flash Capacitor/Fuse Replacement: étape 5, image 1 de 2 Panasonic Lumix DMC-G7 Flash Capacitor/Fuse Replacement: étape 5, image 2 de 2
      • Use an iFixit opening tool (or similarly long and thin object) to insert into the gap between the two camera halves and pry the camera apart from the top.

      Demander à FixBot

      Ajouter un commentaire

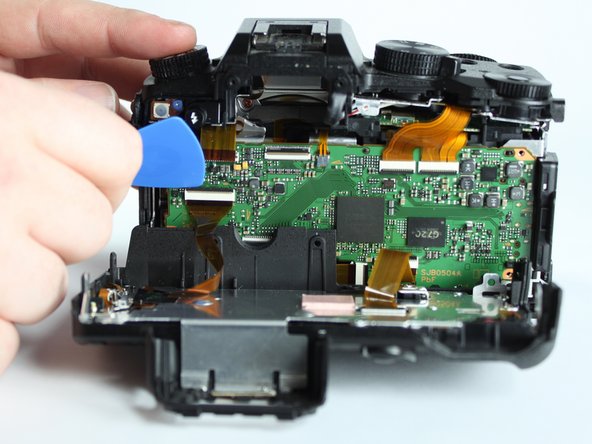
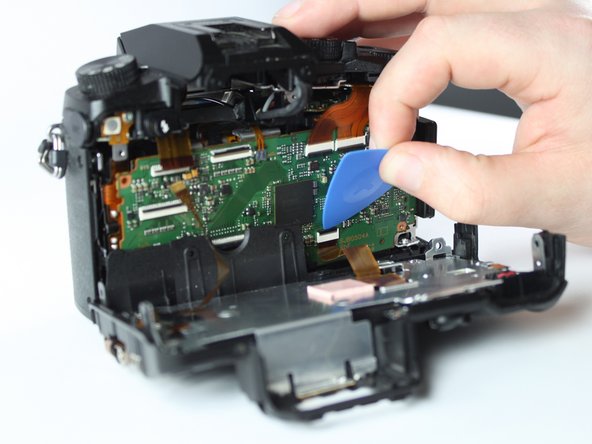
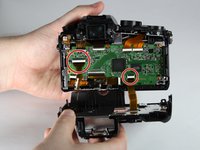
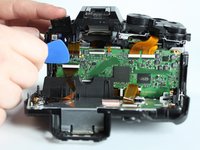
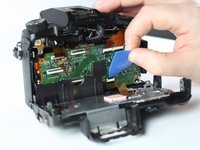
    6. Panasonic Lumix DMC-G7 Flash Capacitor/Fuse Replacement: étape 6, image 1 de 3 Panasonic Lumix DMC-G7 Flash Capacitor/Fuse Replacement: étape 6, image 2 de 3 Panasonic Lumix DMC-G7 Flash Capacitor/Fuse Replacement: étape 6, image 3 de 3
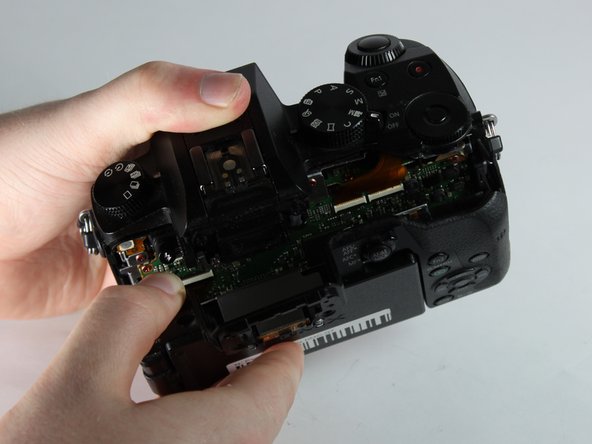
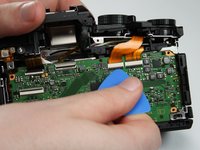
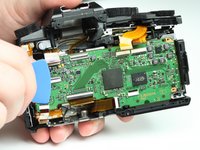
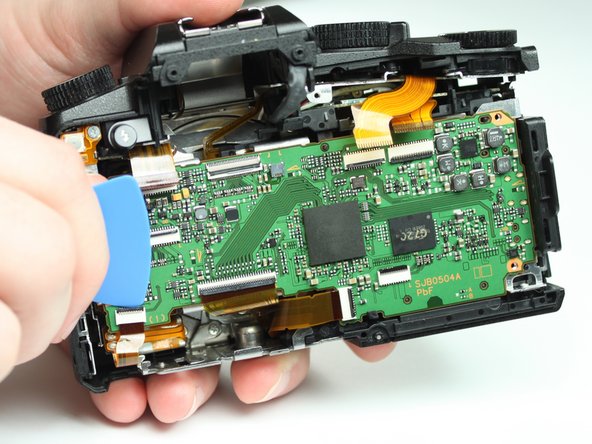
      • Remove the two indicated ribbon cables before separating the two halves of the camera.

      • Using a flat object, pry open the black tabs above the ribbon cable connectors by gently pulling away from the motherboard.

      • An opening pick is recommended, but any equally small and flat object will work.

      • Ribbon cables are fragile, so put as little stress on them as possible.

      Demander à FixBot

      Ajouter un commentaire

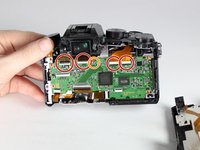
    7. Panasonic Lumix DMC-G7 Flash Capacitor/Fuse Replacement: étape 7, image 1 de 2 Panasonic Lumix DMC-G7 Flash Capacitor/Fuse Replacement: étape 7, image 2 de 2
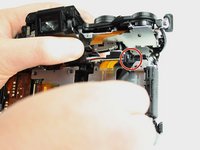
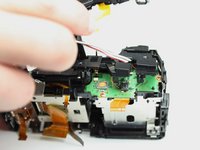
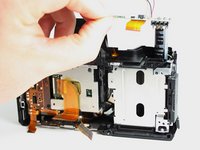
      • Remove the 4 indicated flex cables from top of mainboard

      • Remove the indicated small flex cable from top of mainboard.

      • The small flex cable does not have a lock: simply pull to disconnect it.

      Demander à FixBot

      Ajouter un commentaire

    8. Panasonic Lumix DMC-G7 Flash Capacitor/Fuse Replacement: étape 8, image 1 de 2 Panasonic Lumix DMC-G7 Flash Capacitor/Fuse Replacement: étape 8, image 2 de 2
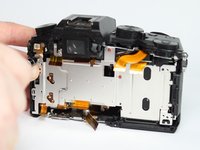
      • Remove the 3 indicated flex cables from the bottom of the mainboard.

      Demander à FixBot

      Ajouter un commentaire

    9. Panasonic Lumix DMC-G7 Flash Capacitor/Fuse Replacement: étape 9, image 1 de 3 Panasonic Lumix DMC-G7 Flash Capacitor/Fuse Replacement: étape 9, image 2 de 3 Panasonic Lumix DMC-G7 Flash Capacitor/Fuse Replacement: étape 9, image 3 de 3
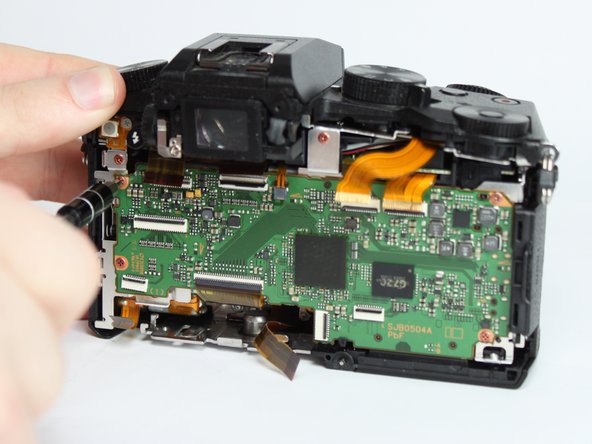
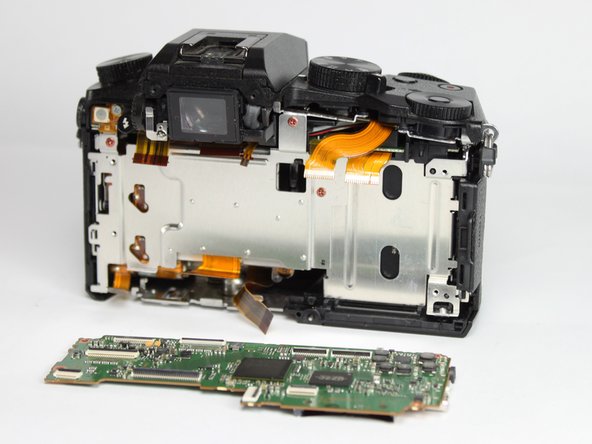
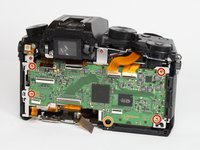
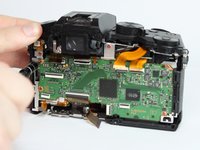
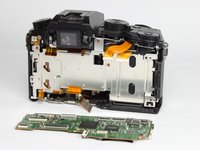
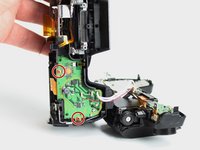
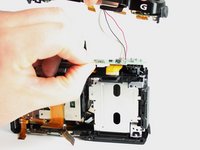
      • Remove the 4 indicated red 3.0mm long screws from the corners of mainboard using a Phillips PH0 screwdriver.

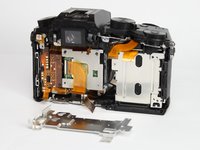
      • With the eyepiece facing away from you, pull up on the main PCB from the left side and then pull it away from the chassis.

      • There is a plastic locking tab on the bottom of the camera that holds the mainboard PCB.

      • A replacement mainboard can be purchased from AliExpress here

      Demander à FixBot

      Ajouter un commentaire

    1. Panasonic Lumix DMC-G7 Flash Capacitor/Fuse Replacement, Flash Capacitor/Fuse: étape 10, image 1 de 3 Panasonic Lumix DMC-G7 Flash Capacitor/Fuse Replacement, Flash Capacitor/Fuse: étape 10, image 2 de 3 Panasonic Lumix DMC-G7 Flash Capacitor/Fuse Replacement, Flash Capacitor/Fuse: étape 10, image 3 de 3
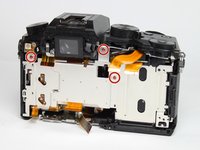
      • Use a PH0 Phillips screwdriver to remove the 3 indicated red 3.0mm screws from heat sink shield, then remove the heat sink.

      Demander à FixBot

      Ajouter un commentaire

    2. Panasonic Lumix DMC-G7 Flash Capacitor/Fuse Replacement: étape 11, image 1 de 2 Panasonic Lumix DMC-G7 Flash Capacitor/Fuse Replacement: étape 11, image 2 de 2
      • Use a PH0 Phillips screwdriver to remove the two indicated black 6.0mm long screws from the top of the camera, underneath the flash mechanism.

      • Remove the indicated black 4.0mm long screw from the top of the camera

      Demander à FixBot

      Ajouter un commentaire

    3. Panasonic Lumix DMC-G7 Flash Capacitor/Fuse Replacement: étape 12, image 1 de 2 Panasonic Lumix DMC-G7 Flash Capacitor/Fuse Replacement: étape 12, image 2 de 2
      • Remove the three indicated silver 5.0mm long screws from the back of the camera and the right side using a Phillips PH0 screwdriver.

      • The two screws on the back require a very thin screwdriver as they are only accessible through the holes on the back shield.

      Demander à FixBot

      Ajouter un commentaire

    4. Panasonic Lumix DMC-G7 Flash Capacitor/Fuse Replacement: étape 13, image 1 de 3 Panasonic Lumix DMC-G7 Flash Capacitor/Fuse Replacement: étape 13, image 2 de 3 Panasonic Lumix DMC-G7 Flash Capacitor/Fuse Replacement: étape 13, image 3 de 3
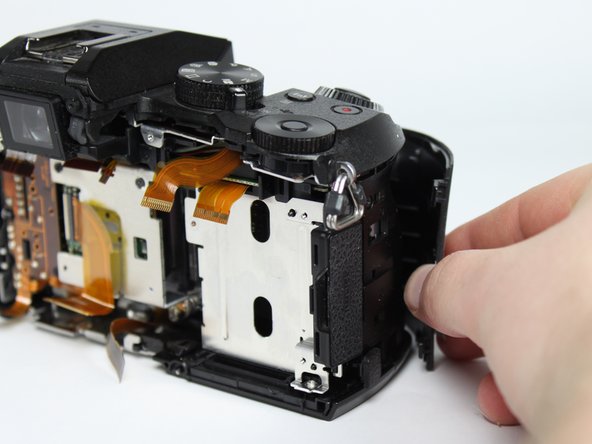
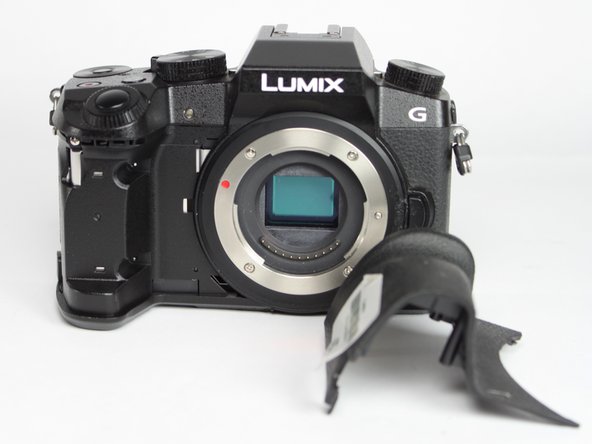
      • Remove the front grip from the camera by pulling it forward and out.

      Demander à FixBot

      Ajouter un commentaire

    5. Panasonic Lumix DMC-G7 Flash Capacitor/Fuse Replacement: étape 14, image 1 de 2 Panasonic Lumix DMC-G7 Flash Capacitor/Fuse Replacement: étape 14, image 2 de 2
      • Remove the indicated black 4.0mm long screw from the side under the front cover using a Phillips PH0 screwdriver.

      Demander à FixBot

      Ajouter un commentaire

    6. Panasonic Lumix DMC-G7 Flash Capacitor/Fuse Replacement: étape 15, image 1 de 2 Panasonic Lumix DMC-G7 Flash Capacitor/Fuse Replacement: étape 15, image 2 de 2
      • Remove the indicated silver 5.0mm long screw from under the front cover using a Phillips PH0 screwdriver.

      Demander à FixBot

      Ajouter un commentaire

    7. Panasonic Lumix DMC-G7 Flash Capacitor/Fuse Replacement: étape 16, image 1 de 3 Panasonic Lumix DMC-G7 Flash Capacitor/Fuse Replacement: étape 16, image 2 de 3 Panasonic Lumix DMC-G7 Flash Capacitor/Fuse Replacement: étape 16, image 3 de 3
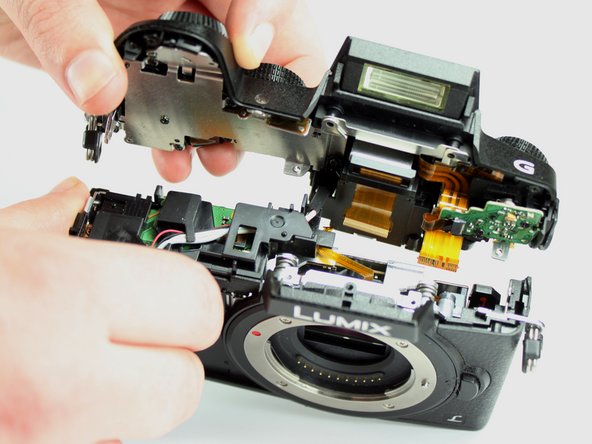
      • Lift the top unit away, separating it from the rest of the unit.

      Demander à FixBot

      Ajouter un commentaire

    8. Panasonic Lumix DMC-G7 Flash Capacitor/Fuse Replacement: étape 17, image 1 de 3 Panasonic Lumix DMC-G7 Flash Capacitor/Fuse Replacement: étape 17, image 2 de 3 Panasonic Lumix DMC-G7 Flash Capacitor/Fuse Replacement: étape 17, image 3 de 3
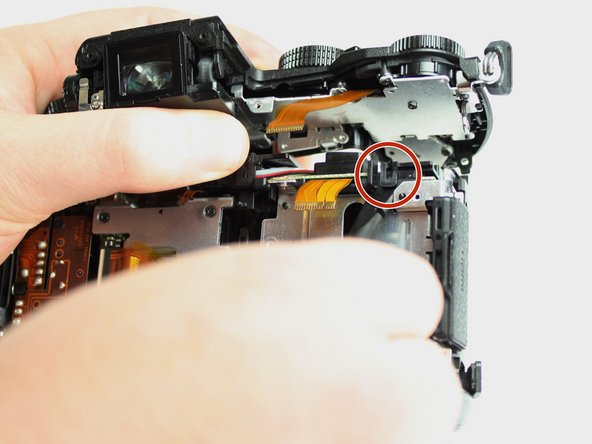
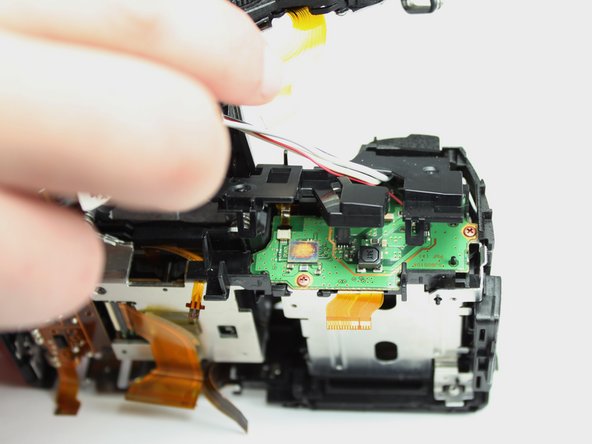
      • Pull the top panel away from the rest of the camera to reveal the flash wire and plastic cover.

      • Use a spudger (or other small prying tool) to release the locking tab on the plastic cover.

      • Pull the flash wire out under the plastic capacitor PCB cover. At the same time lift the cover away.

      Demander à FixBot

      Ajouter un commentaire

    9. Panasonic Lumix DMC-G7 Flash Capacitor/Fuse Replacement: étape 18, image 1 de 3 Panasonic Lumix DMC-G7 Flash Capacitor/Fuse Replacement: étape 18, image 2 de 3 Panasonic Lumix DMC-G7 Flash Capacitor/Fuse Replacement: étape 18, image 3 de 3
      • Remove the two indicated red 3.0mm long screws using a Phillips PH0 screwdriver.

      • Lift away the flash PCB.

      Demander à FixBot

      Ajouter un commentaire

    10. Panasonic Lumix DMC-G7 Flash Capacitor/Fuse Replacement: étape 19, image 1 de 3 Panasonic Lumix DMC-G7 Flash Capacitor/Fuse Replacement: étape 19, image 2 de 3 Panasonic Lumix DMC-G7 Flash Capacitor/Fuse Replacement: étape 19, image 3 de 3
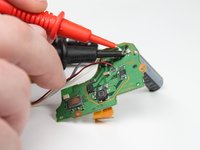
      • Caution: Be careful not to touch the capacitor wires as you work. If possible, use a capacitor discharge probe to safely rid the capacitors of dangerous charges.

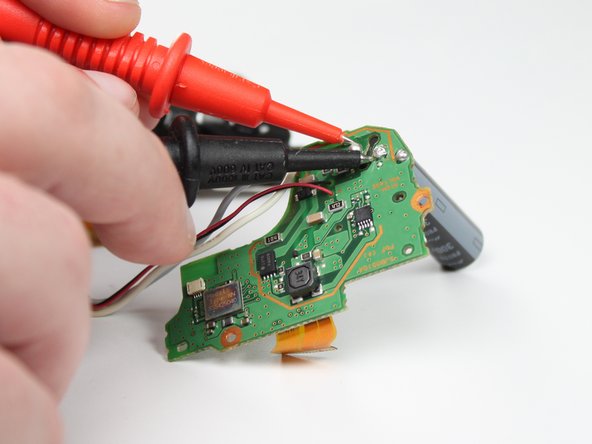
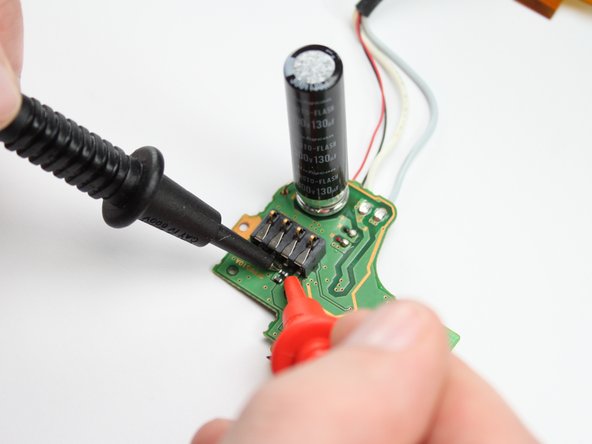
      • Determine if the capacitor or the fuse has failed. Using a Capacitance meter measure the capacitor, it should report a value of 130µF.

      • If the capacitor value reported is close, then use a voltmeter with continuity testing to probe the fuse. If there is no continuity, then the fuse is broken.

      • If the capacitor is the failure point, go to step 20 and stop there. Otherwise, if it is the fuse, skip to step 21.

      Demander à FixBot

      Ajouter un commentaire

    11. Panasonic Lumix DMC-G7 Flash Capacitor/Fuse Replacement: étape 20, image 1 de 1
      Outil utilisé dans cette étape :
      Desoldering Pump
      $3.99
      • Heat and remove the indicated solder on the two capacitor contact points.

      • Solder wick or a solder pump is recommended for removing solder.

      • Pull the flash capacitor away from the PCB.

      Demander à FixBot

      Ajouter un commentaire

    12. Panasonic Lumix DMC-G7 Flash Capacitor/Fuse Replacement: étape 21, image 1 de 2 Panasonic Lumix DMC-G7 Flash Capacitor/Fuse Replacement: étape 21, image 2 de 2
      Outil utilisé dans cette étape :
      Tweezers
      $4.99
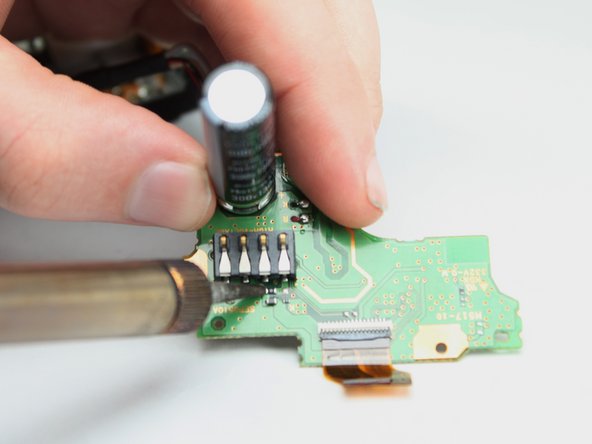
      • The flash fuse is very close to the capacitor and plastic battery connector. Be careful not to touch them.

      • Remove the solder on one side of the fuse.

      • Heat the solder on other side and pull the fuse away.

      • Use tweezers or a similar tool to remove the fuse.

      Demander à FixBot

      Ajouter un commentaire

Conclusion

To reassemble your device, follow these instructions in reverse order.

Annulation : je n'ai pas terminé ce tutoriel.

2 autres ont terminé cette réparation.

Alden Chu

Membre depuis le 04/03/19

439 Réputation

2 tutoriels rédigés

7 commentaires de tutoriel

My G7 can’t turn on anymore. I tried to connect a DMW-AC8 Adaptateur secteur but after that, it never works again.

So I think it’s the fuse ? If it’s that how can I buy a new fuse ?

Matthieu Rousseau - Réponse Partager
Apologies for the delay, I’m one of the students who worked on this guide.

Unfortunately I believe your problem is likely something else. This guide relates specifically to the flash subsystem, so if the fuse or capacitor mentioned here were the problem I believe the device would still power on (though the flash wouldn’t work).

Alan Gardner - Réponse Partager
Hi i have the same issue than the first coment

My camera dont turn on and isnt the motherboard, i know because i buy a replacement and didnt work either.

So you have some idea about what it is?

Excuse my english.

Aaron Gonzalez Montiel - Réponse Partager

I have a G7 that would not turn on, after replacing the Capacitor with one from another broken camera that I had laying around, was able to get it to turn on 2 or 3 times and while it was turned on it worked great.

The other capacitor had a smaller uF Rating (84 vs 130 in the original)

After leaving it turned of for a bit it would not turn on again.

I then opened it up again, discharged the capacitor and same thing happened, it worked again for a few times and as before stopped working.

Not sure if there is something with the resistance of the other capacitor that is different than the original. For now I ordered one that is a similar model but also smaller size, maybe that will help.

Dominik Bessler - Réponse Partager

It's pretty obvious from my experience that this fuse is not only for the flash subsystem cause it is in line with the V+ connector from the battery, and all the power needs to go through this fuse, or the V+ must also connct to the pcb on the other side of the board to provide the main power..
But, as far as i can see, that's not the case cause there is a IC there and no connections to the battery connectors, and no pins of the battery connector come through the board on the other side, so the chance that this is a three layered board is very slim as well.

i think that if you try to power on the camera without this fuse, it will refuse to go on.

marcurios - Réponse Partager

Ajouter un commentaire

Nombre de vues :

Dernières 24 heures : 1

7 derniers jours : 11

30 derniers jours : 47

Total : 2,805