Introduction
This is a fairly simple camera to take apart, just requiring a little care and patience. You will need a small cross-head screwdriver, and a plastic spudger or opening tool is also useful to have.
Ce dont vous avez besoin
-
-
Remove 2 screws on the right hand side of the case.
-
Remove 2 screws on the left hand side of the case.
-
-
-
Remove 2 screws on the bottom of the case, adjacent to the tripod mount. Note that these screws are slightly shorter than the previous ones and so should be kept separate.
-
Ease off the case back. You can help it off by inserting a spudger in the crack on all sides to ease it, especially either side of any points where it seems reluctant to come.
-
-
-
Gently lift the locking bar on the LCD ribbon, then ease the ribbon out of the socket.
-
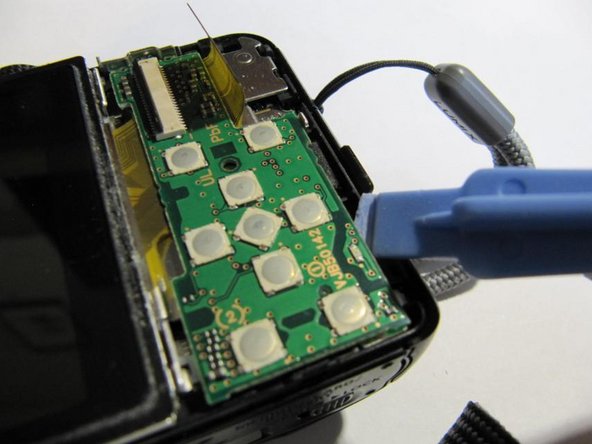
Lift the buttons board by inserting a spudger under the bottom right hand edge. This will detach it from a connector beneath.
-
-
-
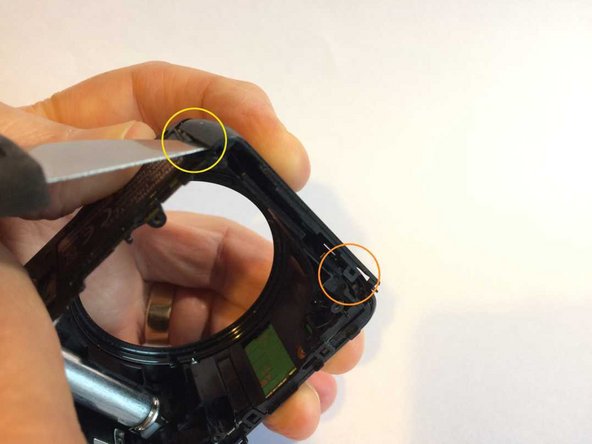
Release a clip on the left hand side of the LCD and hence lift the LCD out.
-
-
-
Remove 3 black screws from the mid plate.
-
Remove one silver screw from the right hand side of the mid plate.
-
Remove the mid plate, carefully releasing it from plastic clips on the top and bottom edges.
-
-
-
-
If required, you can now lift out the lens assembly.
-
If you suspect dust or contamination on the sensor or IR filter you can go on from this stage to clean them without removing the lens.
-
The symptoms are one or more dark patches at the same place in all images and at all levels of optical zoom, but getting bigger and possibly moving out of the image on digital zoom. If the patches are fuzzy then the contamination is probably on the IR filter but if well defined, it's more likely on the sensor itself.
-
A video at https://youtu.be/0nmwt0frZns shows the procedure for a different but similar model of Lumix camera. One difference is that you will need a small Torx rather than cross-head screwdriver (I think T4 or maybe T3 but unfortunately I forgot to make a note of which).
-
With the lens removed you may be able to test the zoom by applying a 3V battery to the terminals on the bottom of the zoom motor, which is mounted on the side of the lens. Reverse the polarity of the battery to reverse the direction of motion.
-
-
-
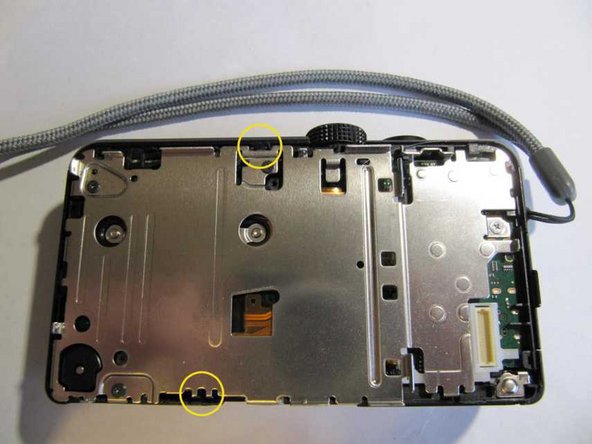
The main logic board can now be removed. It is retained by a clip near the bottom of the left hand side, two plastic pins along the top, and by the connectors which protrude through the right hand side of the camera.
-
-
-
To remove the top assembly it is first necessary to remove the side pieces and the metal front. On reassembly these all snap together again very easily, provided only that they are correctly aligned.
-
Release two tabs on the right hand side
-
You can now angle the side piece away and lift it out.
-
In the left hand side, release one tab.
-
Now release a clip at the bottom in order to remove the side piece.
-
-
-
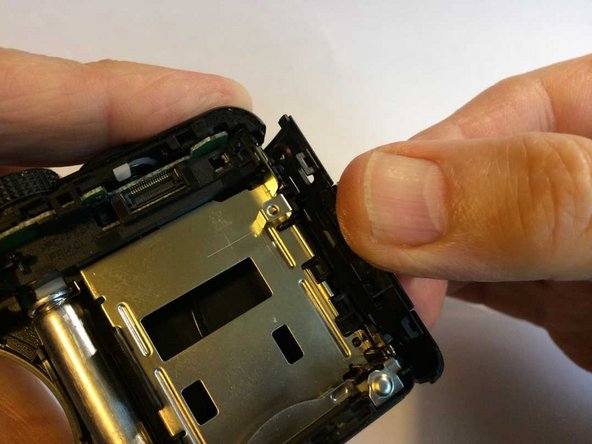
The metal camera front can now simply be pulled off. Ease it on all 4 sides with a spudger
-
-
-
Release two clips retaining the rear of the top assembly.
-
Release two clips on the front of the top assembly, whilst trying not to let the clips on the rear re-engage.
-
-
-
Lift off the top assembly. If it won't come then one or more of the clips has probably re-engaged
-
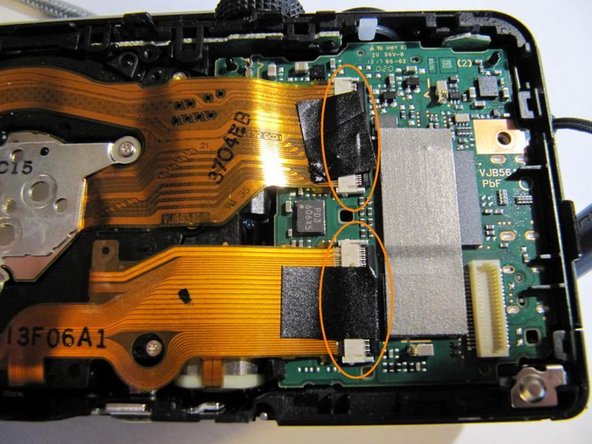
The capacitor contacts are shown in the second photo. DO NOT TOUCH! You can discharge the capacitor by shorting them out with a small insulated handle screwdriver, but be prepared for a very healthy spark! (You really woudn't want that going through your fingers, would you?)
-
Or for preference, take two insulated crocodile clip leads, connect one end of each to a 100k resistor and hold the other ends on the contacts for at least 10 seconds. Take great care not to touch the metal of the crocodile clips or the resistor wires. Measure the voltage between the contacts and don't proceed unless it has fallen below 20V.
-
-
-
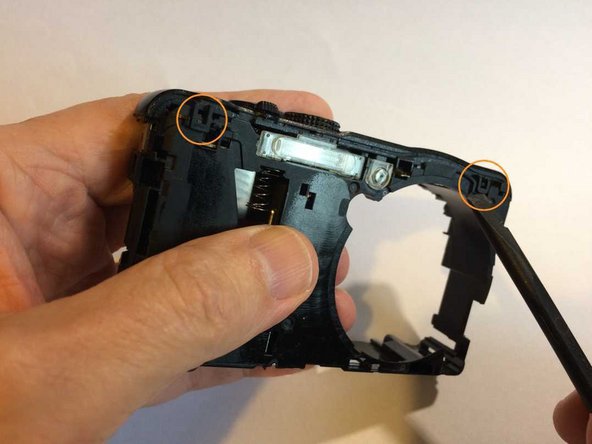
Remove a single screw from the controls board. (It is not necessary to release the small ribbon from its socket on the other side.)
-
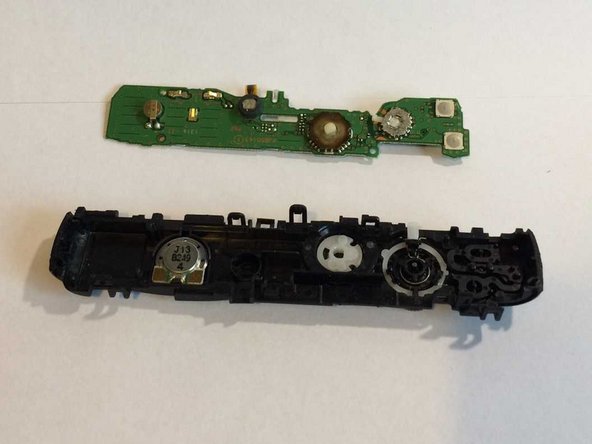
With a spudger, the controls board can now be lifted off the pegs which retain it within the top assembly.
-
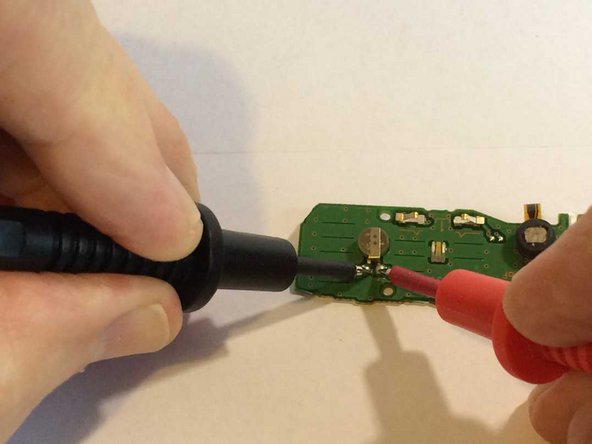
On the hidden side of the board is a small rechargeable lithium cell which maintains the time and settings when the main battery has been removed. Measure its voltage.
-
If the voltage reads less than 2V it may be permanently damaged and will be unable to maintain the time or settings across a main battery change. It is very important to replace it only by another rechargeable lithium cell, not a regular lithium button cell, which would probably leak and cause damage.
-
On reassembly you may have to rotate the function wheel until it engages with the function switch on the board.
-


To reassemble your device, follow these instructions in reverse order.
To reassemble your device, follow these instructions in reverse order.
Annulation : je n'ai pas terminé ce tutoriel.
Une autre personne a terminé cette réparation.

Équipe

Restart Project Membre de l'équipe Restart Project
Local Repair Groups
19 membres
561 tutoriels rédigés