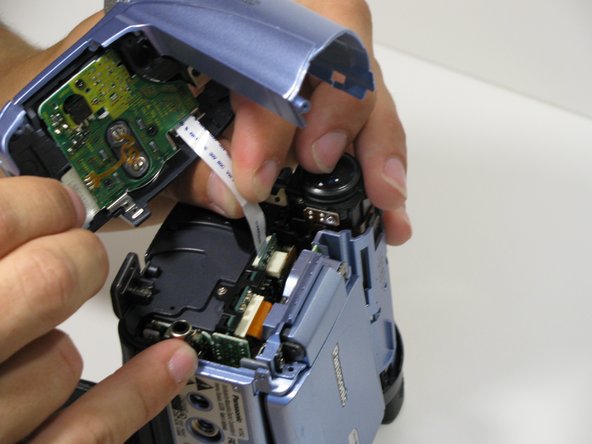
Aller au contenu principal

Panasonic PV-GS9 outercasing replacement

Ce dont vous avez besoin

  1. Panasonic PV-GS9 outercasing replacement, Outer Casing: étape 1, image 1 de 3 Panasonic PV-GS9 outercasing replacement, Outer Casing: étape 1, image 2 de 3 Panasonic PV-GS9 outercasing replacement, Outer Casing: étape 1, image 3 de 3
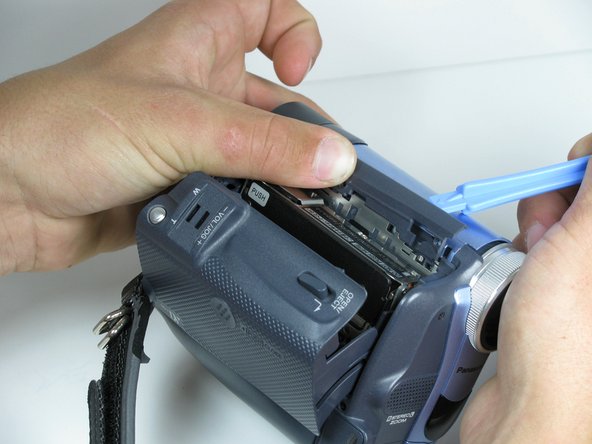
    • Using a plastic opening tool, remove the record/playback and record/power control knobs from the camcorder.

  2. Panasonic PV-GS9 outercasing replacement: étape 2, image 1 de 2 Panasonic PV-GS9 outercasing replacement: étape 2, image 2 de 2
    • Open the tape compartment.

    • Using a #00 Phillips head screwdriver, remove the two 4.5mm screws from the camcorder.

  3. Panasonic PV-GS9 outercasing replacement: étape 3, image 1 de 3 Panasonic PV-GS9 outercasing replacement: étape 3, image 2 de 3 Panasonic PV-GS9 outercasing replacement: étape 3, image 3 de 3
    • Use a plastic opening tool to remove the gray trim piece from top of the camcorder.

    • Take care when removing the trim piece. The plastic parts are fragile and can break easily.

  4. Panasonic PV-GS9 outercasing replacement: étape 4, image 1 de 1
    • Rotate the camcorder so that the eye piece is facing you.

    • Remove the battery.

    • Remove the four black 4.5mm screws, sitting behind the battery.

    • Remove the 5th screw to the right of the battery dock.

    • Be careful not to lose any screws whilst trying to remove them.

  5. Panasonic PV-GS9 outercasing replacement: étape 5, image 1 de 2 Panasonic PV-GS9 outercasing replacement: étape 5, image 2 de 2
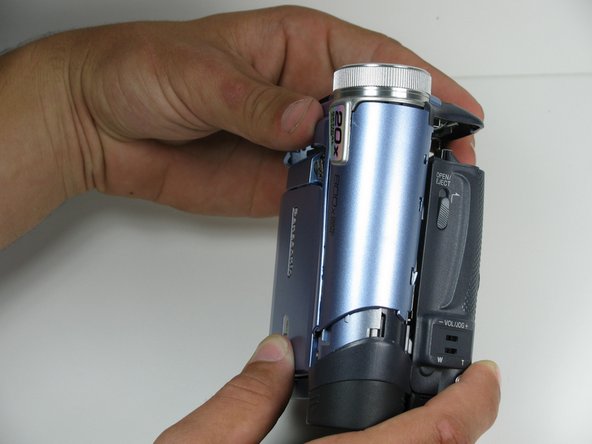
    • Rotate the camcorder so that the tape compartment is facing you.

    • Remove the single 4.5mm black screw above the hook for the hand strap.

    • Undoing the strap on one end may help.

    • Rotate the camcorder so that the lens is facing you.

    • Remove the single 4.5mm black screw from the front panel.

  6. Panasonic PV-GS9 outercasing replacement: étape 6, image 1 de 2 Panasonic PV-GS9 outercasing replacement: étape 6, image 2 de 2
    • Rotate the camcorder so that the bottom is facing towards you.

    • Remove the single remaining 4.5mm black screw from the bottom.

    • Remove the four silver 4.5mm screws from the body.

  7. Panasonic PV-GS9 outercasing replacement: étape 7, image 1 de 1
    • Open the LCD screen on the side of the camcorder.

    • Using a #00 screwdriver, remove the two 4.5mm silver screws located on either side of the hinge of the LCD screen.

  8. Panasonic PV-GS9 outercasing replacement: étape 8, image 1 de 2 Panasonic PV-GS9 outercasing replacement: étape 8, image 2 de 2
    • Very carefully remove the front cover from the main body of the camcorder.

    • This should come apart with relative ease, however a plastic opening tool may help remove the panel.

    • There is a ribbon cable attached to the front panel and the camcorder body, so be careful not to pull that off when you remove this panel.

  9. Panasonic PV-GS9 outercasing replacement: étape 9, image 1 de 2 Panasonic PV-GS9 outercasing replacement: étape 9, image 2 de 2
    • Using your fingers, carefully pull the ribbon cable away from the logic board.

Conclusion

To reassemble your device, follow these instructions in reverse order.

Une autre personne a terminé cette réparation.

Trevor Johnson

Membre depuis le 04/18/10

31 Réputation

2 tutoriels rédigés

Équipe

Cal Poly, Team 7-9, Maness Spring 2010 Membre de l'équipe Cal Poly, Team 7-9, Maness Spring 2010

CPSU-MANESS-S10S7G9

4 membres

15 tutoriels rédigés

0 commentaires

Ajouter un commentaire

Nombre de vues :

Dernières 24 heures : 0

7 derniers jours : 0

30 derniers jours : 1

Total : 2,688