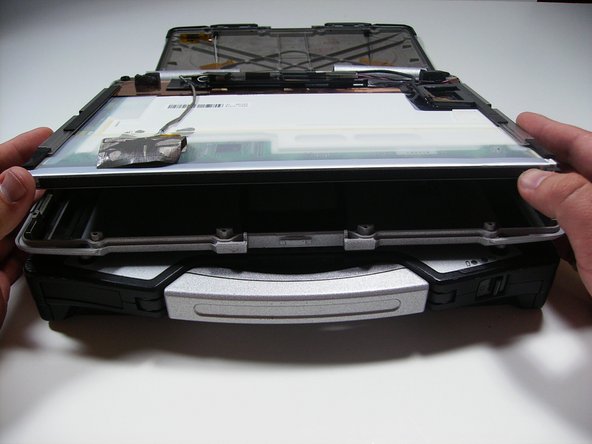
Aller au contenu principal

Panasonic Toughbook CF-29 Touchscreen Replacement

Ce dont vous avez besoin

  1. Panasonic Toughbook CF-29 Touchscreen Replacement, Battery: étape 1, image 1 de 1
    • Locate the bay door for the battery on the left side of the laptop.

  2. Panasonic Toughbook CF-29 Touchscreen Replacement: étape 2, image 1 de 2 Panasonic Toughbook CF-29 Touchscreen Replacement: étape 2, image 2 de 2
    • Slide the latch to the right and then down to unlock it.

    • Pull out the battery.

  3. Panasonic Toughbook CF-29 Touchscreen Replacement, Touchscreen: étape 3, image 1 de 1
    • Remove the four hinge screws from the back of the computer.

  4. Panasonic Toughbook CF-29 Touchscreen Replacement: étape 4, image 1 de 2 Panasonic Toughbook CF-29 Touchscreen Replacement: étape 4, image 2 de 2
    • Open the laptop and remove the four indicated screws with a Phillips size 0 screwdriver.

    • Pry off the plastic strip which was previously held in place by the screws.

  5. Panasonic Toughbook CF-29 Touchscreen Replacement: étape 5, image 1 de 1
    • Remove the four hinge screws to allow the hinges to rotate up and move.

  6. Panasonic Toughbook CF-29 Touchscreen Replacement: étape 6, image 1 de 1
    • Remove 16 screws from the top of the closed laptop.

    • 12 Phillips size 1 screws

    • 2 Phillips size 0 screws

    • 2 Torx size 6 screws (T6)

  7. Panasonic Toughbook CF-29 Touchscreen Replacement: étape 7, image 1 de 1
    • Gently break the adhesive seal between the front and rear display cases with a plastic opening tool.

    • You will need to reapply the silicon adhesive during reassembly to ensure watertight seal.

  8. Panasonic Toughbook CF-29 Touchscreen Replacement: étape 8, image 1 de 1
    • Pull the top halve of the casing up revealing the inside of the screen

  9. Panasonic Toughbook CF-29 Touchscreen Replacement: étape 9, image 1 de 2 Panasonic Toughbook CF-29 Touchscreen Replacement: étape 9, image 2 de 2
    • The top half of the case can be removed by sliding the tabs out from under the hinges.

    • This makes unplugging the screen wiring much easier

  10. Panasonic Toughbook CF-29 Touchscreen Replacement: étape 10, image 1 de 1
    • There are 4 wires that need to be unplugged to remove the screen.

  11. Panasonic Toughbook CF-29 Touchscreen Replacement: étape 11, image 1 de 1
    • For the first wire, peel back the silver cover tape to reveal the connection.

  12. Panasonic Toughbook CF-29 Touchscreen Replacement: étape 12, image 1 de 1
    • Pull the wiring away from the connection to release it.

  13. Panasonic Toughbook CF-29 Touchscreen Replacement: étape 13, image 1 de 1
    • Remove the 3 strips of black tape as shown to reveal connections 2 and 3.

    • Pull the wiring for each away from the connections to remove.

  14. Panasonic Toughbook CF-29 Touchscreen Replacement: étape 14, image 1 de 1
    • The 4th connection is already visible.

    • Depending on your model it might not be plugged into anything. If it is, remove it the same way the other 3 connections were removed.

  15. Panasonic Toughbook CF-29 Touchscreen Replacement: étape 15, image 1 de 2 Panasonic Toughbook CF-29 Touchscreen Replacement: étape 15, image 2 de 2
    • Using a plastic opening tool, lift the screen as shown from the case and pull free.

Conclusion

To reassemble your device, follow these instructions in reverse order.

5 autres ont terminé cette réparation.

Dylan Bloom

Membre depuis le 04/12/10

373 Réputation

4 tutoriels rédigés

Équipe

Cal Poly, Team 27-93, Amido Spring 2010 Membre de l'équipe Cal Poly, Team 27-93, Amido Spring 2010

CPSU-AMIDO-S10S27G93

4 membres

26 tutoriels rédigés

Un commentaire

This guide is good for replacing the LCD screen, but it is not complete for the touchscreen panel, which requires some more delicate and precise steps. I think the title of the guide needs to be changed.

Thanks

Alessandro Cervelli - Réponse

Ajouter un commentaire

Nombre de vues :

Dernières 24 heures : 2

7 derniers jours : 7

30 derniers jours : 14

Total : 17,080