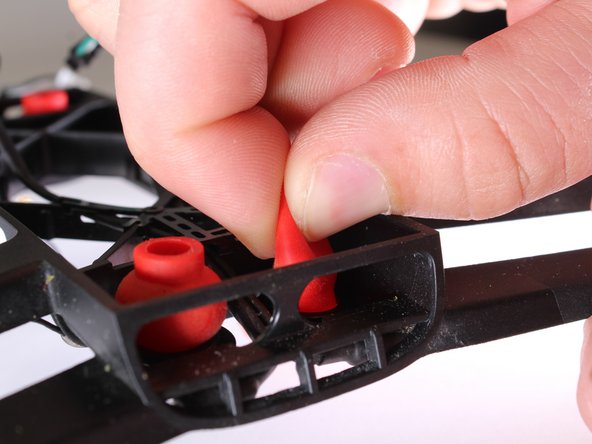
Aller au contenu principal

Parrot Bebop Drone Rubber Shock Absorbers Replacement

Ce dont vous avez besoin

Vidéo d'introduction

  1. Parrot Bebop Drone Rubber Shock Absorbers Replacement, Battery: étape 1, image 1 de 2 Parrot Bebop Drone Rubber Shock Absorbers Replacement, Battery: étape 1, image 2 de 2
    • Begin by removing the velcro strap around the battery.

  2. Parrot Bebop Drone Rubber Shock Absorbers Replacement: étape 2, image 1 de 2 Parrot Bebop Drone Rubber Shock Absorbers Replacement: étape 2, image 2 de 2
    • While holding onto the nose, gently pull the battery away from the nose.

  3. Parrot Bebop Drone Rubber Shock Absorbers Replacement: étape 3, image 1 de 3 Parrot Bebop Drone Rubber Shock Absorbers Replacement: étape 3, image 2 de 3 Parrot Bebop Drone Rubber Shock Absorbers Replacement: étape 3, image 3 de 3
    • Once the battery is separated from the nose, push down on the connector and pull the battery away from the connector.

  4. Parrot Bebop Drone Rubber Shock Absorbers Replacement, Styrofoam Nose: étape 4, image 1 de 2 Parrot Bebop Drone Rubber Shock Absorbers Replacement, Styrofoam Nose: étape 4, image 2 de 2
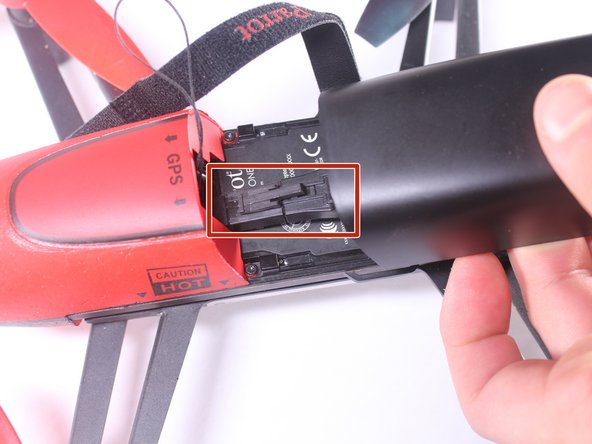
    • Remove the two 7mm T5 torx screws using a screwdriver. There is one located on each side.

  5. Parrot Bebop Drone Rubber Shock Absorbers Replacement: étape 5, image 1 de 1
    • Take the metal spudger, to remove the double stick tape from the foam.

  6. Parrot Bebop Drone Rubber Shock Absorbers Replacement: étape 6, image 1 de 1
    • Remove the styrofoam nose from over the drone's camera by sliding it towards the front of the drone at an angle.

  7. Parrot Bebop Drone Rubber Shock Absorbers Replacement, Rubber Shock Absorbers: étape 7, image 1 de 2 Parrot Bebop Drone Rubber Shock Absorbers Replacement, Rubber Shock Absorbers: étape 7, image 2 de 2
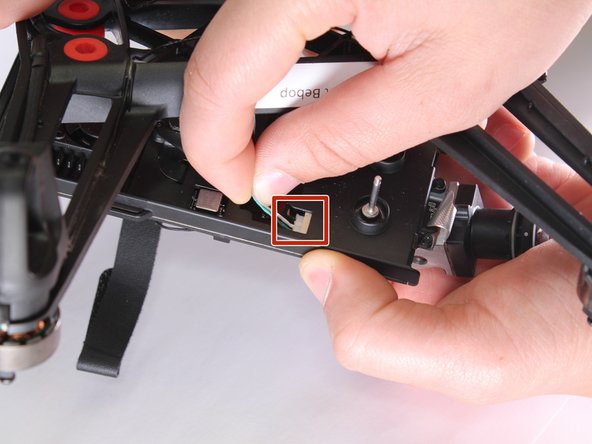
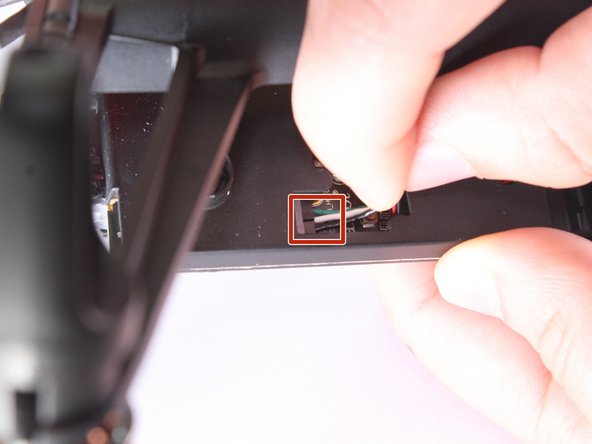
    • Disconnect the two connectors that are attached to the front of the motherboard by gently pulling on the three wires.

  8. Parrot Bebop Drone Rubber Shock Absorbers Replacement: étape 8, image 1 de 1
    • Remove the four 5mm torx T5 screws on the bottom of the drone with a Torx Screwdriver.

  9. Parrot Bebop Drone Rubber Shock Absorbers Replacement: étape 9, image 1 de 1
    • Lightly pull up using the plastic opening tool to remove the back cover.

  10. Parrot Bebop Drone Rubber Shock Absorbers Replacement: étape 10, image 1 de 2 Parrot Bebop Drone Rubber Shock Absorbers Replacement: étape 10, image 2 de 2
    • Using a small pair of tweezers remove the two antenna wires attached to the motherboard.

    • When reconnecting the antenna wires to the motherboard, use the tweezers to place the connector on top of the connection plate and using the 150 mm Flex Extension push down on the gold connector to snap it in place.

  11. Parrot Bebop Drone Rubber Shock Absorbers Replacement: étape 11, image 1 de 1
    • Remove the four wheel fasteners holding the frame together.

    • Hand turn or use a small plier, if tight to loosen the wheel fasteners.

  12. Parrot Bebop Drone Rubber Shock Absorbers Replacement: étape 12, image 1 de 3 Parrot Bebop Drone Rubber Shock Absorbers Replacement: étape 12, image 2 de 3 Parrot Bebop Drone Rubber Shock Absorbers Replacement: étape 12, image 3 de 3
    • Using both hands gently pull the two pieces of the frame apart until you can see the connectors under the frame attached to the motherboard.

    • Remove both of the connectors from the motherboard. There is one connector on each side.

    • Do not fully remove the frame until both of the connectors are detached from the motherboard.

  13. Parrot Bebop Drone Rubber Shock Absorbers Replacement: étape 13, image 1 de 2 Parrot Bebop Drone Rubber Shock Absorbers Replacement: étape 13, image 2 de 2
    • Remove the four rubber shock absorbers by squeezing and twisting them while also pulling up.

    • Insert replacement rubber shock absorbers by placing one side in the hole and pushing down. Verify the shock absorbers are seated with a gentle tug.

Conclusion

To reassemble your device, follow these instructions in reverse order.

Jas Banwait

Membre depuis le 02/02/17

194 Réputation

1 tutoriel rédigé

Équipe

UW Tacoma, Team 1-3, Rose Winter 2017 Membre de l'équipe UW Tacoma, Team 1-3, Rose Winter 2017

UWT-ROSE-W17S1G3

4 membres

5 tutoriels rédigés

0 commentaires

Ajouter un commentaire

Nombre de vues :

Dernières 24 heures : 0

7 derniers jours : 0

30 derniers jours : 6

Total : 1,027