Aller au contenu principal

Pentax Optio WG-2 Menu Buttons Replacement

Tutoriel Archivé
Ce tutoriel est conservé uniquement à des fins de suivis historiques. Utilisez la version actuelle du tutoriel pour effectuer votre réparation.

Ce dont vous avez besoin

  1. Attention : les étapes 1 à 6 sont issues d'un tutoriel marqué comme en cours.

    Pentax Optio WG-2 Menu Buttons Replacement, Back Case: étape 1, image 1 de 2 Pentax Optio WG-2 Menu Buttons Replacement, Back Case: étape 1, image 2 de 2
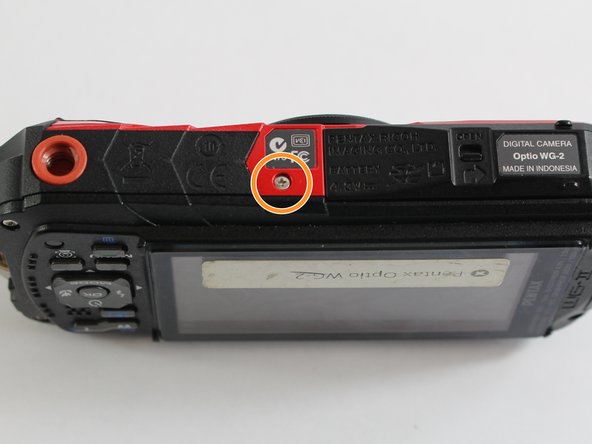
    • Remove all four 1 mm JIS #00 screws from the back of the camera.

  2. Pentax Optio WG-2 Menu Buttons Replacement: étape 2, image 1 de 1
    • Use your finger to peel the grip off the top of the camera.

    • For best results, start from the right side of the camera, opposite the buttons.

    • Once the grip is removed, you will most likely lose the water-tight seal.

  3. Pentax Optio WG-2 Menu Buttons Replacement: étape 3, image 1 de 1
    Outil utilisé dans cette étape :
    Tweezers
    $4.99
    J'achète
    • Use the tweezers to remove the two buttons from the top of the camera.

    • The buttons may fall out while removing the grip.

  4. Pentax Optio WG-2 Menu Buttons Replacement: étape 4, image 1 de 3 Pentax Optio WG-2 Menu Buttons Replacement: étape 4, image 2 de 3 Pentax Optio WG-2 Menu Buttons Replacement: étape 4, image 3 de 3
    • Remove the three 1 mm JIS #000 screws from the top.

    • Remove the 1 mm JIS #000 screw from the bottom.

  5. Pentax Optio WG-2 Menu Buttons Replacement: étape 5, image 1 de 1
    • Carefully separate the back and the front of the camera.

    • There are three ribbon cables connecting the two boards. Be careful not to tear them.

  6. Pentax Optio WG-2 Menu Buttons Replacement: étape 6, image 1 de 1
    • Use the tip of a spudger to flip up the small retaining flaps on the ribbon cable ZIF connectors.

    • Carefully pull the ribbon cables out of their sockets.

  7. Pentax Optio WG-2 Menu Buttons Replacement, Menu Buttons: étape 7, image 1 de 2 Pentax Optio WG-2 Menu Buttons Replacement, Menu Buttons: étape 7, image 2 de 2
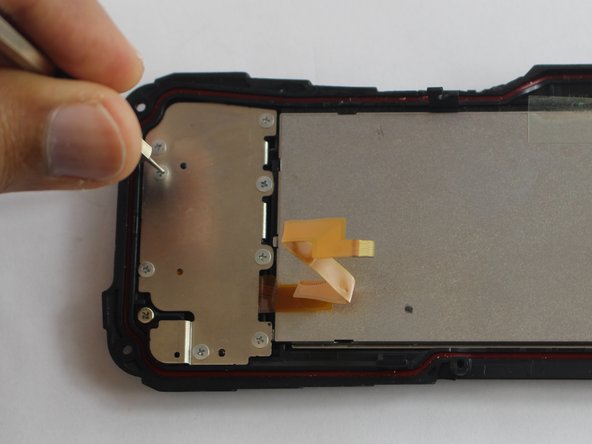
    • Remove the eight JS#000 screws using a screwdriver and lift panel up.

    • This screw does not need to be removed.

  8. Pentax Optio WG-2 Menu Buttons Replacement: étape 8, image 1 de 1
    • Once panel is removed the button 'sheet' can be removed.

Conclusion

To reassemble your device, follow these instructions in reverse order.

Matthew Bessette

Membre depuis le 03/04/16

658 Réputation

6 tutoriels rédigés

Équipe

UMass Dartmouth, Team 6-7, Bhusal Spring 2016 Membre de l'équipe UMass Dartmouth, Team 6-7, Bhusal Spring 2016

UMASSD-BHUSAL-S16S6G7

3 membres

6 tutoriels rédigés

0 commentaires

Ajouter un commentaire

Nombre de vues :

Dernières 24 heures : 0

7 derniers jours : 2

30 derniers jours : 11

Total : 198