Introduction
Removing the front lens board is necessary to access the internal mechanisms of the Spotmatic and/or to remove the mirror box assembly.
Ce dont vous avez besoin
-
-
Remove cover screw using a spanner wrench.
-
Remove the self timer lever. The internal mechanism will unwind past the installed position when the lever is removed.
-
-
-
-
Apply isopropyl alcohol to the edge of the leatherette covering to soften the adhesive.
-
Use a dull scraper to get under the edge of the leatherette and begin peeling it off.
-
Fully remove the leatherette covering from both sides of the camera.
-
If the self timer lever can't be removed, the leatherette can be peeled away just enough to access the screws.
-
-
-
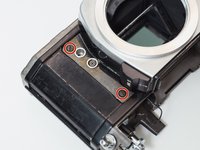
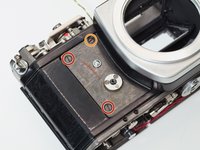
Remove four 4.6 mm flat head screws.
-
Remove one 4.3 mm flat head screws.
-
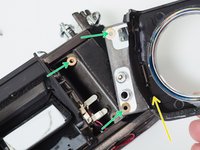
Lift off front lens board.
-
Note the position and number of shim washers at each screw location. They need to be installed in the same positions during reassembly.
-


To reassemble your device, follow these instructions in reverse order.
To reassemble your device, follow these instructions in reverse order.
2 commentaires
There is no real need to remove the top cover in advance.
You're right. I originally included the top cover disassembly because that's the order I use for a more complete disassembly but it's not necessary to get the front cover off. And thanks for your comments elsewhere in the guides. I mention on the main camera page that the guides are for the 23102 models (the mid/late models) but it's good to have more specific notes about where they differ from early models.