Aller au contenu principal

Philips DVP5992-F7 Tray Replacement

Ce dont vous avez besoin

  1. Philips DVP5992-F7 Tray Replacement, Tray: étape 1, image 1 de 3 Philips DVP5992-F7 Tray Replacement, Tray: étape 1, image 2 de 3 Philips DVP5992-F7 Tray Replacement, Tray: étape 1, image 3 de 3
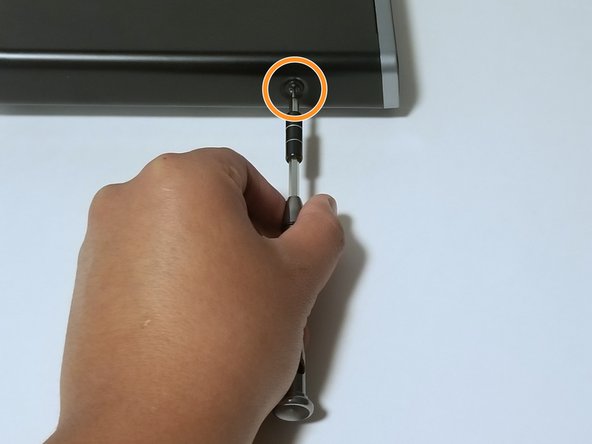
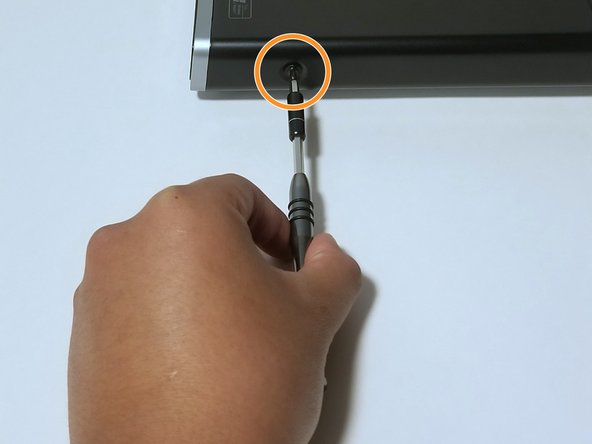
    • Plug in the DVD player.

    • Press the eject button to open the tray.

    • Push up on the tray faceplate to remove it.
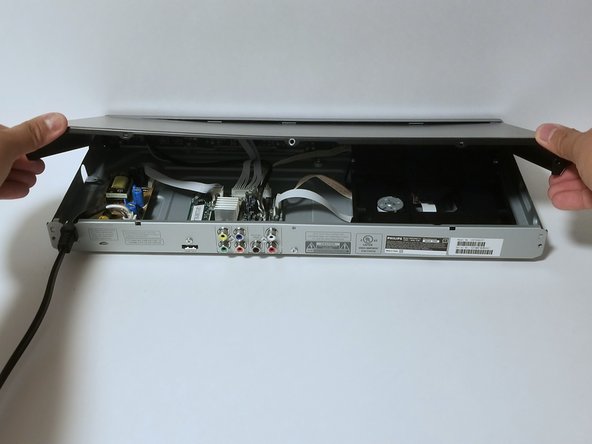
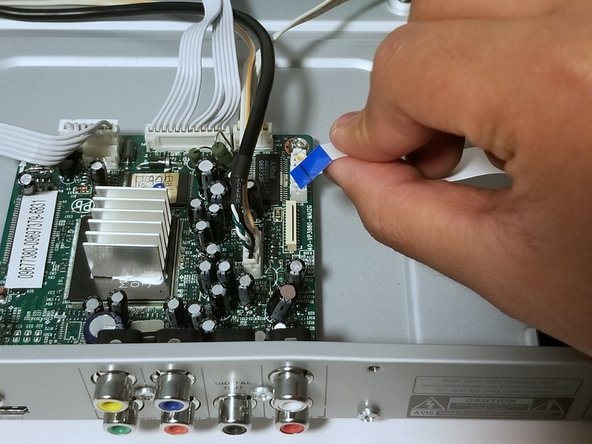
  2. Philips DVP5992-F7 Tray Replacement: étape 2, image 1 de 2 Philips DVP5992-F7 Tray Replacement: étape 2, image 2 de 2
    • Press the eject button to re-insert the tray.

    • Unplug the DVD player after the tray is closed.

  3. Philips DVP5992-F7 Tray Replacement: étape 3, image 1 de 3 Philips DVP5992-F7 Tray Replacement: étape 3, image 2 de 3 Philips DVP5992-F7 Tray Replacement: étape 3, image 3 de 3
    • Remove the three 6.4 mm Phillips #1 screws on the back of the device with a Phillips head screwdriver.

    • Remove the 6.4 mm Phillips #1 screws on each side of the device.

  4. Philips DVP5992-F7 Tray Replacement: étape 4, image 1 de 2 Philips DVP5992-F7 Tray Replacement: étape 4, image 2 de 2
    • Remove the top plate of the DVD by firmly grasping the player on both sides.

    • Shift the top plate towards the backside of the player.

    • Lift the back half of the top plate up to remove it from the player.

  5. Philips DVP5992-F7 Tray Replacement: étape 5, image 1 de 3 Philips DVP5992-F7 Tray Replacement: étape 5, image 2 de 3 Philips DVP5992-F7 Tray Replacement: étape 5, image 3 de 3
    • Locate the motherboard within the DVD player.

    • Firmly grasp the ribbon wire and unplug it from the motherboard.

  6. Philips DVP5992-F7 Tray Replacement: étape 6, image 1 de 2 Philips DVP5992-F7 Tray Replacement: étape 6, image 2 de 2
    • Firmly grasp the bundled cable connector that attaches the tray to the motherboard.

    • Gently pull upwards to remove the bundled cable connector from the motherboard.

  7. Philips DVP5992-F7 Tray Replacement: étape 7, image 1 de 2 Philips DVP5992-F7 Tray Replacement: étape 7, image 2 de 2
    • Firmly grasp the second bundled cable connector that attaches the tray to the motherboard.

    • Gently pull upwards to remove the second bundled cable connector from the motherboard.

  8. Philips DVP5992-F7 Tray Replacement: étape 8, image 1 de 2 Philips DVP5992-F7 Tray Replacement: étape 8, image 2 de 2
    • Remove the 9.0 mm #1 Phillips head screw that holds the tray to the DVD player.

  9. Philips DVP5992-F7 Tray Replacement: étape 9, image 1 de 2 Philips DVP5992-F7 Tray Replacement: étape 9, image 2 de 2
    • Lift the tray out of the DVD player from the back.

Conclusion

To reassemble your device, follow these instructions in reverse order.

Dyllon Phuong

Membre depuis le 08/31/18

540 Réputation

3 tutoriels rédigés

Équipe

0 commentaires

Ajouter un commentaire

Nombre de vues :

Dernières 24 heures : 0

7 derniers jours : 8

30 derniers jours : 20

Total : 487