Aller au contenu principal

Philips HD9252 Latch Button Replacement

Ce dont vous avez besoin

  1. Philips HD9252 Latch Button Replacement, Tray: étape 1, image 1 de 1
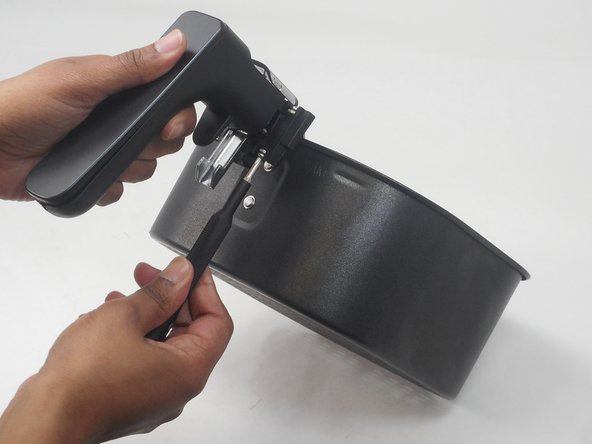
    • Remove the tray from the air fryer by pressing the latch button in, and pulling the handle away.

  2. Philips HD9252 Latch Button Replacement: étape 2, image 1 de 1
    • Pull the tray out of the basket.

  3. Philips HD9252 Latch Button Replacement, Latch Button: étape 3, image 1 de 2 Philips HD9252 Latch Button Replacement, Latch Button: étape 3, image 2 de 2
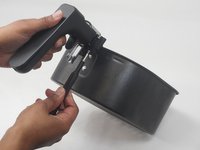
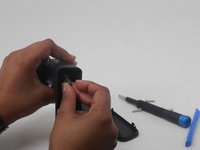
    • Remove the two 14.8 mm screws placed in the top of the latch using a Phillips #00 screwdriver.

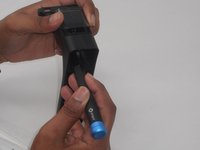
    • Remove the two 14.8 mm screws placed on the bottom of the latch using a Phillips #00 screwdriver.

  4. Philips HD9252 Latch Button Replacement: étape 4, image 1 de 1
    • Remove the four 14.8 mm screws placed on front of the latch button using a Phillips #00 screwdriver.

  5. Philips HD9252 Latch Button Replacement: étape 5, image 1 de 1
    • Pry off the back panel of the handle.

  6. Philips HD9252 Latch Button Replacement: étape 6, image 1 de 2 Philips HD9252 Latch Button Replacement: étape 6, image 2 de 2
    • Push the spring down with a nylon spudger so that it is underneath the button.

    • Slide the spring out of the back of the handle.

  7. Philips HD9252 Latch Button Replacement: étape 7, image 1 de 1
    • Remove the front of the latch from the handle.

  8. Philips HD9252 Latch Button Replacement: étape 8, image 1 de 1
    • Remove the button through the back of the handle.

Conclusion

To reassemble your device, follow these instructions in reverse order.

Rolando_Gonzalez

Membre depuis le 02/14/24

233 Réputation

1 tutoriel rédigé

Équipe

University of Memphis, Team 3-1, Sneed Spring 2024 Membre de l'équipe University of Memphis, Team 3-1, Sneed Spring 2024

UM-SNEED-S24S3G1

4 membres

5 tutoriels rédigés

0 commentaires

Ajouter un commentaire

Nombre de vues :

Dernières 24 heures : 1

7 derniers jours : 7

30 derniers jours : 26

Total : 83