Aller au contenu principal

Photive Rain Motherboard Replacement

Ce dont vous avez besoin

  1. Photive Rain Motherboard Replacement, Back Panel: étape 1, image 1 de 1
    • Turn the speaker off before disassembling.

    • Remove the suction cup from its groove by twisting and turning it.

  2. Photive Rain Motherboard Replacement: étape 2, image 1 de 1
    • Remove the four 8.5 mm screws from the back panel of the speaker by using the Phillips #1 Screwdriver.

    • Remove back panel

  3. Photive Rain Motherboard Replacement, Battery: étape 3, image 1 de 2 Photive Rain Motherboard Replacement, Battery: étape 3, image 2 de 2
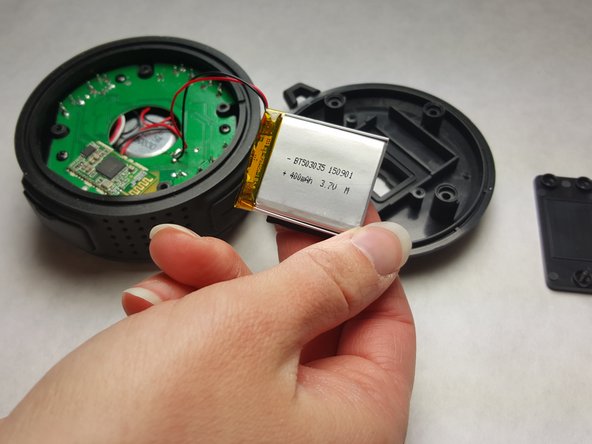
    • Remove the plastic cover in front of the battery slot.

    • Unscrew all the 8.5mm screws that hold the cover to the slot.

    • Separate the battery from the back panel as shown in photograph 3.

    • Caution: manipulation of the device while the battery is still connected to the motherboard may result in electric shock.

  4. Photive Rain Motherboard Replacement: étape 4, image 1 de 1
    • Remove the battery from the motherboard.

    • Use a soldering pen to remove the solder connecting the battery wires to the motherboard.

    • Click here to access the iFixit Soldering Guide. This will provide a safe and instructive manual on the usage of soldering pens.

  5. Photive Rain Motherboard Replacement, Speaker: étape 5, image 1 de 1
    • Carefully remove the front panel from the device.

  6. Photive Rain Motherboard Replacement: étape 6, image 1 de 1
    • Detach the connector clips from the motherboard using the iFixit Opening Tool.

    • Some force may be necessary to remove the plastic clips.

  7. Photive Rain Motherboard Replacement: étape 7, image 1 de 2 Photive Rain Motherboard Replacement: étape 7, image 2 de 2
    • After the speaker is detached, remove the two 8.5mm screws that hold the speaker to the front panel with a Phillips #1 screwdriver.

  8. Photive Rain Motherboard Replacement, Motherboard: étape 8, image 1 de 1
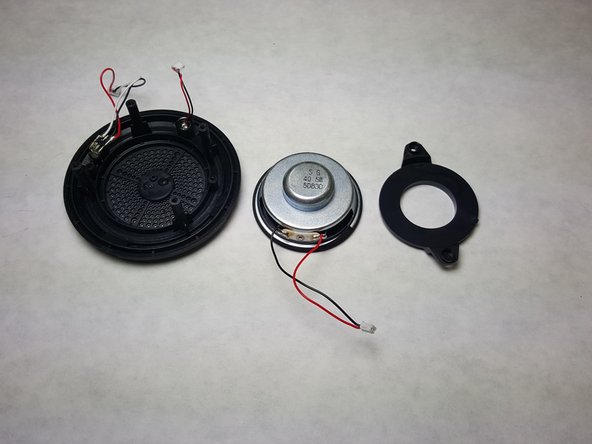
    • From the back of the motherboard, unscrew the three phillips head screws holding the motherboard in place.

  9. Photive Rain Motherboard Replacement: étape 9, image 1 de 1
    • Pull the rubber away from the edge of the motherboard.

  10. Photive Rain Motherboard Replacement: étape 10, image 1 de 2 Photive Rain Motherboard Replacement: étape 10, image 2 de 2
    • Use the plastic opening tool to remove motherboard from device.

    • The second photograph displays a properly removed motherboard.

Conclusion

To reassemble your device, follow these instructions in reverse order.

3 autres ont terminé cette réparation.

abcdef ghijk

Membre depuis le 02/15/16

723 Réputation

4 tutoriels rédigés

Équipe

IUPUI, Team 1-4, Harley Spring 2016 Membre de l'équipe IUPUI, Team 1-4, Harley Spring 2016

IUPUI-HARLEY-S16S1G4

3 membres

4 tutoriels rédigés

0 commentaires

Ajouter un commentaire

Nombre de vues :

Dernières 24 heures : 1

7 derniers jours : 4

30 derniers jours : 4

Total : 289