Aller au contenu principal

Pioneer MXT-X366BT Knob Replacement

Ce dont vous avez besoin

  1. Pioneer MXT-X366BT Knob Replacement, Volume Knob: étape 1, image 1 de 1
    • Push the eject button to release the faceplate.

  2. Pioneer MXT-X366BT Knob Replacement: étape 2, image 1 de 2 Pioneer MXT-X366BT Knob Replacement: étape 2, image 2 de 2
    • Carefully separate the faceplate from the radio.

  3. Pioneer MXT-X366BT Knob Replacement: étape 3, image 1 de 1
    • Remove three 3mm Phillips-head screws with a Phillips #1 screwdriver.

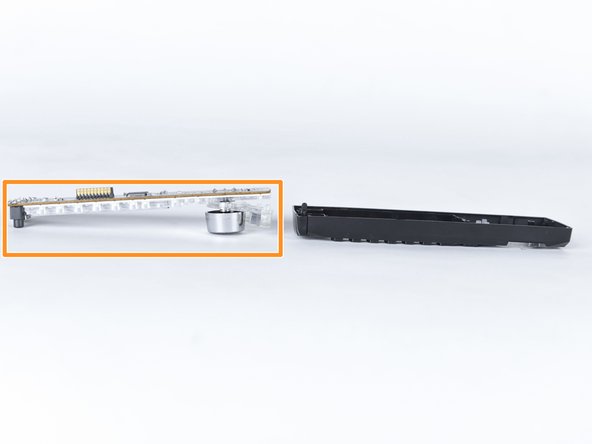
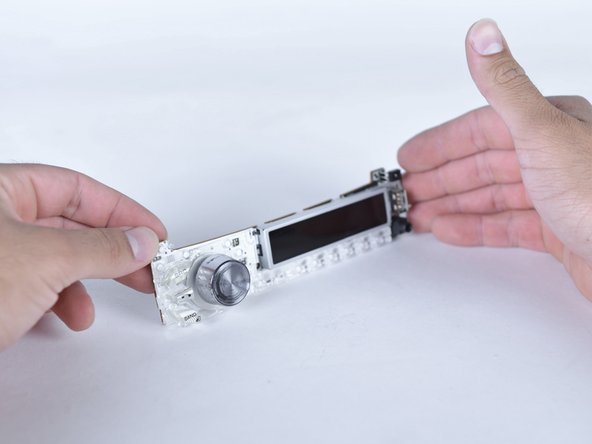
  4. Pioneer MXT-X366BT Knob Replacement: étape 4, image 1 de 3 Pioneer MXT-X366BT Knob Replacement: étape 4, image 2 de 3 Pioneer MXT-X366BT Knob Replacement: étape 4, image 3 de 3
    • Remove the back of the face plate.

    • Separate the motherboard from the casing.

    • Handle the motherboard with care.

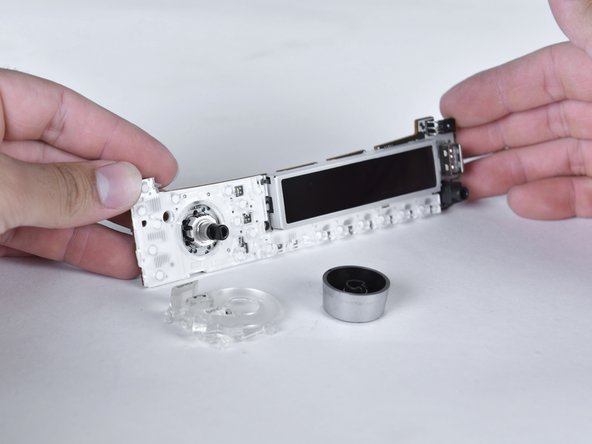
  5. Pioneer MXT-X366BT Knob Replacement: étape 5, image 1 de 2 Pioneer MXT-X366BT Knob Replacement: étape 5, image 2 de 2
    • Firmly pull the volume knob.

    • Carefully handle the motherboard to not break it.

    • Some force may be required to remove the knob.

    • Buttons are attached by a ring behind the volume knob.

Conclusion

To reassemble your device, follow these instructions in reverse order.

martin esquivel

Membre depuis le 03/22/18

323 Réputation

2 tutoriels rédigés

Équipe

Sam Houston State, Team S17-G7, Blackburne Spring 2018 Membre de l'équipe Sam Houston State, Team S17-G7, Blackburne Spring 2018

SHSU-BLACKBURNE-S18S17G7

4 membres

5 tutoriels rédigés

0 commentaires

Ajouter un commentaire

Nombre de vues :

Dernières 24 heures : 1

7 derniers jours : 1

30 derniers jours : 6

Total : 337