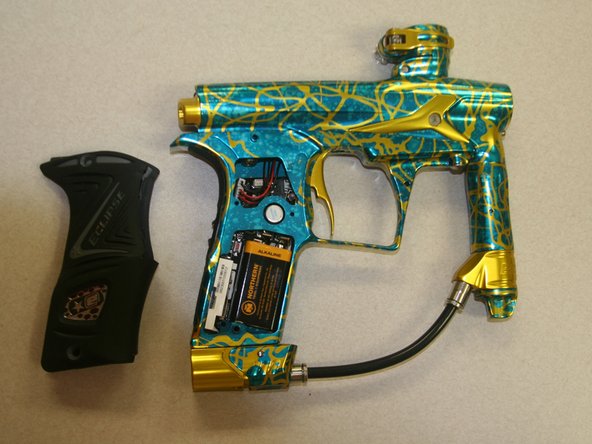
Aller au contenu principal

Planet Eclipse Geo3 Solenoid Manifold Gasket Replacement

Ce dont vous avez besoin

  1. Planet Eclipse Geo3 Solenoid Manifold Gasket Replacement, Grip: étape 1, image 1 de 2 Planet Eclipse Geo3 Solenoid Manifold Gasket Replacement, Grip: étape 1, image 2 de 2
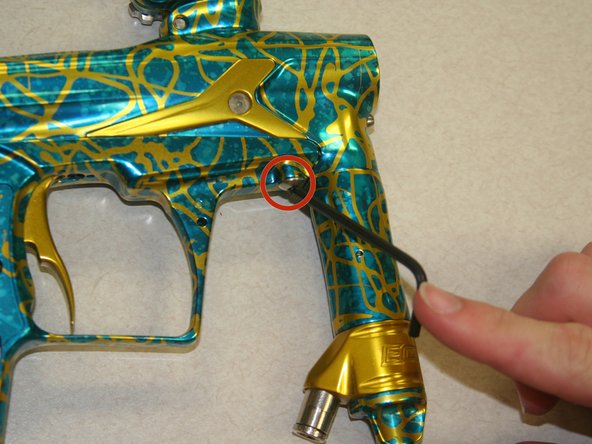
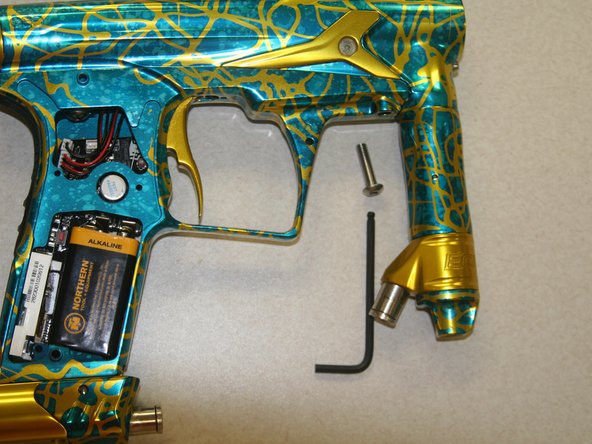
    • Remove the four screws from the grip with the 5/64" allen wrench. There are two on each side.

  2. Planet Eclipse Geo3 Solenoid Manifold Gasket Replacement: étape 2, image 1 de 2 Planet Eclipse Geo3 Solenoid Manifold Gasket Replacement: étape 2, image 2 de 2
    • Pull the grip away from the frame.

  3. Planet Eclipse Geo3 Solenoid Manifold Gasket Replacement: étape 3, image 1 de 2 Planet Eclipse Geo3 Solenoid Manifold Gasket Replacement: étape 3, image 2 de 2
    • Pull the grip through the opening.

    • The grip is connected in the middle and is one piece.

  4. Planet Eclipse Geo3 Solenoid Manifold Gasket Replacement, Macroline: étape 4, image 1 de 3 Planet Eclipse Geo3 Solenoid Manifold Gasket Replacement, Macroline: étape 4, image 2 de 3 Planet Eclipse Geo3 Solenoid Manifold Gasket Replacement, Macroline: étape 4, image 3 de 3
    • Remove the macroline from the fitting by pulling the metal ring around the end of the fitting away while pulling out the macroline.

    • It helps to rotate the collar to create room to pull out macroline.

  5. Planet Eclipse Geo3 Solenoid Manifold Gasket Replacement: étape 5, image 1 de 3 Planet Eclipse Geo3 Solenoid Manifold Gasket Replacement: étape 5, image 2 de 3 Planet Eclipse Geo3 Solenoid Manifold Gasket Replacement: étape 5, image 3 de 3
    • While pulling in the metal ring on the fitting, pull the macroline out.

  6. Planet Eclipse Geo3 Solenoid Manifold Gasket Replacement, Body: étape 6, image 1 de 3 Planet Eclipse Geo3 Solenoid Manifold Gasket Replacement, Body: étape 6, image 2 de 3 Planet Eclipse Geo3 Solenoid Manifold Gasket Replacement, Body: étape 6, image 3 de 3
    • Use 1/8" allen wrench to remove screw behind regulator.

  7. Planet Eclipse Geo3 Solenoid Manifold Gasket Replacement: étape 7, image 1 de 3 Planet Eclipse Geo3 Solenoid Manifold Gasket Replacement: étape 7, image 2 de 3 Planet Eclipse Geo3 Solenoid Manifold Gasket Replacement: étape 7, image 3 de 3
    • Use 1/8" allen wrench to loosen the screw inside the grip on the right side.

    • The screw only needs to be turned a couple of times.

    • Slide the upper frame forward on the rails and remove the screw from the slot to separate the two halves of the body.

    • BE CAREFUL: Do not pull the two frames apart too much or too quickly. This may cause the wires to be damaged.

  8. Planet Eclipse Geo3 Solenoid Manifold Gasket Replacement, Solenoid: étape 8, image 1 de 3 Planet Eclipse Geo3 Solenoid Manifold Gasket Replacement, Solenoid: étape 8, image 2 de 3 Planet Eclipse Geo3 Solenoid Manifold Gasket Replacement, Solenoid: étape 8, image 3 de 3
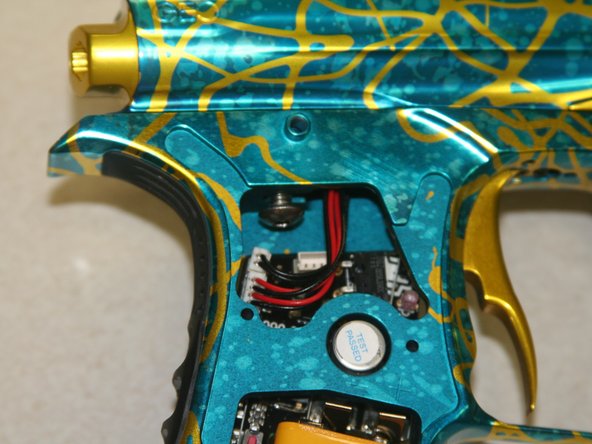
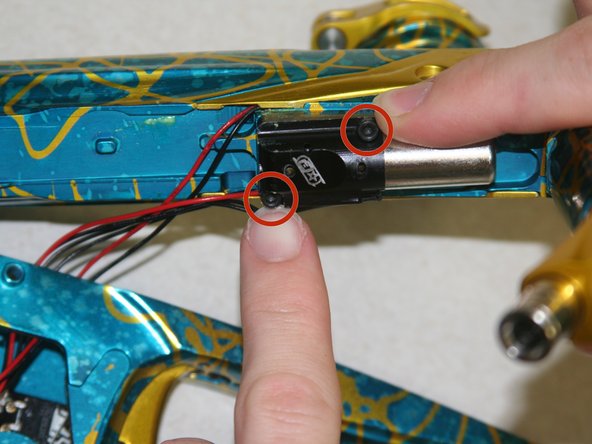
    • Using the Phillips #0 screwdriver, remove the 2 screws in the solenoid.

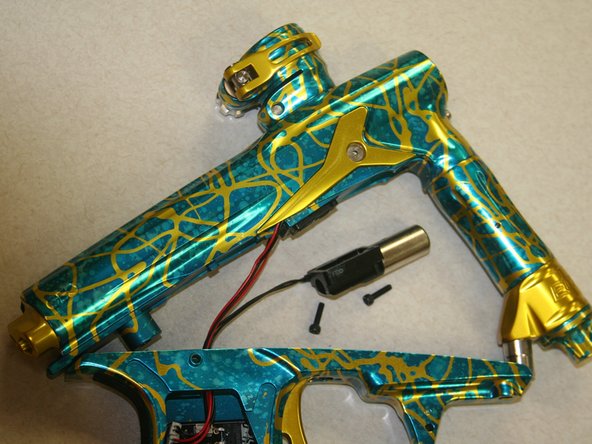
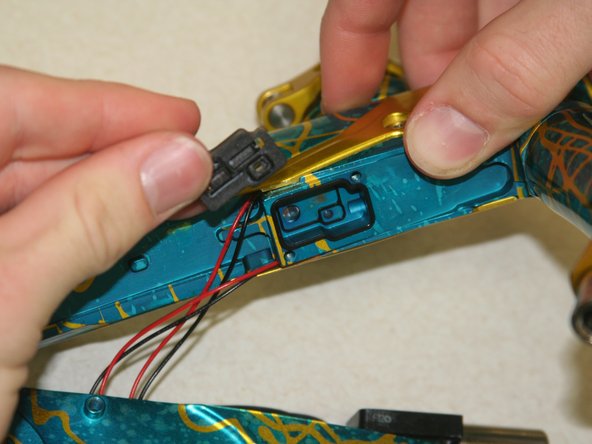
    • Remove the solenoid.

  9. Planet Eclipse Geo3 Solenoid Manifold Gasket Replacement: étape 9, image 1 de 1
    • Pry the board connection with the 2 black wires from the terminal.

    • BE CAREFUL: Do not pull hard by the wires or you may dislodge them from the connection instead of removing the connection from the board.

    • Pull out the wires through the opening in the top of the grip and replace the solenoid.

  10. Planet Eclipse Geo3 Solenoid Manifold Gasket Replacement, Solenoid Gasket: étape 10, image 1 de 3 Planet Eclipse Geo3 Solenoid Manifold Gasket Replacement, Solenoid Gasket: étape 10, image 2 de 3 Planet Eclipse Geo3 Solenoid Manifold Gasket Replacement, Solenoid Gasket: étape 10, image 3 de 3
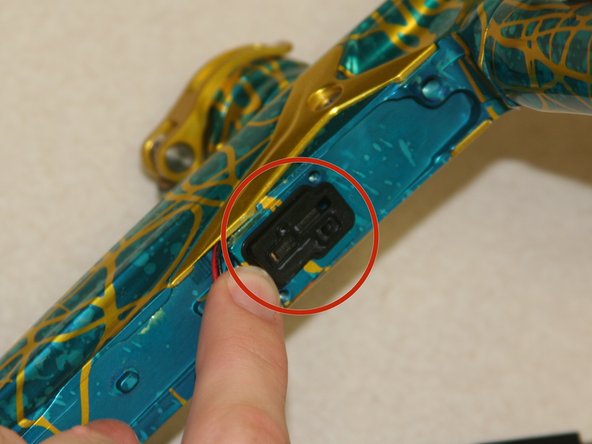
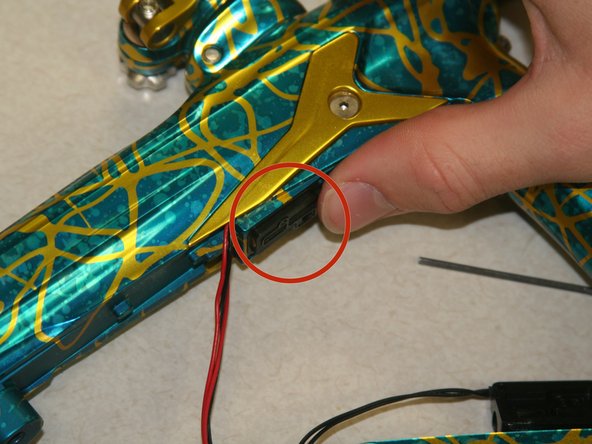
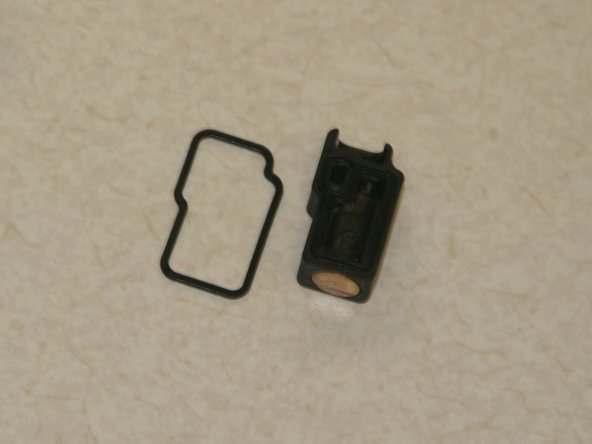
    • Locate the solenoid gasket manifold, underneath the top half of the body.

  11. Planet Eclipse Geo3 Solenoid Manifold Gasket Replacement: étape 11, image 1 de 3 Planet Eclipse Geo3 Solenoid Manifold Gasket Replacement: étape 11, image 2 de 3 Planet Eclipse Geo3 Solenoid Manifold Gasket Replacement: étape 11, image 3 de 3
    • Remove the solenoid gasket manifold by applying pressure with one finger to the part closest to the end of the barrel.

Conclusion

To reassemble your device, follow these instructions in reverse order.

Rett Triplett

Membre depuis le 10/18/13

801 Réputation

8 tutoriels rédigés

Équipe

Clemson, Team 13-6, Benson Fall 2013 Membre de l'équipe Clemson, Team 13-6, Benson Fall 2013

CLEM-BENSON-F13S13G6

3 membres

8 tutoriels rédigés

0 commentaires

Ajouter un commentaire

Nombre de vues :

Dernières 24 heures : 0

7 derniers jours : 0

30 derniers jours : 3

Total : 591