Aller au contenu principal

PlayStation Motherboard Replacement

Ce dont vous avez besoin

  1. PlayStation Motherboard Replacement, Open the Console: étape 1, image 1 de 1
    • Before you begin, make sure the console is turned off and unplugged.

    • Turn the console upside down and remove the five 15.8 mm-long Phillips #1 screws.

    The SCPH-9001 model does not have the Parallel Port panel to remove.

    Aislinn - Réponse

  2. PlayStation Motherboard Replacement: étape 2, image 1 de 2 PlayStation Motherboard Replacement: étape 2, image 2 de 2
    • While holding the top and bottom halves of the console together, flip the console back over. Lift the top cover straight up to remove it.

  3. PlayStation Motherboard Replacement, Remove the Controller Ports: étape 3, image 1 de 1
    • Remove five Phillips #1 screws securing the metal shield to the controller ports:

    • Two 14 mm screws

    • Three 8 mm screws

  4. PlayStation Motherboard Replacement: étape 4, image 1 de 2 PlayStation Motherboard Replacement: étape 4, image 2 de 2
    • Lift the metal shield straight up to remove it.

  5. PlayStation Motherboard Replacement: étape 5, image 1 de 2 PlayStation Motherboard Replacement: étape 5, image 2 de 2
    • Pull the controller port's ribbon cable straight up and out of its socket on the motherboard to disconnect it.

  6. PlayStation Motherboard Replacement: étape 6, image 1 de 2 PlayStation Motherboard Replacement: étape 6, image 2 de 2
    • Lift the controller ports straight up and out of the bottom case.

  7. PlayStation Motherboard Replacement, Remove the Optical Drive: étape 7, image 1 de 2 PlayStation Motherboard Replacement, Remove the Optical Drive: étape 7, image 2 de 2
    • Pull the optical drive power cable straight up and out of its socket on the motherboard to disconnect it.

    I broke the optical drive power cable’s socket off from the motherboard! How to put it back on?

    B H - Réponse

  8. PlayStation Motherboard Replacement: étape 8, image 1 de 3 PlayStation Motherboard Replacement: étape 8, image 2 de 3 PlayStation Motherboard Replacement: étape 8, image 3 de 3
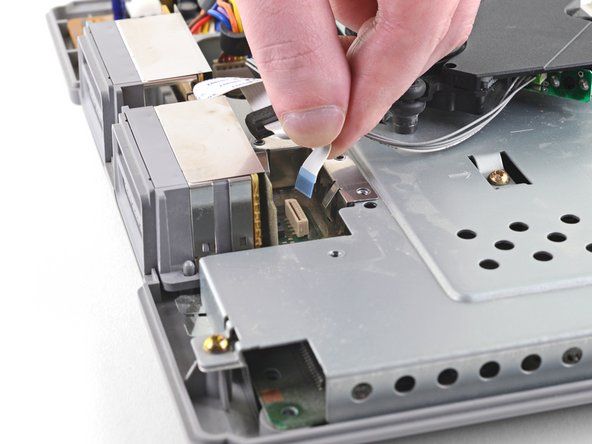
    • Use the flat end of a spudger to lift up and unlock one side of the data cable's connector on the motherboard. Repeat this step on the other side of the connector.

    • You'll hear a faint click noise when unlocking the connector. Make sure not to apply too much pressure when lifting up on the connector with the spudger, or else damage may result.

    • Gently pull the optical drive data cable straight up and out of its socket on the motherboard to disconnect it.

    While I was pulling this cable, the whole connector came off the motherboard (the white part that's supposed do stay on the motherboard)... How can I fix it?

    Zvezdan Disic - Réponse

    Do I solder it or what?

    Zvezdan Disic - Réponse

    Same exact problem with pulling the entire connector off the motherboard. What do i do?

    Aaron Loyd - Réponse

    Yes, could try clean and re-solder, and do a proper re-work job.

    leafybye - Réponse

    help! i just had the same problem! someone was able to solve it ???

    Jack - Réponse

  9. PlayStation Motherboard Replacement: étape 9, image 1 de 2 PlayStation Motherboard Replacement: étape 9, image 2 de 2
    • Lift the optical drive straight up to remove it.

  10. PlayStation Motherboard Replacement, Unplug the Power Supply: étape 10, image 1 de 2 PlayStation Motherboard Replacement, Unplug the Power Supply: étape 10, image 2 de 2
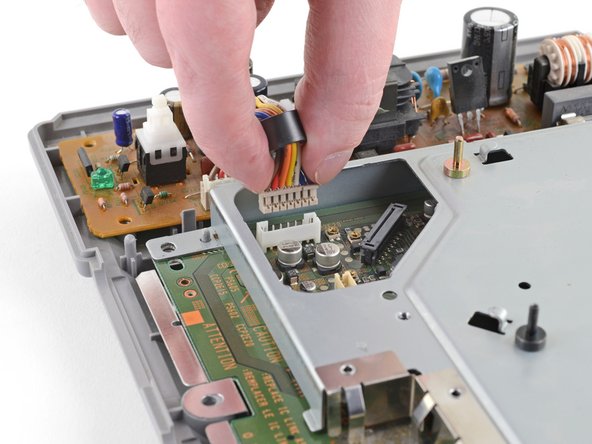
    • Pull the power supply cable straight up and out of its socket on the motherboard to disconnect it.

  11. PlayStation Motherboard Replacement, Remove the Motherboard's Metal Shield: étape 11, image 1 de 1
    • Remove the five 14 mm-long Phillips #1 screws from the motherboard's metal shield.

  12. PlayStation Motherboard Replacement: étape 12, image 1 de 3 PlayStation Motherboard Replacement: étape 12, image 2 de 3 PlayStation Motherboard Replacement: étape 12, image 3 de 3
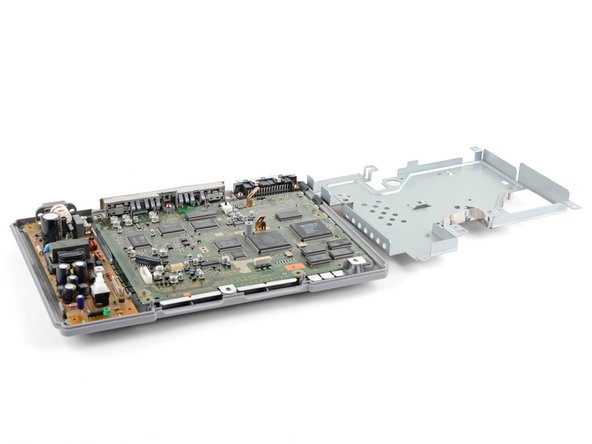
    • From the left side, lift up the metal shield and rotate it about its right edge, opening it like a book.

    • There may be strips of tape holding the right side of the metal shield to the case, necessitating this kind of removal procedure. If there isn't tape, you can simply lift the shield straight up to remove it.

  13. PlayStation Motherboard Replacement, Remove the Motherboard: étape 13, image 1 de 1
    • Remove the three 14 mm-long Phillips #1 screws securing the motherboard to the bottom case.

  14. PlayStation Motherboard Replacement: étape 14, image 1 de 2 PlayStation Motherboard Replacement: étape 14, image 2 de 2
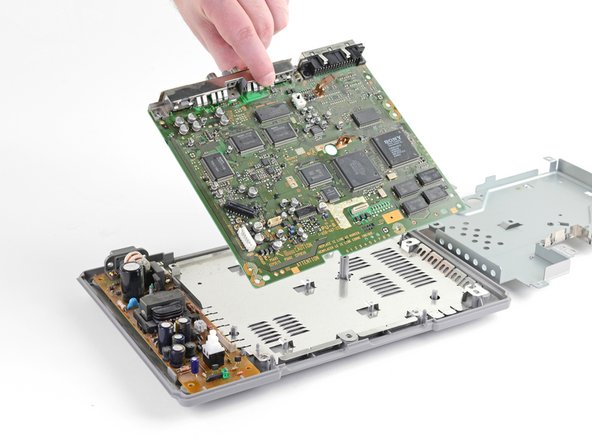
    • Lift the motherboard out of the bottom case.

Conclusion

Compare your new replacement part to the original part—you may need to transfer remaining components or remove adhesive backings from the new part before installing.

To reassemble your device, follow the above steps in reverse order.

Take your e-waste to an R2 or e-Stewards certified recycler.

Repair didn’t go as planned? Check out our Answers community for troubleshooting help.

27 autres ont terminé cette réparation.

Craig Lloyd

Membre depuis le 02/10/16

35 351 Réputation

82 tutoriels rédigés

2 commentaires

Hi there.

Here i can buy that copper tape from the right of the metal shield ?

Thkx in adv

Haitham - Réponse

Excelente guía, esto ayuda a muchos para aprender a reparar y no hacer gastos innecesarios.

aldrin peñate - Réponse

Ajouter un commentaire

Nombre de vues :

Dernières 24 heures : 7

7 derniers jours : 65

30 derniers jours : 200

Total : 25,944