Aller au contenu principal

PlayStation Move LED Light Replacement

Ce dont vous avez besoin

  1. PlayStation Move LED Light Replacement, Battery: étape 1, image 1 de 3 PlayStation Move LED Light Replacement, Battery: étape 1, image 2 de 3 PlayStation Move LED Light Replacement, Battery: étape 1, image 3 de 3
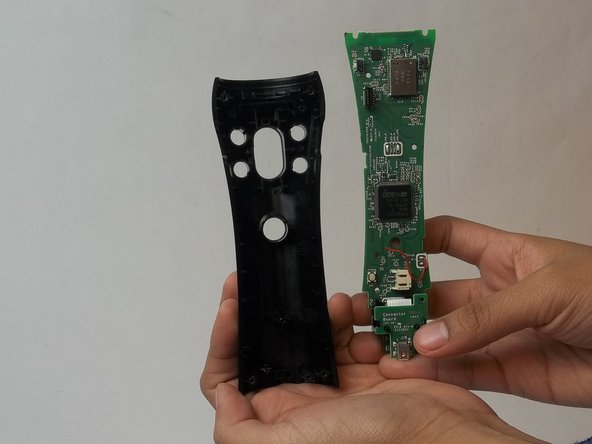
    • Using a Phillips #0 screwdriver, remove the four 10mm screws located on the back of the device.

  2. PlayStation Move LED Light Replacement: étape 2, image 1 de 2 PlayStation Move LED Light Replacement: étape 2, image 2 de 2
    • Insert the plastic opening tool at the indent.

    • Gently use a forward and backward motion to safely pop open the cover.

    • Using your hands to further pull it apart.

  3. PlayStation Move LED Light Replacement: étape 3, image 1 de 2 PlayStation Move LED Light Replacement: étape 3, image 2 de 2
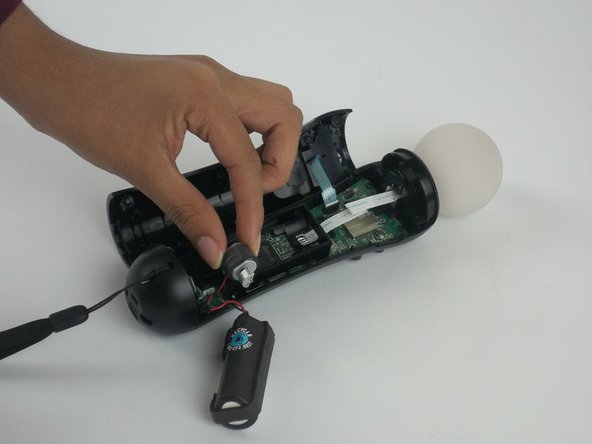
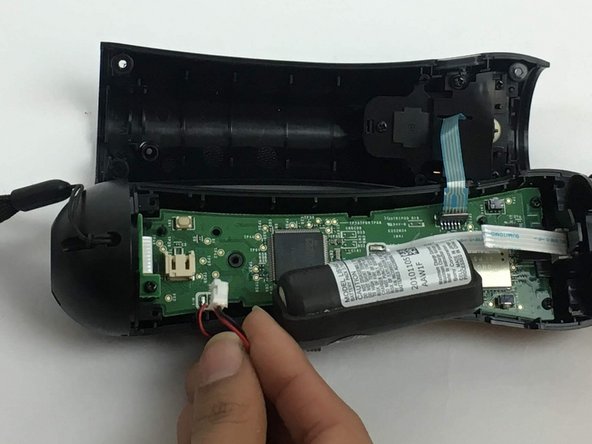
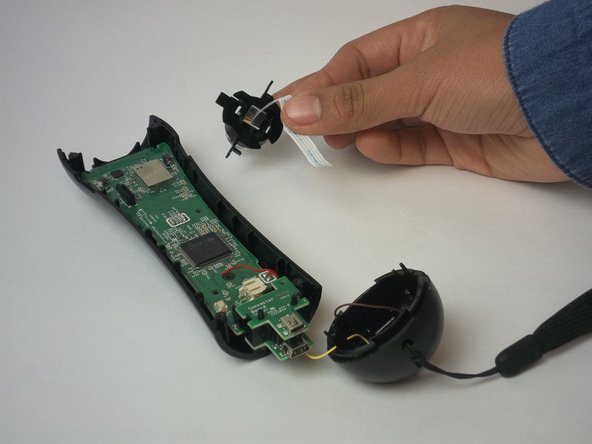
    • Once the device is opened, lift the battery out of the black plastic holder.

    • Carefully pull the battery out and ensure that it's wires are still connected to the inside.

    You can disconnect the back/trigger assembly ribbon cable at this point by proceeding to Steps 13/14 (without the other steps for disassembly as they are unnecessary for replacing just the trigger).

    Peter Miller - Réponse

  4. PlayStation Move LED Light Replacement: étape 4, image 1 de 3 PlayStation Move LED Light Replacement: étape 4, image 2 de 3 PlayStation Move LED Light Replacement: étape 4, image 3 de 3
    • Using a Phillips head screwdriver, remove the 9mm screw located to the right of the battery, which is connected to the inner plastic frame.

    • Using the plastic opening tool carefully take out the grey cylindrical piece (vibrator) that is also attached to a wire.

  5. PlayStation Move LED Light Replacement: étape 5, image 1 de 2 PlayStation Move LED Light Replacement: étape 5, image 2 de 2
    • Gently pull out the small grey cylindrical piece (vibrator).

    • Removing this piece makes it easier to access the wire connection of the battery and remove it.

  6. PlayStation Move LED Light Replacement: étape 6, image 1 de 2 PlayStation Move LED Light Replacement: étape 6, image 2 de 2
    • Using tweezers, remove the small piece with a cylindrical top that is located to the left of the inner plastic frame.

  7. PlayStation Move LED Light Replacement: étape 7, image 1 de 3 PlayStation Move LED Light Replacement: étape 7, image 2 de 3 PlayStation Move LED Light Replacement: étape 7, image 3 de 3
    • Using one hand to hold the device, and the other hand to squeeze the inner plastic frame.

    • Remove by squeezing the inner plastic frame, lift and pull it towards you.

    • While removing the frame, be extremely careful because it could damage the frame or the motherboard.

  8. PlayStation Move LED Light Replacement: étape 8, image 1 de 2 PlayStation Move LED Light Replacement: étape 8, image 2 de 2
    • Gently pull on the white piece connecting the battery and the connector.

  9. PlayStation Move LED Light Replacement, Motherboard: étape 9, image 1 de 3 PlayStation Move LED Light Replacement, Motherboard: étape 9, image 2 de 3 PlayStation Move LED Light Replacement, Motherboard: étape 9, image 3 de 3
    • Remove the five 1.2 mm screws from upper portion of the controller.

    • If you are replacing the trigger button, continue to step 13.

  10. PlayStation Move LED Light Replacement: étape 10, image 1 de 2 PlayStation Move LED Light Replacement: étape 10, image 2 de 2
    • Remove the two 1.2mm Phillips #1 screws.

  11. PlayStation Move LED Light Replacement: étape 11, image 1 de 3 PlayStation Move LED Light Replacement: étape 11, image 2 de 3 PlayStation Move LED Light Replacement: étape 11, image 3 de 3
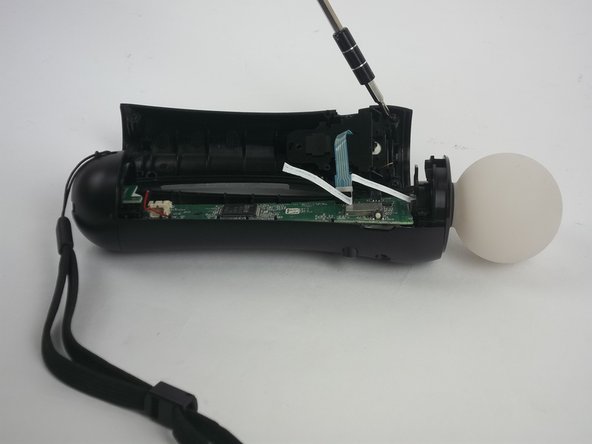
    • Cautiously remove the circular white piece at the top without removing the LED inside.

    Accidentally ripped this off as my PS Move is a different model, any chance this could be fixed using like jumper wires or not?

    Alex Flint - Réponse

  12. PlayStation Move LED Light Replacement: étape 12, image 1 de 3 PlayStation Move LED Light Replacement: étape 12, image 2 de 3 PlayStation Move LED Light Replacement: étape 12, image 3 de 3
    • Remove the blue strip that is connected to the trigger button from the motherboard.

    • Be careful to gently detach it from the motherboard. The strip may rip if too much strength is applied.

  13. PlayStation Move LED Light Replacement: étape 13, image 1 de 2 PlayStation Move LED Light Replacement: étape 13, image 2 de 2
    • Remove the trigger button from the controller.

  14. PlayStation Move LED Light Replacement: étape 14, image 1 de 3 PlayStation Move LED Light Replacement: étape 14, image 2 de 3 PlayStation Move LED Light Replacement: étape 14, image 3 de 3
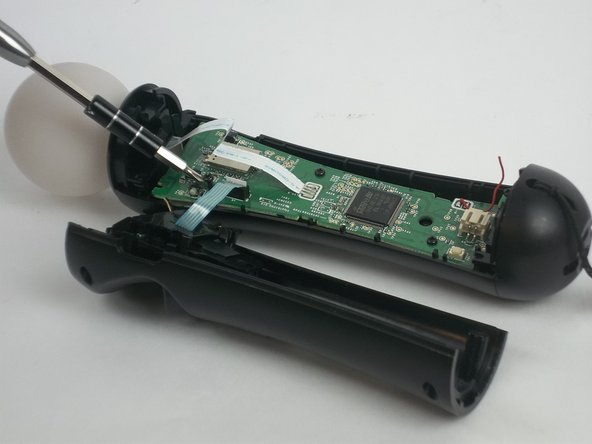
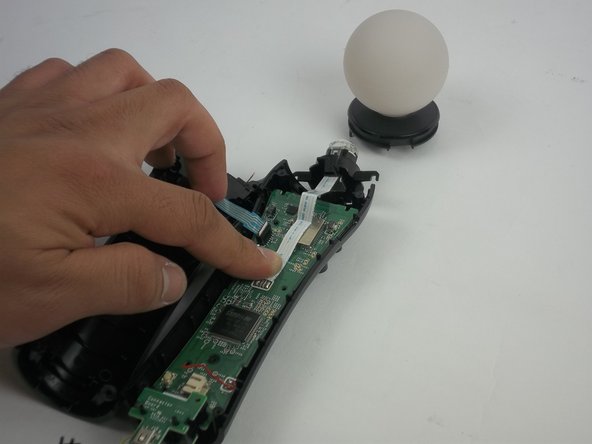
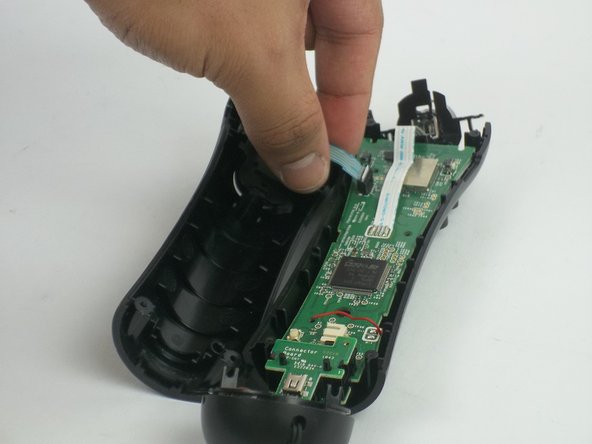
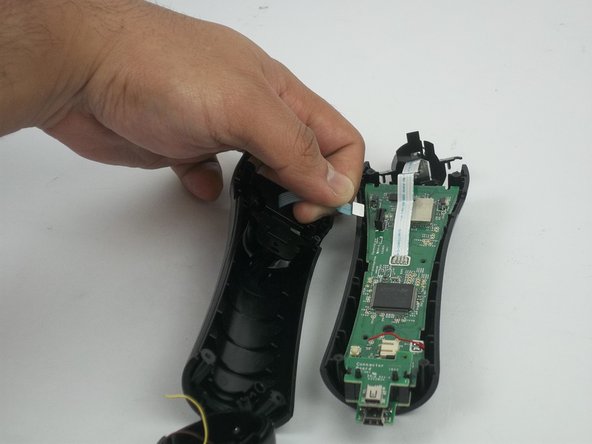
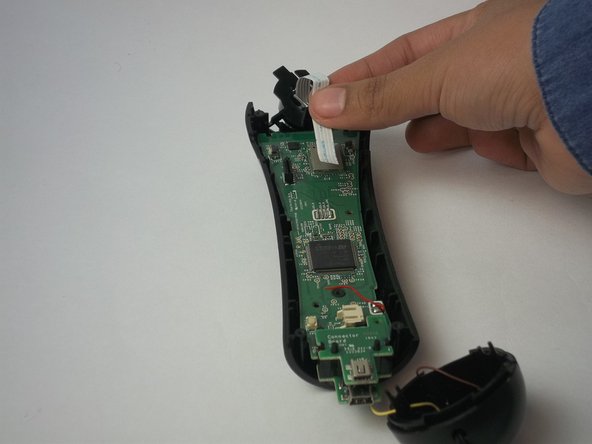
    • Remove the LED light by removing the white strip.

    • If you are replacing the LED light, continue to Step 17.

    This step is destructive and simply breaks the LED solder joints!!!

    Peter Miller - Réponse

    WTF, you literally broke the soldered ribbon cable.

    fastasleep - Réponse

  15. PlayStation Move LED Light Replacement: étape 15, image 1 de 2 PlayStation Move LED Light Replacement: étape 15, image 2 de 2
    • Remove the motherboard from the plastic case.

  16. PlayStation Move LED Light Replacement, LED Light: étape 16, image 1 de 2 PlayStation Move LED Light Replacement, LED Light: étape 16, image 2 de 2
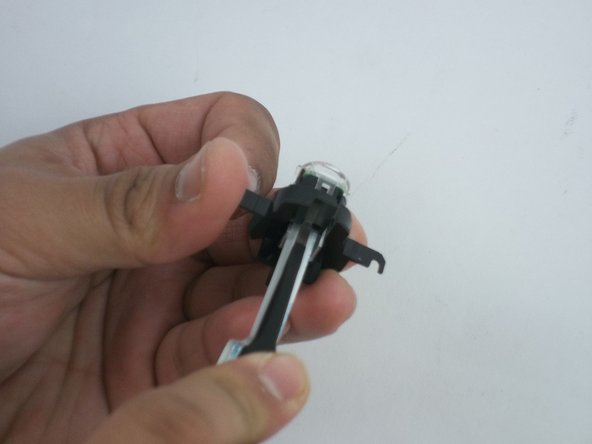
    • Insert tweezers between the LED case and the LED clear plastic cover.

    • Lift the edge of the LED clear cover clip to be able to remove the cover.

    • Repeat the previous step to the other side.

    • Remove the LED cover.

  17. PlayStation Move LED Light Replacement: étape 17, image 1 de 2 PlayStation Move LED Light Replacement: étape 17, image 2 de 2
    • Remove the LED board using a blue opening tool to lift the board.

    • After the board is loose, remove the LED board.

Conclusion

To reassemble your device, follow these instructions in reverse order.

2 autres ont terminé cette réparation.

Maritza Martinez

Membre depuis le 09/28/16

149 Réputation

1 tutoriel rédigé

Équipe

USF Tampa, Team 3-3, Passmore Fall 2016 Membre de l'équipe USF Tampa, Team 3-3, Passmore Fall 2016

USFT-PASSMORE-F16S3G3

4 membres

8 tutoriels rédigés

3 commentaires

Okay, going to try this. Do I have to solder the white strip back onto the board?

randallrigdonjr - Réponse

did you ever get this done? need to know the same.

[deleted] -

très clair, mais où trouver une led ? et en enlevant le cable de la led, il faut le dessourder, non ?

Pierrot - Réponse

Ajouter un commentaire

Nombre de vues :

Dernières 24 heures : 1

7 derniers jours : 5

30 derniers jours : 23

Total : 4,160