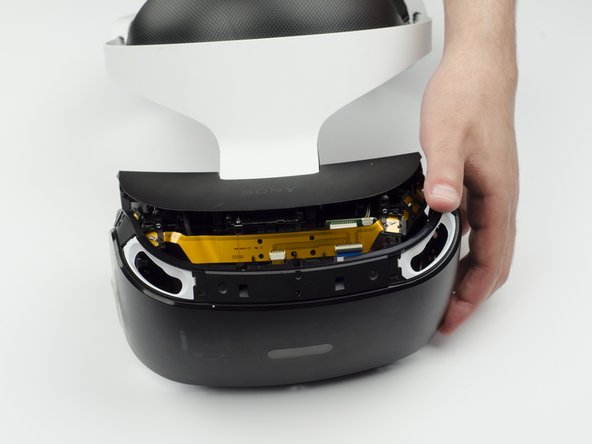
Aller au contenu principal

PlayStation VR LED Light Tracker Replacement

Ce dont vous avez besoin

  1. PlayStation VR LED Light Tracker Replacement, LED Light Tracker: étape 1, image 1 de 3 PlayStation VR LED Light Tracker Replacement, LED Light Tracker: étape 1, image 2 de 3 PlayStation VR LED Light Tracker Replacement, LED Light Tracker: étape 1, image 3 de 3
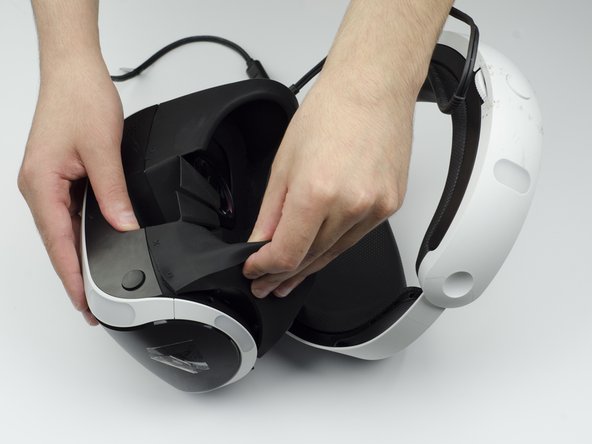
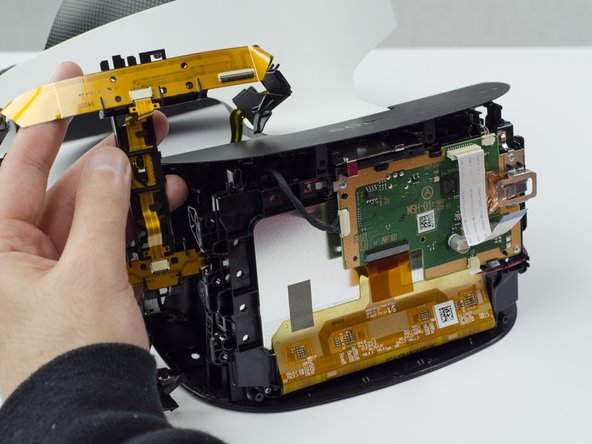
    • Peel back the rubber covering around the lenses to remove the surrounding plastic eyepieces.

  2. PlayStation VR LED Light Tracker Replacement: étape 2, image 1 de 2 PlayStation VR LED Light Tracker Replacement: étape 2, image 2 de 2
    • Unscrew four 13 mm screws with a PH #000 screwdriver.

  3. PlayStation VR LED Light Tracker Replacement: étape 3, image 1 de 2 PlayStation VR LED Light Tracker Replacement: étape 3, image 2 de 2
    • Using the plastic opening tool, carefully pry the white plastic panel free from the side of the headset. Repeat this action for the opposite side.

  4. PlayStation VR LED Light Tracker Replacement: étape 4, image 1 de 3 PlayStation VR LED Light Tracker Replacement: étape 4, image 2 de 3 PlayStation VR LED Light Tracker Replacement: étape 4, image 3 de 3
    • Use the plastic opening tool to pry the top white plastic panel free from the headset.

    • Do not try to remove the bottom plastic panel. There is a screw attaching it that must be removed first.

    • There may be a small amount of adhesive attaching the top panel to the headset, in which case you may need to use a bit more force to remove the panel.

  5. PlayStation VR LED Light Tracker Replacement: étape 5, image 1 de 1
    • Flip the headset over.

    • Using a PH #000, unscrew the 7 mm screw found on the bottom of the headset.

  6. PlayStation VR LED Light Tracker Replacement: étape 6, image 1 de 3 PlayStation VR LED Light Tracker Replacement: étape 6, image 2 de 3 PlayStation VR LED Light Tracker Replacement: étape 6, image 3 de 3
    • Using the plastic opening tool, pry the bottom white plastic panel loose and remove it from the headset.

    • There is adhesive attaching the panel to the headset, in which case it will take more force to remove the panel.

  7. PlayStation VR LED Light Tracker Replacement: étape 7, image 1 de 3 PlayStation VR LED Light Tracker Replacement: étape 7, image 2 de 3 PlayStation VR LED Light Tracker Replacement: étape 7, image 3 de 3
    • Unscrew the two 7 mm screws from the top of the headset.

  8. PlayStation VR LED Light Tracker Replacement: étape 8, image 1 de 3 PlayStation VR LED Light Tracker Replacement: étape 8, image 2 de 3 PlayStation VR LED Light Tracker Replacement: étape 8, image 3 de 3
    • Using your fingers, carefully pry the black front panel free from the headset.

    • We recommend that you start the removal from the sides by pulling them forward.

    • There is adhesive holding the front panel in place, which means you will need a bit of extra force to remove it.

  9. PlayStation VR LED Light Tracker Replacement: étape 9, image 1 de 1
    • Unscrew the four silver 6 mm screws in each corner using a PH #000 screwdriver.

  10. PlayStation VR LED Light Tracker Replacement: étape 10, image 1 de 3 PlayStation VR LED Light Tracker Replacement: étape 10, image 2 de 3 PlayStation VR LED Light Tracker Replacement: étape 10, image 3 de 3
    • Lift the small silver latch attaching the ZIF (zero insertion force) connector to the circuit board.

    • Carefully pull the end of the white ribbon connector from its slot.

    • Be careful not to damage or dirty the ribbon connector.

  11. PlayStation VR LED Light Tracker Replacement: étape 11, image 1 de 2 PlayStation VR LED Light Tracker Replacement: étape 11, image 2 de 2
    • Unhitch the yellow led connector ribbon and move it aside.

    • Be careful not to damage or dirty the ribbon connector.

  12. PlayStation VR LED Light Tracker Replacement: étape 12, image 1 de 3 PlayStation VR LED Light Tracker Replacement: étape 12, image 2 de 3 PlayStation VR LED Light Tracker Replacement: étape 12, image 3 de 3
    • Carefully pry the black plastic piece attaching the yellow ribbon to the headset away from the green circuit board.

    • Remove the yellow LED ribbons and black plastic connecting piece from the headset.

Conclusion

To reassemble your device, follow these instructions in reverse order.

Une autre personne a terminé cette réparation.

Sarah Shand

Membre depuis le 02/20/17

1 885 Réputation

7 tutoriels rédigés

Équipe

USF Tampa, Team S3-G1, Sullivan Spring 2017 Membre de l'équipe USF Tampa, Team S3-G1, Sullivan Spring 2017

USFT-SULLIVAN-S17S3G1

3 membres

13 tutoriels rédigés

Un commentaire

where can I buy the LED lights for it??

Jordi - Réponse

Ajouter un commentaire

Nombre de vues :

Dernières 24 heures : 1

7 derniers jours : 4

30 derniers jours : 14

Total : 3,792