Aller au contenu principal

Polyconcept 900-MHz Retro Cordless Telephone Device Charger Plate Replacement

Ce dont vous avez besoin

  1. Polyconcept 900-MHz Retro Cordless Telephone Device Charger Plate Replacement, Removing Power and Telephone Cords: étape 1, image 1 de 3 Polyconcept 900-MHz Retro Cordless Telephone Device Charger Plate Replacement, Removing Power and Telephone Cords: étape 1, image 2 de 3 Polyconcept 900-MHz Retro Cordless Telephone Device Charger Plate Replacement, Removing Power and Telephone Cords: étape 1, image 3 de 3
    • To disconnect the phone cord, squeeze the tab against the connector and pull the cord away from the telephone-line-in-jack.

    • To disconnect the power cord, grasp the end and pull back and away until it is disconnected.

    • Once disconnected remove each cord from its track.

  2. Polyconcept 900-MHz Retro Cordless Telephone Device Charger Plate Replacement, Removing Screws to Base Plate: étape 2, image 1 de 1
    • Using a Phillips #00 screwdriver, remove the six 7mm screws from the base plate.

  3. Polyconcept 900-MHz Retro Cordless Telephone Device Charger Plate Replacement, Remove Bottom Plate from Base: étape 3, image 1 de 3 Polyconcept 900-MHz Retro Cordless Telephone Device Charger Plate Replacement, Remove Bottom Plate from Base: étape 3, image 2 de 3 Polyconcept 900-MHz Retro Cordless Telephone Device Charger Plate Replacement, Remove Bottom Plate from Base: étape 3, image 3 de 3
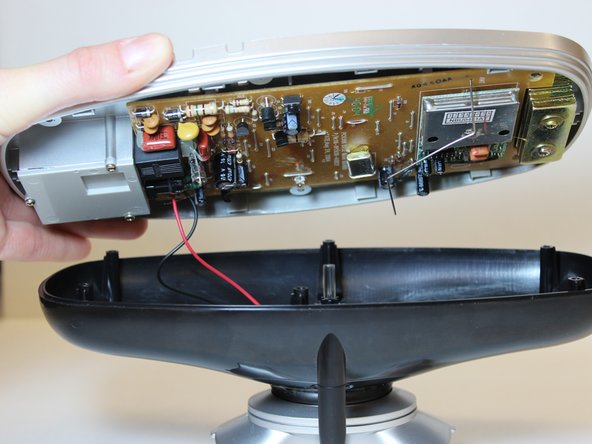
    • With the base turned upside down, grasp the edges of the base plate and gently lift from the rest of the base.

    • Two wires lead from the motherboard to the charger plate, so the two parts cannot be completely separated without further steps.

  4. Polyconcept 900-MHz Retro Cordless Telephone Device Charger Plate Replacement, Removing the Screws from the Charger Plate: étape 4, image 1 de 1
    • Use a Phillips #00 screwdriver to remove the two 5mm screws from the metal plate.

  5. Polyconcept 900-MHz Retro Cordless Telephone Device Charger Plate Replacement, Removing the Plate: étape 5, image 1 de 1
    • Grip the metal plate and pull towards you.

    • You may need to wiggle the plate back and forth gently to loosen it from its housing.

  6. Polyconcept 900-MHz Retro Cordless Telephone Device Charger Plate Replacement, Removing Screw from Base Cover: étape 6, image 1 de 1
    • Use the Philips #00 screwdriver to remove the four 6mm screws from the base cover.

  7. Polyconcept 900-MHz Retro Cordless Telephone Device Charger Plate Replacement, Separating Charge Plate from Base Cover: étape 7, image 1 de 1
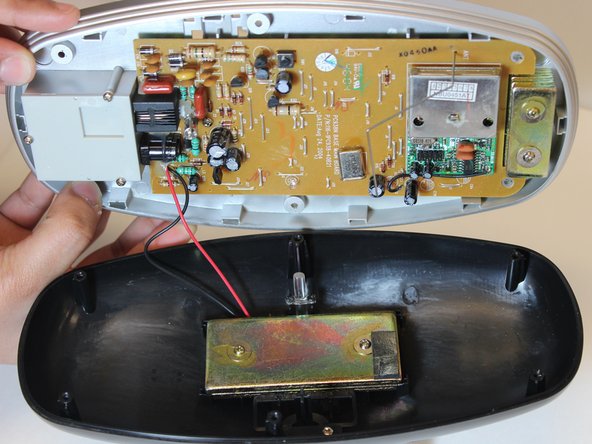
    • Gently pull the charge plate away from the rest of the base and separate the two pieces of the charge plate.

  8. Polyconcept 900-MHz Retro Cordless Telephone Device Charger Plate Replacement, Removing Glue from Wires: étape 8, image 1 de 2 Polyconcept 900-MHz Retro Cordless Telephone Device Charger Plate Replacement, Removing Glue from Wires: étape 8, image 2 de 2
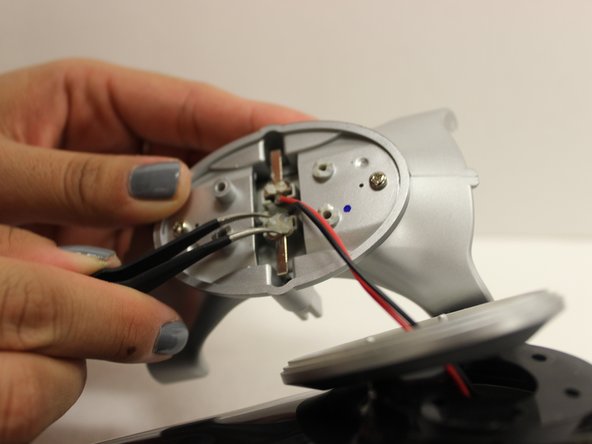
    • Use the spudger to gently scrape the glue away from the wire connections.

    • If the spudger is not adequate, try using the tweezers to pull the glue away before scraping.

  9. Polyconcept 900-MHz Retro Cordless Telephone Device Charger Plate Replacement, Desoldering the Wire Connections: étape 9, image 1 de 1
    • Use the soldering station to desolder the wire connections.

    • For further instructions on using the soldering station click here.

Conclusion

To reassemble your device, follow these instructions in reverse order.

2 autres ont terminé cette réparation.

Jay Gunter

Membre depuis le 10/27/14

378 Réputation

3 tutoriels rédigés

Équipe

0 commentaires

Ajouter un commentaire

Nombre de vues :

Dernières 24 heures : 0

7 derniers jours : 0

30 derniers jours : 0

Total : 176