Cette version peut contenir des modifications incorrectes. Passez au dernier aperçu vérifié.
Ce dont vous avez besoin
-
-
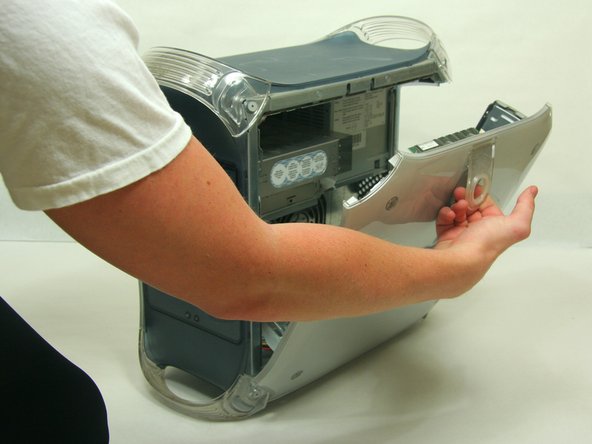
Tirez sur le loquet extérieur.
-
Faites descendre la porte jusqu'à ce qu'elle atteigne votre surface de travail.
-
-
Cette étape n’est pas traduite. Aidez à la traduire
-
Remove the screw from each of the two niches on lower part of fan using the Phillips #1 screwdriver.
-
-
Cette étape n’est pas traduite. Aidez à la traduire
-
Remove the power cable from the fan and detach bracing.
-
-
-
Cette étape n’est pas traduite. Aidez à la traduire
-
Removing the faceplate.
-
On the inside of the case, find the two plastic tabs.
-
While depressing the tabs, remove the faceplate by pulling and rotating outward.
-
-
Cette étape n’est pas traduite. Aidez à la traduire
-
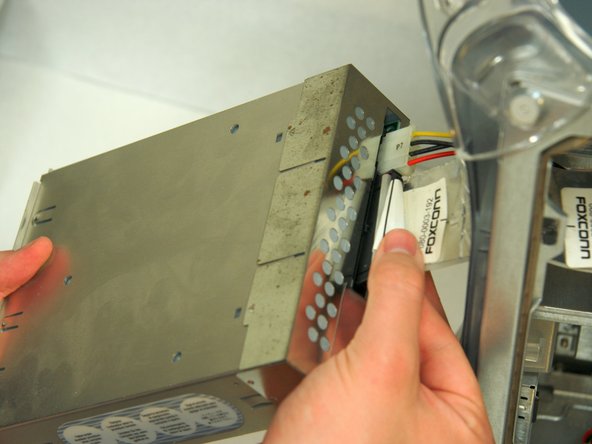
Remove the two screws on the front of the drive with the Phillips #1 screwdriver.
-
-
Cette étape n’est pas traduite. Aidez à la traduire
-
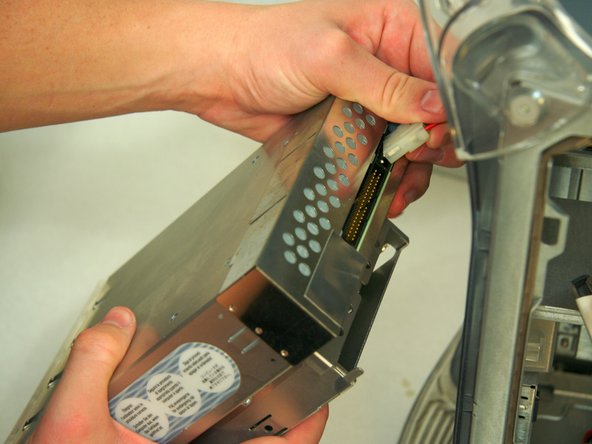
Pull the drive out to allow access to the power and ribbon cables. Do not fully remove.
-
Remove both the power and ribbon cable.
-
-
Cette étape n’est pas traduite. Aidez à la traduire
-
Remove the 3 hex screws on the back of the case.
-
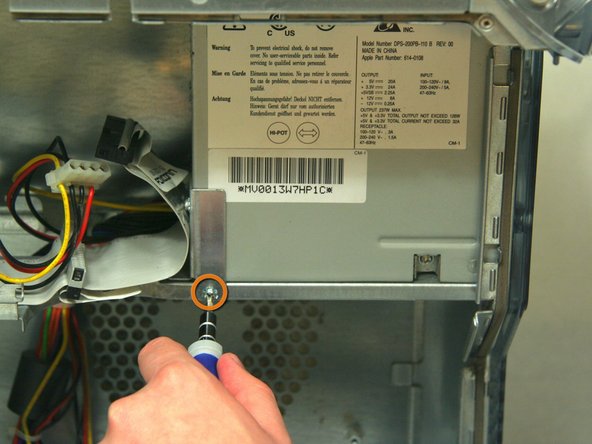
Remove the single screw on the side of the power supply casing with the Phillips #1 screwdriver.
-
-
Cette étape n’est pas traduite. Aidez à la traduire
-
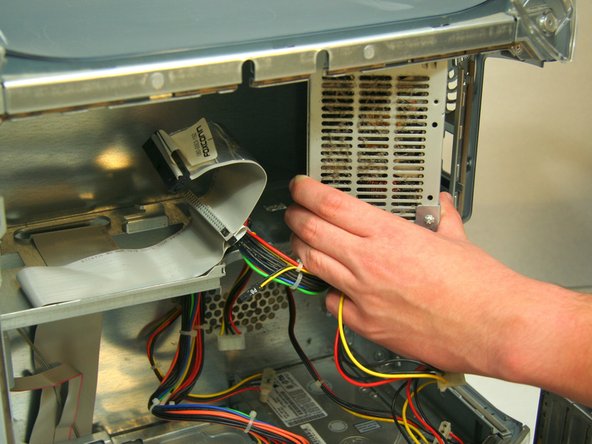
Remove power cable from the logic board.
-
Remove power cable from hard drive.
-
Pull the power supply out and towards yourself.
-


Annulation : je n'ai pas terminé ce tutoriel.
18 autres ont terminé cette réparation.
Équipe

Cal Poly, Team 13-24, Maness Winter 2010 Membre de l'équipe Cal Poly, Team 13-24, Maness Winter 2010
CPSU-MANESS-W10S13G24
4 membres
25 tutoriels rédigés
3 commentaires
Had a nearby lightning strike, "scrammed" my Mac, but couldn't start it up afterwards. Google led me to the ifixit site ( where I should have gone first!) and your instructions got me going again. Granted, I had an identical, spare Macintosh so I was able to pull that power supply to replace the damaged one and not have to wait for a replacement, but your step-by-step made the swap fairly easy! Thank you! I am happy tonight!
Now to order the replacement.
Hello Bill, I was wondering what power supply did you order as a replacement. Getting an original would cost over $100 almost next to $200, so I want to make sure where else I can buy a good power supply. Thanks in advance.
ditto…. like Bill I had a faithful G4 i use to archive some old OS9 files that need specific software that never went to OS X and some very basic Apache web server stuff. Mostly sleeping it went pop one day, I had replaced it a few years previously after a pram issue with a clean SH unit which i just swopped drives over, so getting sleeping beauty down from attic, following instructions I removed the power pac and in 30 minus the dead mac was running again and archive is protected