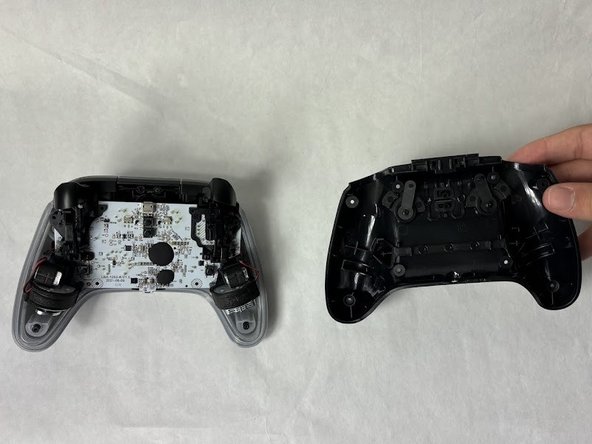
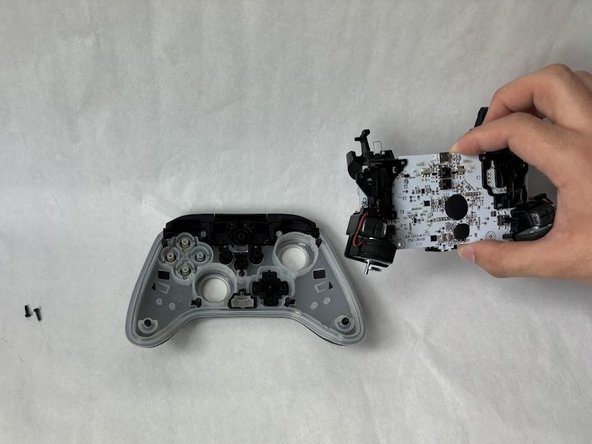
Aller au contenu principal

PowerA Spectra Infinity Enhanced Motherboard Replacement

Ce dont vous avez besoin

  1. PowerA Spectra Infinity Enhanced Motherboard Replacement, Motherboard: étape 1, image 1 de 2 PowerA Spectra Infinity Enhanced Motherboard Replacement, Motherboard: étape 1, image 2 de 2
    • Flip the controller so the back is facing up.

  2. PowerA Spectra Infinity Enhanced Motherboard Replacement: étape 2, image 1 de 1
    • Remove the eight 10 mm screws from the back of the controller using a Phillips #0 screwdriver.

  3. PowerA Spectra Infinity Enhanced Motherboard Replacement: étape 3, image 1 de 2 PowerA Spectra Infinity Enhanced Motherboard Replacement: étape 3, image 2 de 2
    • Unlock the trigger locks before removing the backplate.

    • This will make taking the plate off easier.

    • Use your fingers and carefully remove the backplate.

  4. PowerA Spectra Infinity Enhanced Motherboard Replacement: étape 4, image 1 de 1
    • Remove the two 10 mm screws connecting the motherboard to the faceplate using a Phillips #0 screwdriver.

  5. PowerA Spectra Infinity Enhanced Motherboard Replacement: étape 5, image 1 de 2 PowerA Spectra Infinity Enhanced Motherboard Replacement: étape 5, image 2 de 2
    • Use your hand to separate the motherboard from the face plate.

Conclusion

To reassemble your device, follow these instructions in reverse order.

Une autre personne a terminé cette réparation.

Kevyn Jorge

Membre depuis le 03/22/24

1 003 Réputation

6 tutoriels rédigés

Équipe

UMass Dartmouth, Team 6-5, Botvin Spring 2024 Membre de l'équipe UMass Dartmouth, Team 6-5, Botvin Spring 2024

UMASSD-BOTVIN-S24S6G5

3 membres

6 tutoriels rédigés

0 commentaires de tutoriel

Ajouter un commentaire

Nombre de vues :

Dernières 24 heures : 0

7 derniers jours : 1

30 derniers jours : 19

Total : 402