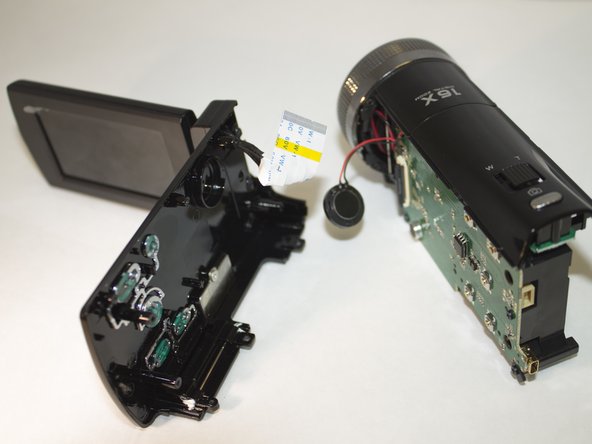
Aller au contenu principal

PowerLead Puto PLD003 Screen Replacement

Ce dont vous avez besoin

  1. PowerLead Puto PLD003 Screen Replacement, Side Panel: étape 1, image 1 de 1
    • Slide the battery eject button open to release the battery door.

  2. PowerLead Puto PLD003 Screen Replacement: étape 2, image 1 de 1
    • With the battery door open, carefully remove all four 5 mm Phillips #1 screws.

  3. PowerLead Puto PLD003 Screen Replacement: étape 3, image 1 de 1
    • Rotate the camera so that the underside is facing up.

    • Remove the four 5 mm Phillips #1 screws.

  4. PowerLead Puto PLD003 Screen Replacement: étape 4, image 1 de 1
    • Place the camera on a flat surface, with its underside facing you.

    • Gently pull up on the side panel to remove it from the camera.

  5. PowerLead Puto PLD003 Screen Replacement, Screen: étape 5, image 1 de 2 PowerLead Puto PLD003 Screen Replacement, Screen: étape 5, image 2 de 2
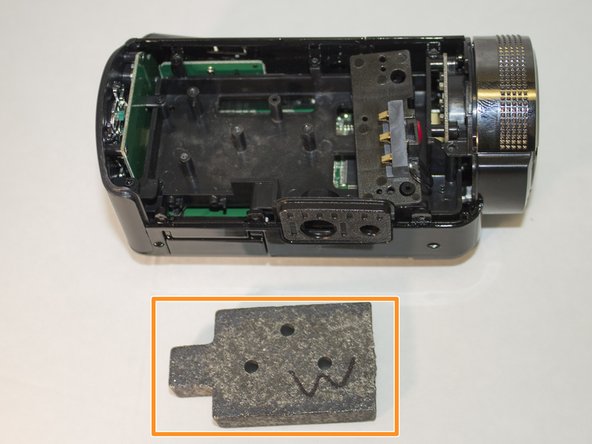
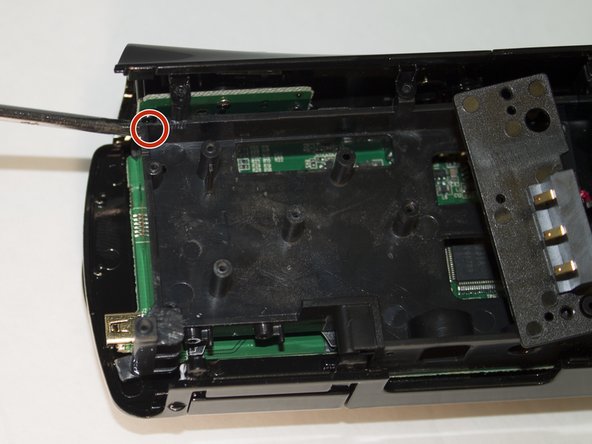
    • Remove the three 4 mm Phillips #1 screws holding the weight.

    • Remove the weight.

  6. PowerLead Puto PLD003 Screen Replacement: étape 6, image 1 de 1
    • Remove the two 4 mm Phillips #1 screws holding the back panel in place.

  7. PowerLead Puto PLD003 Screen Replacement: étape 7, image 1 de 1
    • Remove the back panel away from the camera by applying pressure to it.

  8. PowerLead Puto PLD003 Screen Replacement: étape 8, image 1 de 2 PowerLead Puto PLD003 Screen Replacement: étape 8, image 2 de 2
    • Set aside back panel for now.

    • Remove the final 4 mm Phillips #1 screw holding the screen in place. It is very small and hard to see.

  9. PowerLead Puto PLD003 Screen Replacement: étape 9, image 1 de 1
    • Carefully apply pressure, away from the camera, to the screen to detach it from the body.

    • The white cord should still be connected to the body.

  10. PowerLead Puto PLD003 Screen Replacement: étape 10, image 1 de 2 PowerLead Puto PLD003 Screen Replacement: étape 10, image 2 de 2
    • Lift the black clip upward.

    • With the clip up, pull the white cord to the left. This will detach the screen from the body.

Conclusion

To reassemble your device, follow these instructions in reverse order.

Justin Tew

Membre depuis le 03/31/16

767 Réputation

7 tutoriels rédigés

0 commentaires

Ajouter un commentaire

Nombre de vues :

Dernières 24 heures : 1

7 derniers jours : 8

30 derniers jours : 11

Total : 201