Aller au contenu principal

Protocol Vento Wi-Fi Antenna Replacement

Ce dont vous avez besoin

  1. Protocol Vento Wi-Fi Antenna Replacement, Battery: étape 1, image 1 de 1
    • Grasp the tail end of the drone where the lip of the battery protrudes.

  2. Protocol Vento Wi-Fi Antenna Replacement: étape 2, image 1 de 1
    • Pull away from the drone to remove the battery.

    • Do not attempt any repairs or replacements before removing the battery from the drone.

  3. Protocol Vento Wi-Fi Antenna Replacement, Transmitter Board: étape 3, image 1 de 1
    • To get into the drone, twelve total screws need to be removed:

    • Ten 5.7mm Phillips #000 screws from the bottom of the drone body.

    • Two 4.5mm Phillips #000 screws at the front of the drone.

    • It is not necessary to remove the four screws on the arms of the drone.

  4. Protocol Vento Wi-Fi Antenna Replacement: étape 4, image 1 de 3 Protocol Vento Wi-Fi Antenna Replacement: étape 4, image 2 de 3 Protocol Vento Wi-Fi Antenna Replacement: étape 4, image 3 de 3
    • Flip the drone over and lift off the top plastic shell of the drone.

  5. Protocol Vento Wi-Fi Antenna Replacement: étape 5, image 1 de 2 Protocol Vento Wi-Fi Antenna Replacement: étape 5, image 2 de 2
    • Remove the foam adhesive pad located on the Wi-Fi transmitter board.

  6. Protocol Vento Wi-Fi Antenna Replacement: étape 6, image 1 de 2 Protocol Vento Wi-Fi Antenna Replacement: étape 6, image 2 de 2
    • Pry the gold Wi-Fi antenna connector, located under the previously removed foam pad, away from the Wi-Fi transmitter board to disconnect it.

    • Be sure to only apply force to the gold connector and not the black wire attached to it, as the connection between the two is very fragile.

  7. Protocol Vento Wi-Fi Antenna Replacement: étape 7, image 1 de 1
    • Remove the two 3.8mm Phillips #000 screws from the Wi-Fi transmitter board.

    • Be careful with the delicate ribbon cable attached to the camera.

  8. Protocol Vento Wi-Fi Antenna Replacement: étape 8, image 1 de 1
    • Disconnect the white clip that connects the four colored wires (black, orange, red, blue) to the motherboard.

    • Be sure to pull only on the white clip, as to avoid damaging the wires.

  9. Protocol Vento Wi-Fi Antenna Replacement: étape 9, image 1 de 2 Protocol Vento Wi-Fi Antenna Replacement: étape 9, image 2 de 2
    • Gently pull the black wedge away from the main board until it shifts to a stop. You will feel it slide out, then stop.

    • The black insert acts as a wedge to keep the ribbon cable attached to the board. The wedge needs to be jostled loose before the cable can be removed.

    • Lightly pull the ribbon cable away from the connector.

  10. Protocol Vento Wi-Fi Antenna Replacement, Front Camera: étape 10, image 1 de 1
    • Remove the two 4.9mm Phillips #000 screws securing the camera to the front of the drone body.

  11. Protocol Vento Wi-Fi Antenna Replacement: étape 11, image 1 de 3 Protocol Vento Wi-Fi Antenna Replacement: étape 11, image 2 de 3 Protocol Vento Wi-Fi Antenna Replacement: étape 11, image 3 de 3
    • Lift the camera holder and the camera up and away from the drone.

  12. Protocol Vento Wi-Fi Antenna Replacement, Wi-Fi Antenna: étape 12, image 1 de 1
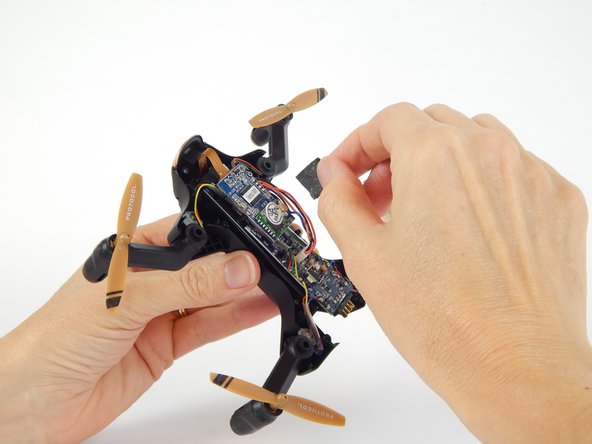
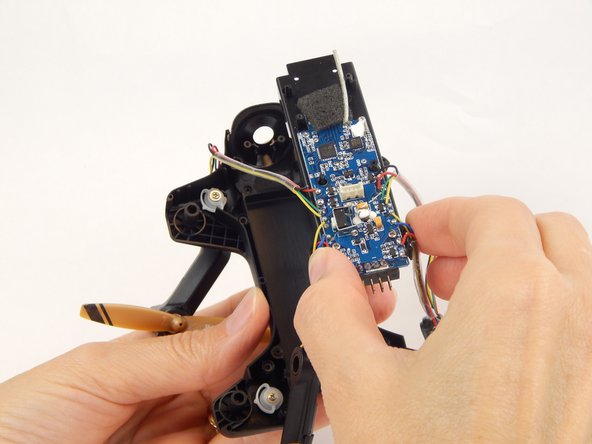
    • Unscrew the four 4.9mm Phillips #000 corner screws that are securing the motherboard’s black base to the drone.

    • It is not necessary to unscrew the motherboard from the black base.

  13. Protocol Vento Wi-Fi Antenna Replacement: étape 13, image 1 de 2 Protocol Vento Wi-Fi Antenna Replacement: étape 13, image 2 de 2
    • Grasp and pull each of the four drone arms in the direction of their propellers, one at a time, to remove them from the drone.

  14. Protocol Vento Wi-Fi Antenna Replacement: étape 14, image 1 de 1
    • Gently pull the motherboard out of the drone.

    • The four arms of the drone will dangle from the motherboard by their cords.

  15. Protocol Vento Wi-Fi Antenna Replacement: étape 15, image 1 de 1
    • Pull the black, rectangular shell out of the drone.

    • It is not attached with screws.

  16. Protocol Vento Wi-Fi Antenna Replacement: étape 16, image 1 de 2 Protocol Vento Wi-Fi Antenna Replacement: étape 16, image 2 de 2
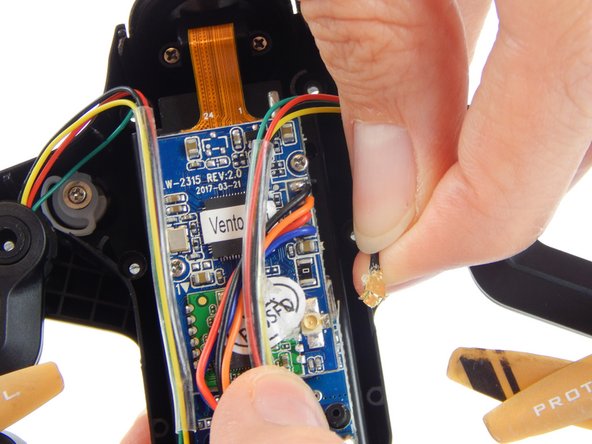
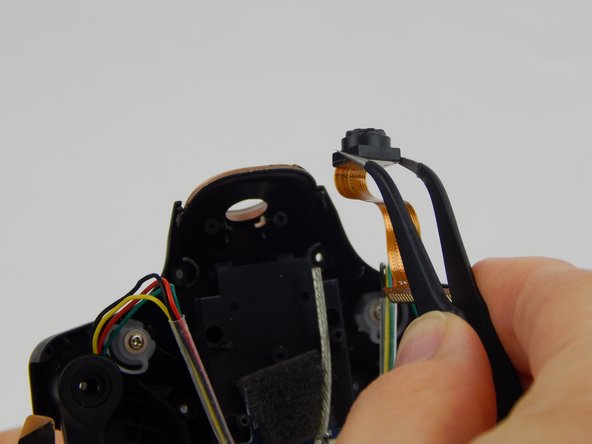
    • Hold the drone’s shell with both hands so that the inside of the shell is facing you.

    • Gently flex the shell outward, so that the two latches (holding the antenna in place) move apart slightly.

    • At the same time, push the antenna from the back of the drone towards you until it releases from the latches.

Conclusion

To reassemble your device, follow these instructions in reverse order.

3 autres ont terminé cette réparation.

Maria Larcomb

Membre depuis le 02/15/18

926 Réputation

5 tutoriels rédigés

Équipe

USF Tampa, Team S1-G2, Leahy Spring 2018 Membre de l'équipe USF Tampa, Team S1-G2, Leahy Spring 2018

USFT-LEAHY-S18S1G2

4 membres

6 tutoriels rédigés

0 commentaires

Ajouter un commentaire

Nombre de vues :

Dernières 24 heures : 0

7 derniers jours : 0

30 derniers jours : 1

Total : 284