Aller au contenu principal

Qualcomm Snapdragon 800 Mobile Development Motherboard Replacement

Ce dont vous avez besoin

  1. Qualcomm Snapdragon 800 Mobile Development Motherboard Replacement, Battery: étape 1, image 1 de 2 Qualcomm Snapdragon 800 Mobile Development Motherboard Replacement, Battery: étape 1, image 2 de 2
    • Locate your device.

    • Flip device onto its back.

  2. Qualcomm Snapdragon 800 Mobile Development Motherboard Replacement: étape 2, image 1 de 1
    • Remove the tablet's back cover.

  3. Qualcomm Snapdragon 800 Mobile Development Motherboard Replacement: étape 3, image 1 de 1
    • Locate the battery and remove it.

    • If you wish to replace the battery you can do so here.

  4. Qualcomm Snapdragon 800 Mobile Development Motherboard Replacement, Back Panel: étape 4, image 1 de 2 Qualcomm Snapdragon 800 Mobile Development Motherboard Replacement, Back Panel: étape 4, image 2 de 2
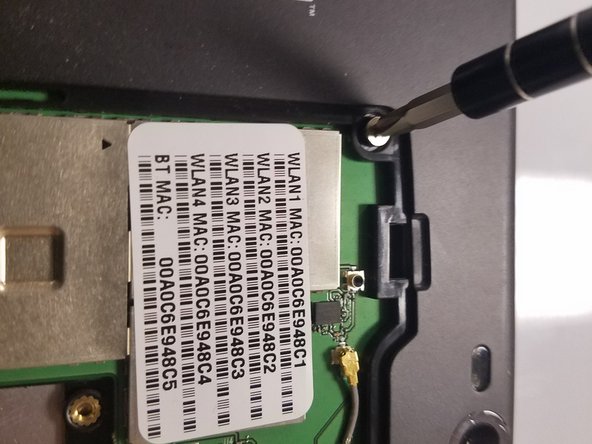
    • Use the Phillips PH1 screwdriver to unscrew the five 4x2.5mm screws that hold the back cover.

  5. Qualcomm Snapdragon 800 Mobile Development Motherboard Replacement: étape 5, image 1 de 1
    • Pop out the back cover.

  6. Qualcomm Snapdragon 800 Mobile Development Motherboard Replacement, Motherboard: étape 6, image 1 de 3 Qualcomm Snapdragon 800 Mobile Development Motherboard Replacement, Motherboard: étape 6, image 2 de 3 Qualcomm Snapdragon 800 Mobile Development Motherboard Replacement, Motherboard: étape 6, image 3 de 3
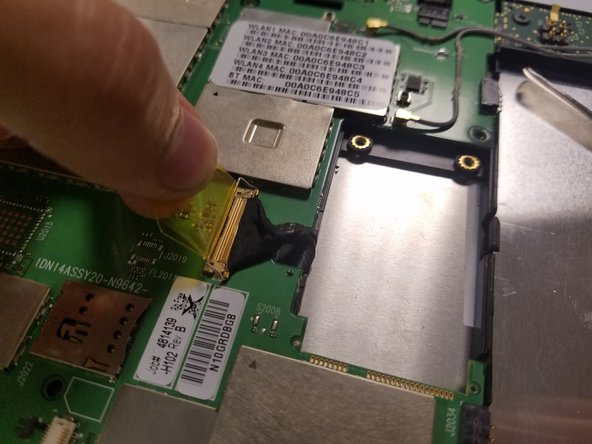
    • Start by disconnecting the cables attached to the motherboard

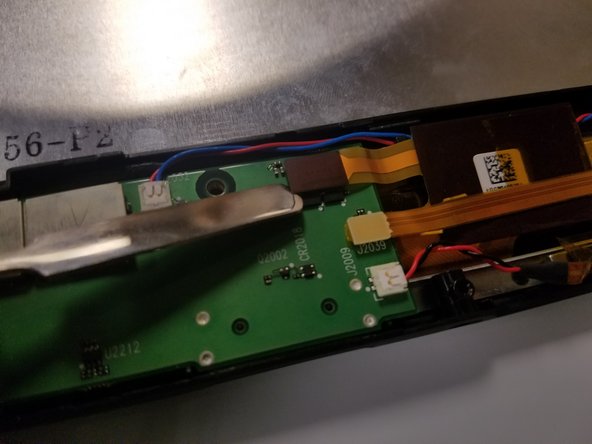
    • use the spudger to lift the connectors vertically off. They should pop off with relative ease

    • The last connector has a yellow tab. Pull up on the tab until the small metal catch lifts up. Then pull straight back to remove the connector from its socket.

  7. Qualcomm Snapdragon 800 Mobile Development Motherboard Replacement: étape 7, image 1 de 1
    • Using the Phillips PH1, remove all 6 of the 3x2.5mm screws (circled in red) holding the motherboard in place.

  8. Qualcomm Snapdragon 800 Mobile Development Motherboard Replacement: étape 8, image 1 de 1
    • Using the spudger lift the motherboard out of the tablet frame.

Conclusion

To reassemble your device, follow these instructions in reverse order.

Une autre personne a terminé cette réparation.

Jason

Membre depuis le 09/25/17

149 Réputation

1 tutoriel rédigé

Équipe

0 commentaires

Ajouter un commentaire

Nombre de vues :

Dernières 24 heures : 0

7 derniers jours : 0

30 derniers jours : 2

Total : 476