Cette version peut contenir des modifications incorrectes. Passez au dernier aperçu vérifié.
Ce dont vous avez besoin
-
Cette étape n’est pas traduite. Aidez à la traduire
-
Remove the six 7.9mm Phillips #0 screws on the back and bottom.
-
Remove the one 3.8mm Phillips #0 screw on the bottom.
-
Remove the two 7.5mm Phillips #0 screws on the back and bottom.
-
-
Cette étape n’est pas traduite. Aidez à la traduire
-
Remove 5.8mm Phillips #1 screw from the side button panel.
-
Slide the viewfinder all the way to the right and remove the 7.9mm Phillips #0 screw.
-
-
Cette étape n’est pas traduite. Aidez à la traduire
-
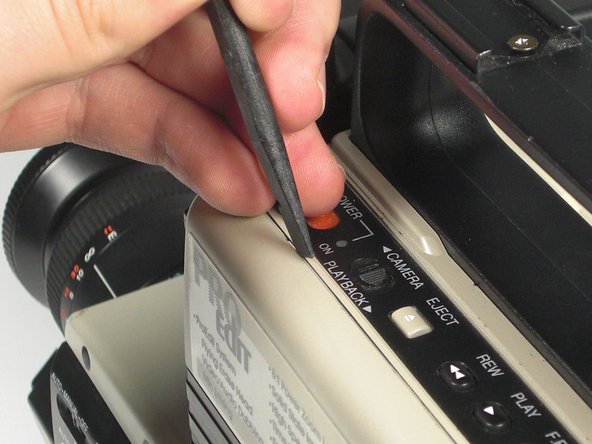
Pry along the seam on the top side near the buttons with a spudger.
-
-
-
Cette étape n’est pas traduite. Aidez à la traduire
-
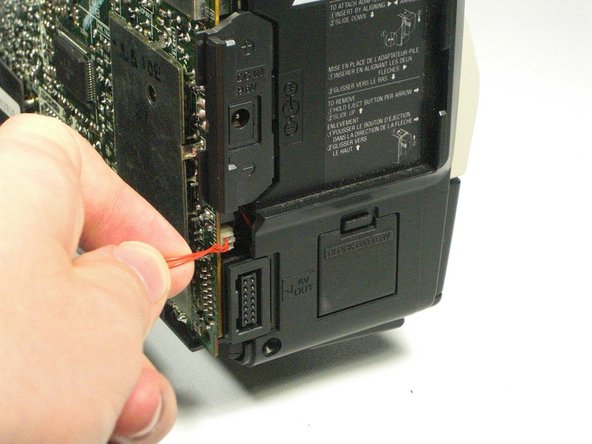
Pull the left panel away from the rest of the camcorder.
-
Unplug the red speaker cable located at the rear of the device.
-
-
Cette étape n’est pas traduite. Aidez à la traduire
-
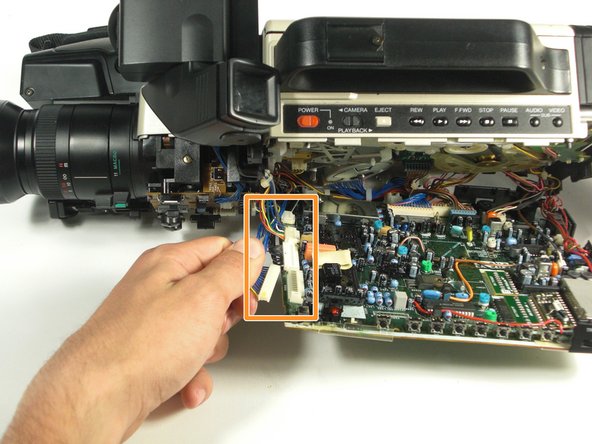
Pull back the plastic tabs along the edges of the motherboard.
-
Disconnect all the cables along the left side of the motherboard.
-
-
Cette étape n’est pas traduite. Aidez à la traduire
-
Disconnect all cables along the bottom of the motherboard.
-
Pull the motherboard away from the camcorder.
-
-
Cette étape n’est pas traduite. Aidez à la traduire
-
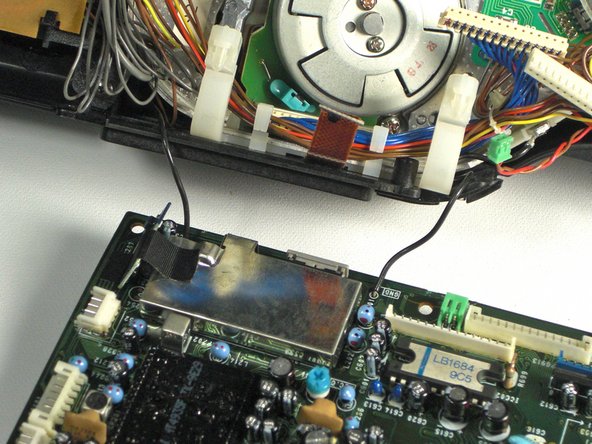
Desolder the two black wires holding the motherboard to the camcorder using a soldering iron.
-


Annulation : je n'ai pas terminé ce tutoriel.
Une autre personne a terminé cette réparation.
Équipe

Cal Poly, Team 5-20, Amido Winter 2011 Membre de l'équipe Cal Poly, Team 5-20, Amido Winter 2011
CPSU-AMIDO-W11S5G20
4 membres
7 tutoriels rédigés