Aller au contenu principal

RCA RCT6203W46 Rear Speaker Replacement

Ce dont vous avez besoin

  1. RCA RCT6203W46 Rear Speaker Replacement, Rear Speaker: étape 1, image 1 de 2 RCA RCT6203W46 Rear Speaker Replacement, Rear Speaker: étape 1, image 2 de 2
    • Remove these four 4 mm Phillips #00 screws.

  2. RCA RCT6203W46 Rear Speaker Replacement: étape 2, image 1 de 2 RCA RCT6203W46 Rear Speaker Replacement: étape 2, image 2 de 2
    • Run a spudger tool around the edge of the screen to loosen it and begin to pry upward.

    • The screen will be able to be removed once you see it pop up like it has in the photo.

    • There are wires attached to the back cover and screen so be careful not to pull them apart.

  3. RCA RCT6203W46 Rear Speaker Replacement: étape 3, image 1 de 3 RCA RCT6203W46 Rear Speaker Replacement: étape 3, image 2 de 3 RCA RCT6203W46 Rear Speaker Replacement: étape 3, image 3 de 3
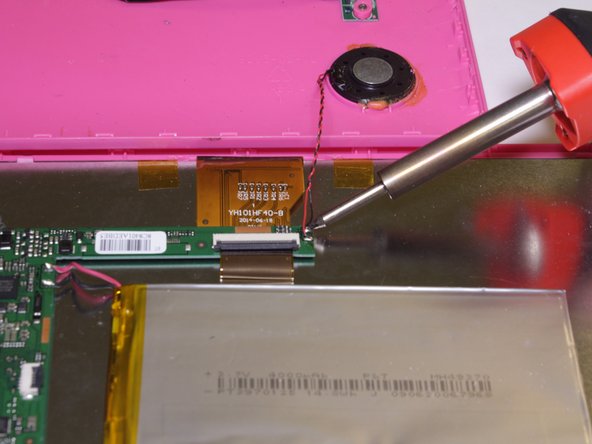
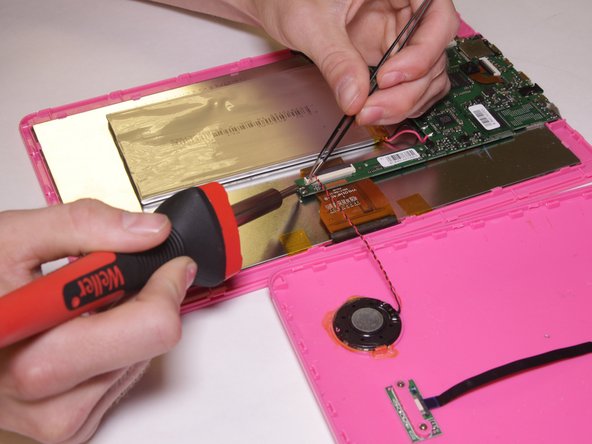
    • With a soldering iron, remove the wires from the circuit board.

    • Due to the size of the wires, tweezers may be necessary.

  4. RCA RCT6203W46 Rear Speaker Replacement: étape 4, image 1 de 1
    • Use a metal spudger to pry out the speakers from its housing.

Conclusion

To reassemble your device, follow these instructions in reverse order.

3 autres ont terminé cette réparation.

Nicholas Alexander

Membre depuis le 09/21/16

318 Réputation

2 tutoriels rédigés

Équipe

UC Davis, Team 1-2, Oliver Fall 2016 Membre de l'équipe UC Davis, Team 1-2, Oliver Fall 2016

UCD-OLIVER-F16S1G2

5 membres

4 tutoriels rédigés

0 commentaires

Ajouter un commentaire

Nombre de vues :

Dernières 24 heures : 1

7 derniers jours : 4

30 derniers jours : 4

Total : 355