Aller au contenu principal

RCA RCT6378W2 Screen Replacement

Tutoriel Archivé
Ce tutoriel est conservé uniquement à des fins de suivis historiques. Utilisez la version actuelle du tutoriel pour effectuer votre réparation.

Ce dont vous avez besoin

  1. RCA RCT6378W2 Screen Replacement, Screen Replacement: étape 1, image 1 de 1
    • Remove two 2.4mm x 4mm screws from bottom of the tablet with Phillips #00 Screwdriver.

  2. RCA RCT6378W2 Screen Replacement: étape 2, image 1 de 2 RCA RCT6378W2 Screen Replacement: étape 2, image 2 de 2
    • Remove back cover with lever tool, exposing the battery and motherboard.

  3. RCA RCT6378W2 Screen Replacement: étape 3, image 1 de 2 RCA RCT6378W2 Screen Replacement: étape 3, image 2 de 2
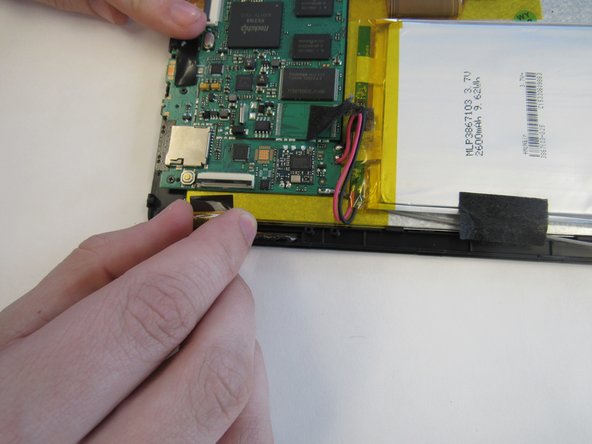
    • Using the tweezers, remove the black tape connecting the screen to the motherboard.

  4. RCA RCT6378W2 Screen Replacement: étape 4, image 1 de 2 RCA RCT6378W2 Screen Replacement: étape 4, image 2 de 2
    • Pull up the switch to remove the input connector.

  5. RCA RCT6378W2 Screen Replacement: étape 5, image 1 de 1
    • Heat the iOpener in the microwave, following the instructions provided with the tool. Lay the heated iOpener on the front screen for two minutes to soften the connection of the screen to the tablet.

  6. RCA RCT6378W2 Screen Replacement: étape 6, image 1 de 2 RCA RCT6378W2 Screen Replacement: étape 6, image 2 de 2
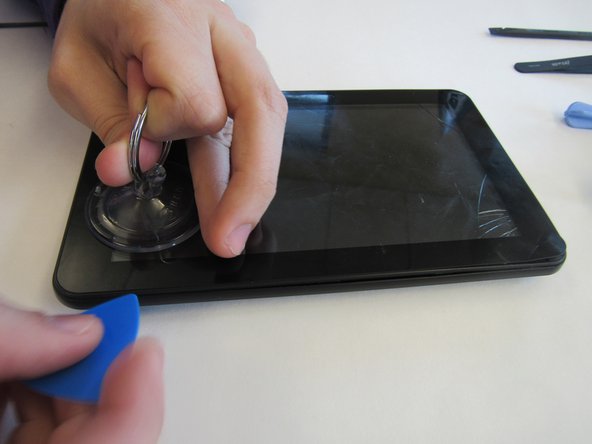
    • Use the suction cup and lever tool tool to pry the front screen from the tablet.

Conclusion

To reassemble your device, follow these instructions in reverse order.

2 autres ont terminé cette réparation.

mikayla

Membre depuis le 01/29/15

408 Réputation

2 tutoriels rédigés

Équipe

Clemson, Team 14-4, Shirley Spring 2015 Membre de l'équipe Clemson, Team 14-4, Shirley Spring 2015

CLEM-SHIRLEY-S15S14G4

6 membres

15 tutoriels rédigés

0 commentaires

Ajouter un commentaire

Nombre de vues :

Dernières 24 heures : 0

7 derniers jours : 6

30 derniers jours : 6

Total : 1,195