Cette version peut contenir des modifications incorrectes. Passez au dernier aperçu vérifié.
Ce dont vous avez besoin
-
Cette étape n’est pas traduite. Aidez à la traduire
-
Using a Torx T5 screwdriver, remove the ten 1/8 inch screws securing the back cover.
-
Remove the back cover.
-
-
Cette étape n’est pas traduite. Aidez à la traduire
-
Remove the seven screws holding the battery in place using a Phillips #0 screwdriver.
-
-
Cette étape n’est pas traduite. Aidez à la traduire
-
Unlock the ZIF connectors securing the right ribbon cable.
-
Carefully pull the two ribbon cables out of their sockets.
-
-
Cette étape n’est pas traduite. Aidez à la traduire
-
Use an opening tool to unlock the ZIF connector securing the white ribbon over the battery.
-
-
Cette étape n’est pas traduite. Aidez à la traduire
-
Carefully pull out the two connectors out of their sockets.
-
-
Cette étape n’est pas traduite. Aidez à la traduire
-
Pull the wide battery connector towards the battery to disconnect it from the motherboard.
-
-
Cette étape n’est pas traduite. Aidez à la traduire
-
Remove the battery from the laptop.
-
-
-
Cette étape n’est pas traduite. Aidez à la traduire
-
Using a Phillips #0 screwdriver, remove the two screws holding down the speaker.
-
-
Cette étape n’est pas traduite. Aidez à la traduire
-
Disconnect the wire by pinching with your fingers and pulling up.
-
-
Cette étape n’est pas traduite. Aidez à la traduire
-
Remove the three black rubber pads that cover the screws holding the fan.
-
-
Cette étape n’est pas traduite. Aidez à la traduire
-
Use the Phillips #0 screwdriver to remove the three 1/4 inch screws.
-
-
Cette étape n’est pas traduite. Aidez à la traduire
-
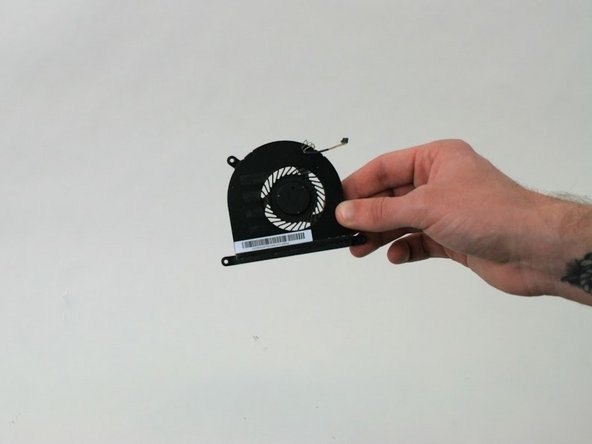
Disconnect the wire that goes from the fan into the white connector, but leave the wire attached to the fan.
-
-
Cette étape n’est pas traduite. Aidez à la traduire
-
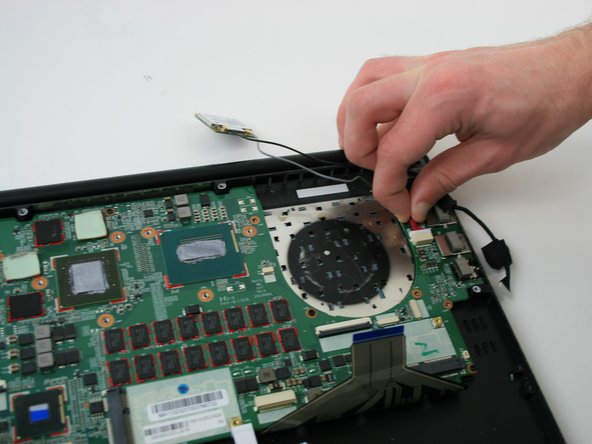
On the left and right sides of the motherboard, remove the black tape holding down the wires.
-
-
Cette étape n’est pas traduite. Aidez à la traduire
-
Using a Phillips #0 screwdriver, remove the single 4.5mm long screw holding down the network card.
-
-
Cette étape n’est pas traduite. Aidez à la traduire
-
Pull out the network card from its connector on the motherboard.
-
-
Cette étape n’est pas traduite. Aidez à la traduire
-
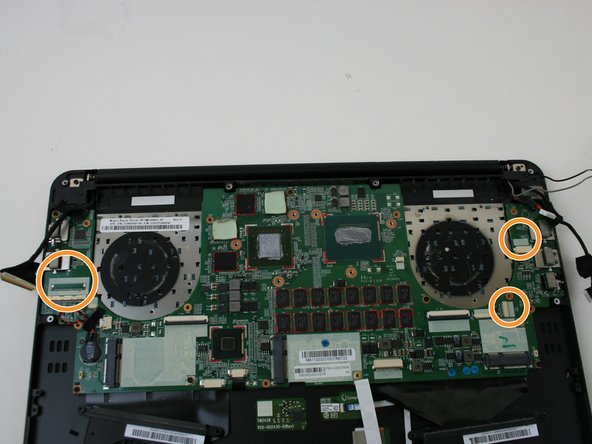
Disconnect the 2 wires on right side and the 1 wire on the left that holds the motherboard down. To remove the two right wires pull them straight out of their connectors. To remove the left wire pull up on the metal clamp and pull the wire straight out.
-
-
Cette étape n’est pas traduite. Aidez à la traduire
-
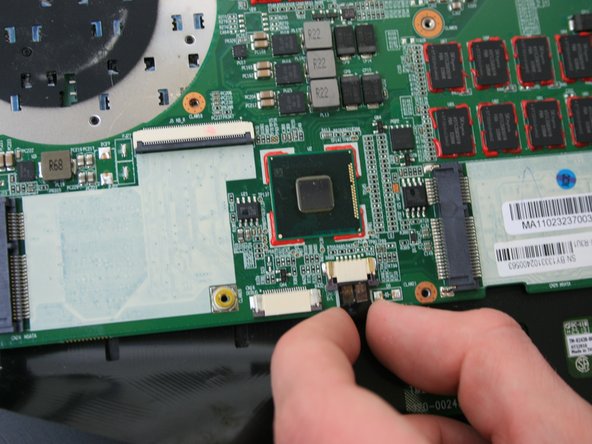
Remove the wire located close to left hand side black ribbon cable. Pull down on both sides of the connector to remove.
-
-
Cette étape n’est pas traduite. Aidez à la traduire
-
Using a Phillips #0 screwdriver, remove the nine 5 mm screws holding down the motherboard to the laptop case.
-


Annulation : je n'ai pas terminé ce tutoriel.
5 autres ont terminé cette réparation.

Équipe

Linn Benton Community College, Team S2-G6, Karnes Fall 2018 Membre de l'équipe Linn Benton Community College, Team S2-G6, Karnes Fall 2018
LBCC-KARNES-F18S2G6
4 membres
9 tutoriels rédigés
I need the screws is there any way I can get them?
Lupita Muro - Réponse