Aller au contenu principal

Razer Huntsman TE Keycaps Replacement

Ce dont vous avez besoin

  1. Razer Huntsman TE Keycaps Replacement, Keycaps: étape 1, image 1 de 2 Razer Huntsman TE Keycaps Replacement, Keycaps: étape 1, image 2 de 2
    • Identify the correct type of key to replace.

    • Keys such as "Shift" and "Enter" have multiple slots, and each slot has a different shape, so be sure to pick the correct one.

  2. Razer Huntsman TE Keycaps Replacement: étape 2, image 1 de 2 Razer Huntsman TE Keycaps Replacement: étape 2, image 2 de 2
    • Insert the keycap puller so that the teeth at the end of the puller sit beneath the keycap.

    • Apply enough upwards force for the keycap to pop out.

  3. Razer Huntsman TE Keycaps Replacement: étape 3, image 1 de 2 Razer Huntsman TE Keycaps Replacement: étape 3, image 2 de 2
    Outil utilisé dans cette étape :
    Microfiber Cleaning Cloths
    $3.99
    J'achète
    • Apply 91% isopropyl alcohol to microfiber cloth.

    • Wipe around the key.

    • Make sure that there is no residual stickiness on the key.

  4. Razer Huntsman TE Keycaps Replacement: étape 4, image 1 de 2 Razer Huntsman TE Keycaps Replacement: étape 4, image 2 de 2
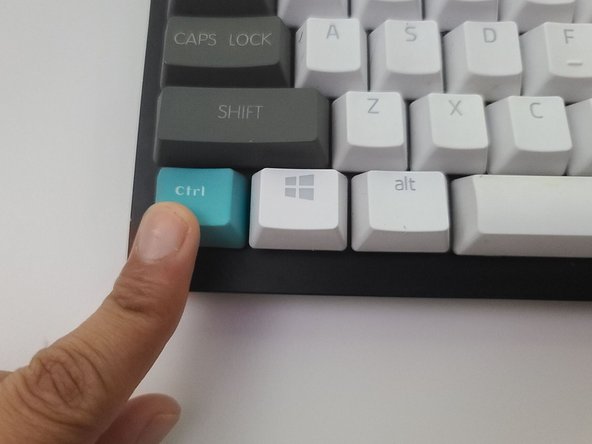
    • Position the replacement keycap above the keyslot.

    • Using your finger, apply downwards force to the keycap until you hear it snap into place.

Conclusion

Use a diagnostic tool such as an online keyboard tester to test the key.


Lucas de Castro

Membre depuis le 02/24/21

109 Réputation

1 tutoriel rédigé

Équipe

0 commentaires

Ajouter un commentaire

Nombre de vues :

Dernières 24 heures : 4

7 derniers jours : 10

30 derniers jours : 38

Total : 1,942