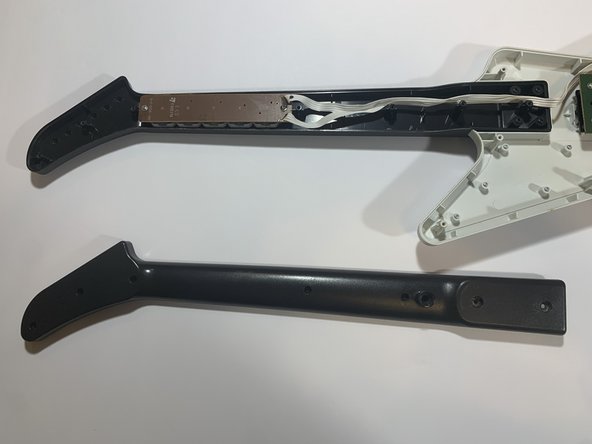
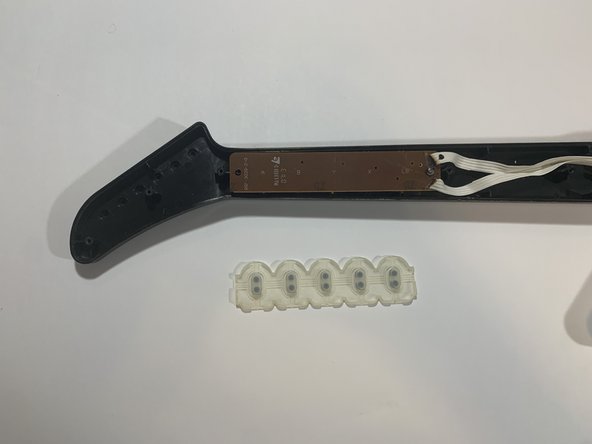
Aller au contenu principal

RedOctane X-Plorer Rubber Button Strip Replacement

Ce dont vous avez besoin

  1. RedOctane X-Plorer Rubber Button Strip Replacement, Rubber Button Strip: étape 1, image 1 de 2 RedOctane X-Plorer Rubber Button Strip Replacement, Rubber Button Strip: étape 1, image 2 de 2
    • Remove the controller's strap, which will be attached at the points in the red circles.

    • If your controller does not have a strap, move to the next step.

  2. RedOctane X-Plorer Rubber Button Strip Replacement: étape 2, image 1 de 1
    • Remove all nine 12mm screws around the perimeter of the body of the controller, using the Phillips #2 screwdriver.

    • Remove the two 15mm screws near the neck of the controller, using the Phillips #2 screwdriver.

  3. RedOctane X-Plorer Rubber Button Strip Replacement: étape 3, image 1 de 2 RedOctane X-Plorer Rubber Button Strip Replacement: étape 3, image 2 de 2
    • Using your hands, remove the body shell.

  4. RedOctane X-Plorer Rubber Button Strip Replacement: étape 4, image 1 de 1
    • Remove all seven 12mm screws on the neck of the controller using the Phillips #2 screwdriver.

  5. RedOctane X-Plorer Rubber Button Strip Replacement: étape 5, image 1 de 2 RedOctane X-Plorer Rubber Button Strip Replacement: étape 5, image 2 de 2
    • Using your hands, remove the top shell of neck.

  6. RedOctane X-Plorer Rubber Button Strip Replacement: étape 6, image 1 de 1
    Outil utilisé dans cette étape :
    Flathead 1.5 mm Screwdriver
    $5.49
    J'achète
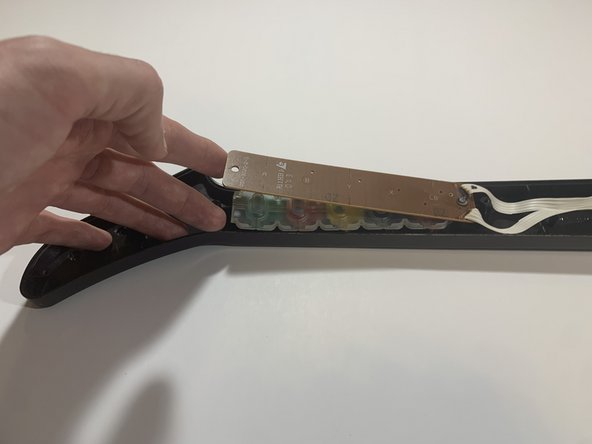
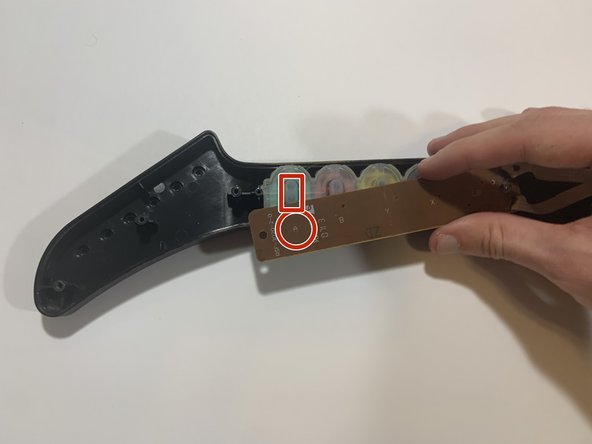
    • Remove the left 1.5mm mm screw (as shown) on the key sensor board, using the 1.5mm flathead screwdriver.

    • Do not remove the other (right-side) screw on key sensor board, as this can cause damage to the circuitry.

  7. RedOctane X-Plorer Rubber Button Strip Replacement: étape 7, image 1 de 2 RedOctane X-Plorer Rubber Button Strip Replacement: étape 7, image 2 de 2
    • Using your hands, remove the rubber button strip.

  8. RedOctane X-Plorer Rubber Button Strip Replacement: étape 8, image 1 de 2 RedOctane X-Plorer Rubber Button Strip Replacement: étape 8, image 2 de 2
    • Using your hands, insert the replacement strip underneath the key sensor board.

  9. RedOctane X-Plorer Rubber Button Strip Replacement: étape 9, image 1 de 2 RedOctane X-Plorer Rubber Button Strip Replacement: étape 9, image 2 de 2
    • Align the black dots on the rubber strip with the corresponding button indicator before rescrewing key sensor board.

    • The first button will be "A" on Xbox and Wii, and "X" on Playstation.

Conclusion

To reassemble your device, follow these instructions in reverse order.

Stephen Haning

Membre depuis le 09/30/21

169 Réputation

1 tutoriel rédigé

Équipe

0 commentaires

Ajouter un commentaire

Nombre de vues :

Dernières 24 heures : 0

7 derniers jours : 1

30 derniers jours : 13

Total : 221