Il est possible que cette traduction ne reflète pas les dernières mises à jour du tutoriel source. Aidez à mettre à jour la traduction ou bien consultez le tutoriel source.
Introduction
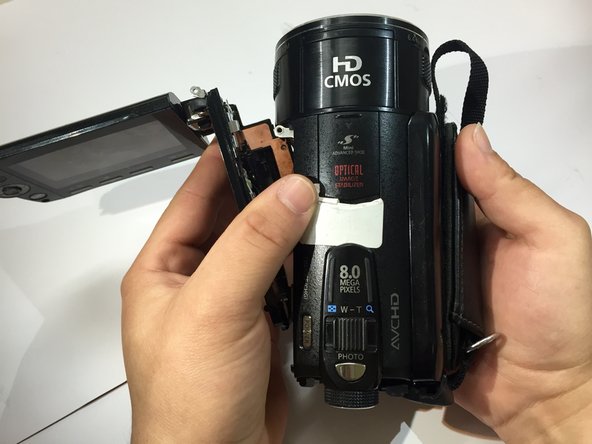
Avez-vous un Canon Vixia HF S10 avec un écran fissuré, cassé, rayé ou qui a besoin d'un remplacement? Pas de soucis! Ce guide vous donnera des instructions claires et vous montrera étape par étape comment démonter votre caméscope pour retirer l'écran LCD.
Ce dont vous avez besoin
-
-
Retournez le caméscope et retirez les trois vis Phillips 3x4 mm fixant le boîtier en plastique noir.
-


Pour remonter votre appareil, suivez ces instructions dans l'ordre inverse.
Pour remonter votre appareil, suivez ces instructions dans l'ordre inverse.
Annulation : je n'ai pas terminé ce tutoriel.
Une autre personne a terminé cette réparation.
Merci à ces traducteurs :
20%
[deleted] nous aide à réparer le monde ! Vous voulez contribuer ?
Commencez à traduire ›
Équipe

Sam Houston State, Team 13-1, Blackburne Winter 2015 Membre de l'équipe Sam Houston State, Team 13-1, Blackburne Winter 2015
SHSU-BLACKBURNE-W15S13G1
4 membres
9 tutoriels rédigés
2 commentaires
The trick to reconnecting the orange ribbon is to bend back the ribbon from its natural position so it sticks out a bit then to put the plastic body almost back in position, leaving the gap open like a partially opened book. The ribbon and socket should be almost aligned. The gap should be just enough to see in and poke about with a small tweezers. I needed a decent light and glasses to carefully align the ribbon into its receptacle. I used a small fine pair of tweezers to push (not grab!) the ribbon into place. Make sure the ribbon is correctly inserted and aligned then carefully gently flip the securing clip with the the tweezer and moving along the clip push it gently to secure the ribbon. Dont push too hard, it wont help! Next carefully manipulate the shell over the main body making sure it is aligned at back of the camera with the screw holes all lined up. Put just a couple of screws in to stabilize the loose shell then pop in the battery to check operation of the screen and buttons.