Il est possible que cette traduction ne reflète pas les dernières mises à jour du tutoriel source. Aidez à mettre à jour la traduction ou bien consultez le tutoriel source.
Introduction
Ce guide vous montrera comment remplacer l'écran LCD sur le panneau arrière.
Ce dont vous avez besoin
-
-
Poussez la languette grise vers le bas, à l'aide d'un spudger si nécessaire, et la batterie sortira.
-
-
-
Il y a un total de six vis qui doivent être retirées à l'aide du tournevis Philips n ° 000.
-
Selon la première photo: il y a une vis à tête Phillips de 4,9 mm sur le côté gauche de la caméra.
-
Comme sur l'image deux: au bas de la caméra, il y a trois vis à tête Philips de 3,4 mm; ceux-ci sont situés sur la zone la plus sombre du boîtier.
-
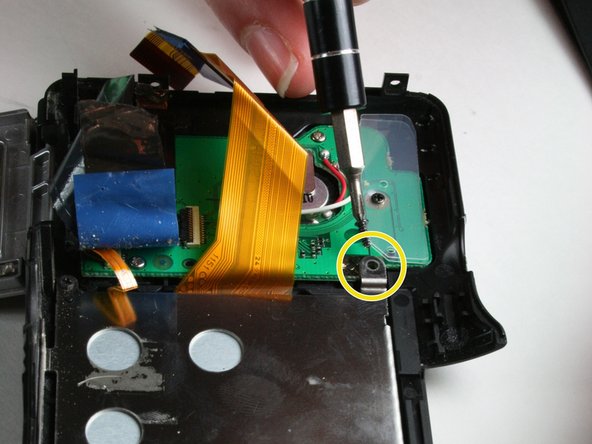
Comme sur l'image trois: il y a deux vis à tête Phillips de 5,3 mm sur le côté droit, une sous le couvercle USB.
-
-
-
-
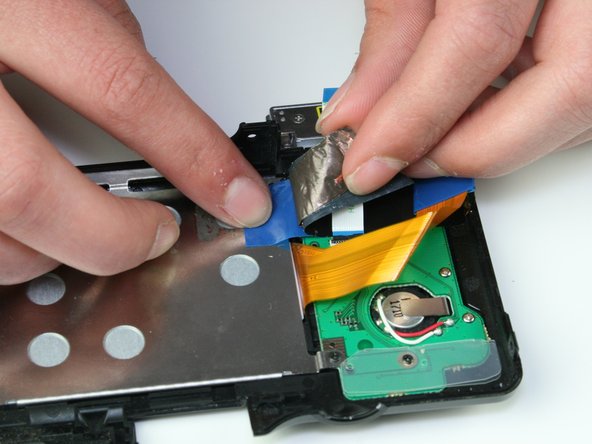
Comme sur la première photo: décollez la bande noire.
-
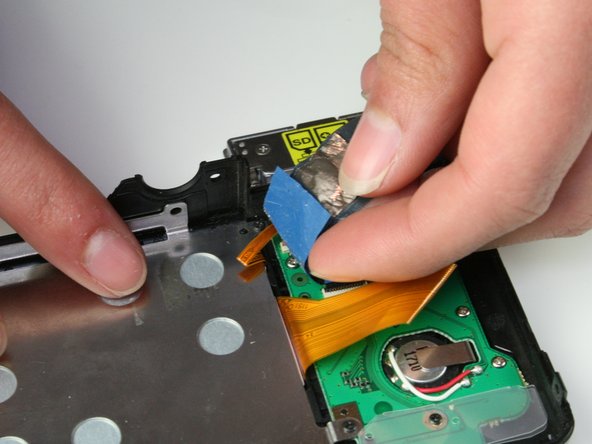
Comme sur l'image deux: décollez la bande de cuivre.
-
Comme sur l'image trois: décollez le ruban bleu.
-


Pour remonter votre appareil, suivez ces instructions dans l'ordre inverse.
Pour remonter votre appareil, suivez ces instructions dans l'ordre inverse.
Annulation : je n'ai pas terminé ce tutoriel.
4 autres ont terminé cette réparation.
Merci à ces traducteurs :
88%
[deleted] nous aide à réparer le monde ! Vous voulez contribuer ?
Commencez à traduire ›

Équipe

Colorado Springs, Team 9-1, Panko Spring 2015 Membre de l'équipe Colorado Springs, Team 9-1, Panko Spring 2015
UCCS-PANKO-S15S9G1
3 membres
12 tutoriels rédigés
5 commentaires
Same thing happened to me. Avoid purchasing DHcamera replacements, either the small ribbon is missing or the large ribbon is too short. In addition, the model missing the small ribbon is the glass only, and does not have the metal housing.
BTW, your instructs are perfect!!! Good work. Now, if I only knew where to find the right part.
I have the same problem. Bought a LCD screen in Ebay and sent from China. The backlight is missing.
It seems like complete assembly screen is very hard to find. Searched in Google but nothing. The problem with my camera's screen is that borders and corners had been becoming dark progressively, perhaps to backlight problem.
Perfect instructions/guide! Only bit that may be missing is highlighted by the questions above - most replacement screens that you can buy online come without the silver metal casing and backlight.
The additional step therefore is to gently pull the top of the silver frame apart - perhaps a thin chisel screwdriver or blade will help ease it out. Then gently prise the old LCD screen from the white coloured backlight. I used a blade to start the seperation. Then I just laid the new screen on and pushed the silver flame back together