Introduction
Consultez ce tutoriel pour remplacer l'écran fissuré ou cassé de votre Samsung Galaxy A50.
Remarque : le lecteur d'empreintes digitales ne fonctionnera peut-être plus après le remplacement de l'écran. Les patchs de sécurité installés après septembre 2020 ne sont pas compatibles avec cette réparation.
Ce tutoriel explique comment remplacer juste l'écran tout en laissant en place le châssis d'origine et la carte mère en place. Cependant, quelques écrans de remplacement de ce téléphone comprennent un châssis préinstallé et nécessitent une procédure différente. Assurez-vous de disposer de la bonne pièce avant de vous lancer dans la réparation.
Avant de démonter votre téléphone, déchargez la batterie en dessous de 25 %. Une batterie accidentellement perforée risque de prendre feu et/ou d’exploser, mais les risques sont moindres avec une batterie déchargée.
Vous aurez besoin d'adhésif de remplacement pour rattacher certains composants au moment de remonter l'appareil.
Ce dont vous avez besoin
-
-
Insérez un outil ou un embout éjecteur de carte SIM, ou bien un trombone déplié dans le trou du tiroir SIM, à gauche du téléphone.
-
Appuyez fermement pour éjecter le tiroir.
-
Retirez le tiroir de carte SIM.
-
-
-
Commencez par éteindre votre téléphone.
-
Chauffez un iOpener et posez-le sur la coque arrière pour ramollir l'adhésif.
Überhitzen das Gerät nicht, das AMOLED-Display und der Akku sind sehr hitzeempfindlich.
Nur ein kleiner Tippfehler-Hinweis: (Überhitze das Gerät nicht)
OK, korrigiert. Das kann übrigens jeder machen, iFixit ist ein Wiki.
VauWeh -
how long should the heat pack be used for?
The heat pack is in the wrong position in photo - the glue that you are heating is actually all around the edge of the phone!
-
-
-
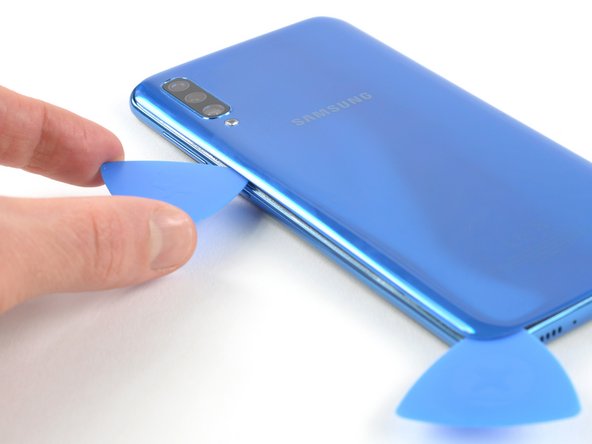
Insérez un médiator en bas de votre téléphone, à côté du port USB-C.
-
Faites glisser le médiator vers le coin inférieur gauche.
It would be much better to attempt the opening from the top of the phone as there is a delicate flex PCB antenna at the bottom just where you stick the pick in that can get damaged.
Wish I would have read your comment before, since I destroyed that cable while opening my phone... It's a cable for microphone, speaker and headphone jack. Replacing it was a real pain because it's glued but luckily I was able to find a spare.
H.W -
-
-
-
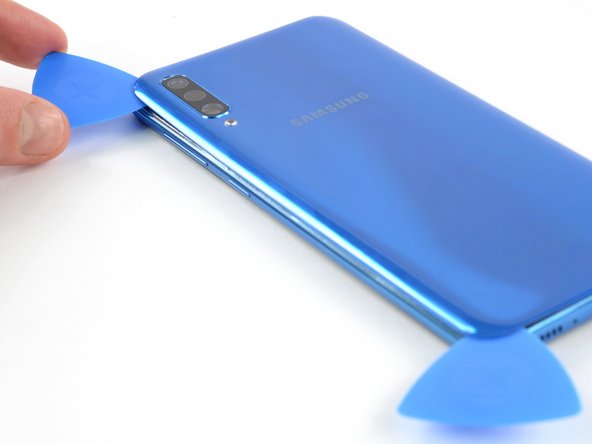
Ôtez la coque arrière.
Very straight forward and simple replacement to do with the right tools, I used my hot air gun work station so this might have been alot easier for me then someone without one? Hair dryers work too, just in case a hot airgun station is not available to you dont worry you can do this repair without, but some form of heat will make life alot simpler :)
-
-
-
Dévissez les 13 vis cruciformes #00 de 4 mm de long.
To separate the screen from the mid-frame a few pointers I picked up from a video
1. use a hard pry tool such as iFixit Opening Tool
2. start on a long side about quarter way down from corner
3. work around the frame careful not hook the button assembly -
-
-
-
Faites levier avec une spatule (spudger) sur le connecteur de la batterie pour la débrancher de sa prise.
-
-
-
Avec une spatule, faites levier à la verticale sur la caméra frontale pour la débrancher de sa prise.
-
-
-
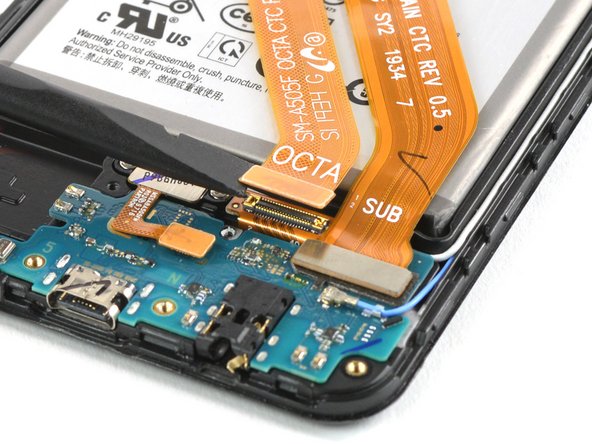
Faites levier sur les nappes d'interconnexion et de l'écran avec l'extrémité plate d'une spatule pour les débrancher de la carte mère.
-
Repliez soigneusement les deux nappes de côté.
-
-
-
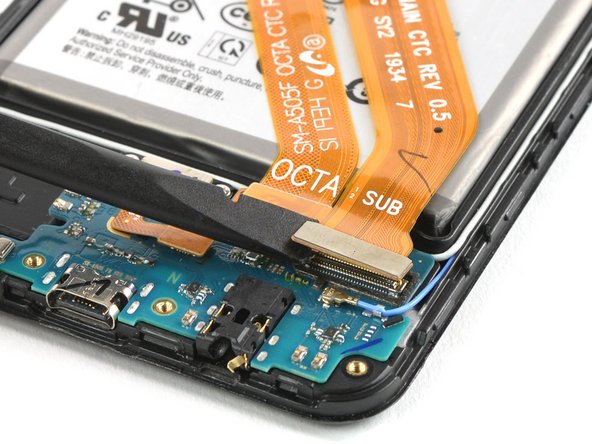
Prenez la pointe de la spatule pour détacher le connecteur de l'écran au-dessus de la carte fille.
-
-
-
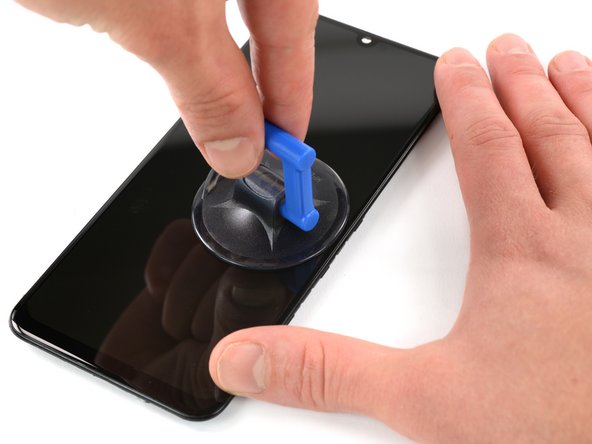
Faites chauffer un iOpener et posez-le sur l'écran pendant au moins deux minutes pour ramollir l'adhésif en dessous.
-
Posez une ventouse près du bord droit de l'écran et tirez fermement dessus pendant 30 secondes pour faire céder l'adhésif.
-
-
-
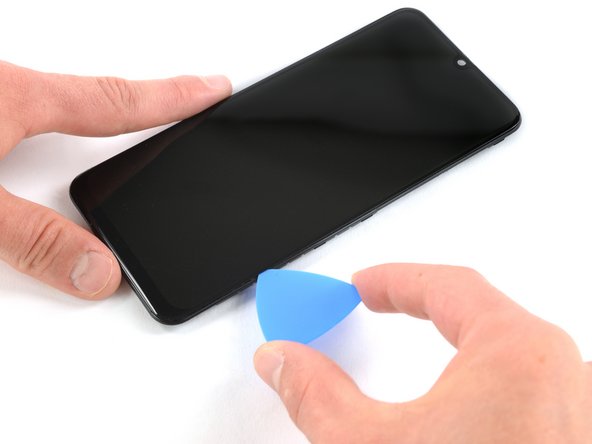
Posez un iOpener chauffé sur l'écran pour que l'adhésif en dessous ramollisse.
-
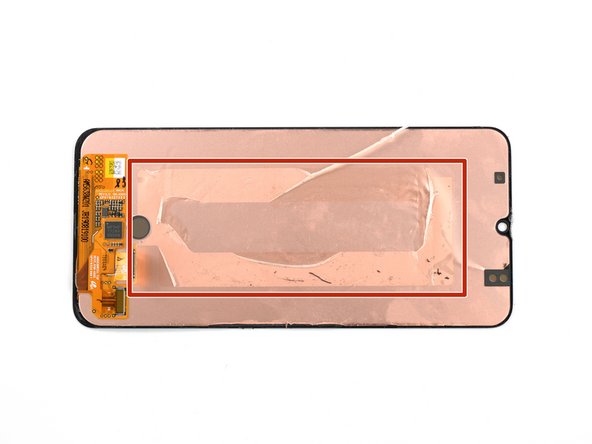
Pendant que vous attendez, prenez note de la couche rectangulaire d'adhésif au dos de l'écran.
Beste
Hoe kan ik de achterkant van het scherm bekijken wanneer ik deze pas loskrijg twee stappen later?
Met vriendelijke groeten
Sébastien
-
-
-
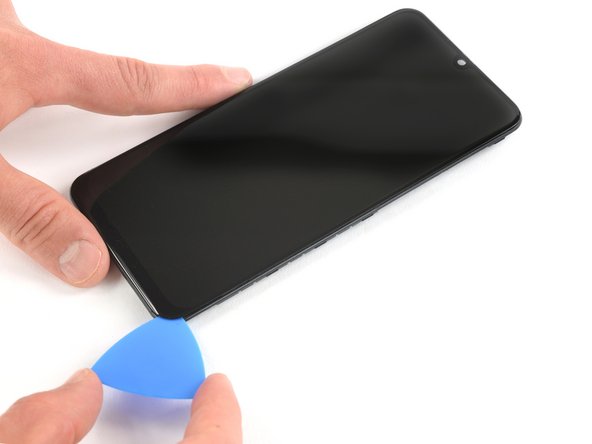
Insérez une carte en plastique du côté gauche de l'écran que vous avez commencé à détacher.
-
Appuyez sur la carte et faites-la glisser d'avant en arrière pour couper tout l'adhésif.
-
Une fois que vous avez détaché l'adhésif, ôtez les quatre médiators des coins.
-


Si possible, allumez votre téléphone et testez votre réparation avant de poser du nouvel adhésif et de sceller à nouveau votre téléphone.
Le meilleur moyen de fixer le nouvel écran est d'appliquer une couche de ruban adhésif double-face prédécoupé à l'arrière de l'écran.
Pour remonter votre appareil, suivez ces instructions en sens inverse. Nettoyez les zones d'adhérence avec de l'alcool isopropylique (>90 %) et posez une nouvelle couche d'adhésif là où c'est nécessaire.
Apportez vos déchets électroniques à un recycleur certifié R2 ou e-Stewards.
La réparation ne s’est pas déroulée comme prévu ? Consultez nos conseils basiques de diagnostic ou notre communauté de réponses pour obtenir de l’aide.
Annulation : je n'ai pas terminé ce tutoriel.
70 autres ont terminé cette réparation.
Merci à ces traducteurs :
100%


Ces traducteurs nous aident réparer le monde ! Vous voulez contribuer ?
Commencez à traduire ›


24 commentaires
considering it is embedded within the display assembly, any chance that the fingerprint sensor is affected by replacing the screen?
Hi Steve, the fingerprint sensor is not embedded within the display as you can see here. The sensor is fixed under the frame and can be seen through the hole in the frame.
Hey, I followed this procedure to replace my screen and now, whenever I am charging my phone it keeps on rebooting itself every 3-5 seconds, or even when it’s not charging and is just idle. I tried to open it up and realign everything however it didn’t help and kept rebooting. So I am not quite sure what I did wrong and was wondering if you have ever experienced that, and what to do about it.
sounds like you may have damaged the battery in some way, try replacing the battery!
Which one is easier way to replace the screen on a50? With or without frame? Thank you.
With the frame. Without the frame you have to follow this guide. With the frame you only have to remove all the internals and place on the new mid-frame that is pre-attached to the new display.
BAM5 -
With frame is significantly easier (but more expensive)
jcage19 -
I replaced the screen with a frame. Yes, it was pretty easy. Few things I would like to note up: the back cover was in this particulary phone pretty tight. I warmed it and tried to extract, but still it bended enough to crack the paint inside. Kind of spider web crackling if you get my idea. So try not to bend it too much. Other thing was with the ear speaker. It was placed on a “cradle” or “hub”, dont know exact word, but anyway the speaker came out in two pieces. Adhesive tape inside it was not so strong. I could see the electric wires inside. So when taking it off, pry it from beneath, not from side. I put the ear piece back together and it was not harmed.
One more question about this. I hope you have experience about it. The finger print sensor doesn’t work with new screen. It took daughterboard out and I projected the brightest led through the finger print sensor hole. I was in dark toilet. No light whatsoever came thorough. And this finger print sensor technique is optical. I paid 66e from this screen from China. I thought you would get a decent one with that price. Has this happened anyone?
A friend has given me A50 Ear speaker not working on calls, I cant hear them they can hear me.
Tried tests receive dosent give dial tone.
apparently had new screen (not fitted by me) do i need to replace complete new screen or just ear piece Speaker?
any help gratefull.
Try just with new ear piece first, its cheaper. (By now you propably already did…) the ear piece is a separated component from screen.
I went through this repair and when I powered it on, the LCD came on, but there was no touch. Thinking it was just a defective LCD, I sent it back and got a replacement; the replacement they sent me didn’t come with a midframe, but didn’t respond to touch either (one of the comments above said “if you change the screen without a midframe, it will not work. “). I ordered a new cable and STILL no touch. Is it possible for the port on the board to be bad? The LCD and Digitizer are together on the same cable, but one works and the other doesn’t. Is there something (like the aforementioned midframe) that causes the digitizer not to function, but allows the LCD to?
Hello I have this question / problem, too. Could anybody please help us?
Try power on safe mode. Triple check cables. Understand that woth vary bad luck you really got defective screens. I’m done with buying screens from china. Getting perfect quality screen is like a lottery.
Let me guess… you insist we BUY an Iopener… %#*@ half this repair read was advertising. Annoying as F&^%#
Hi @nicole, in this guide the iOpener is used, but a hair dryer or heat gun could also be used.
I'm sorry that your repair didn't worked. Have you tried some basic troubleshooting, or asked our Answers community for help?
I accidentally damaged the “E4” antenna at the bottom while opening it, as you can see here https://i.imgur.com/XfvVt3Q.png
What was this antenna for? Where can I get a replacement?
What adhesive do I need for the back cover? Is a regular double-sided tape enough? Thanks.
Hi @knezi! Yes, regular thin double-sided tape works fine. In our store we offer also pre-cut tapes for your use: Tesa 61395 Tape
I connected tft display to my a50 and the light underneath the display works but the display itself doesn't and also this is the second display that i tried the first one was amoled from aliexpress and it worked for like a month and then i once placed it on the table and only the touch part of the display worked but it didn't show anything
Hii, I tried to fix new screen in samsung A50 and now the screen shows nothing.