Il est possible que cette traduction ne reflète pas les dernières mises à jour du tutoriel source. Aidez à mettre à jour la traduction ou bien consultez le tutoriel source.
Introduction
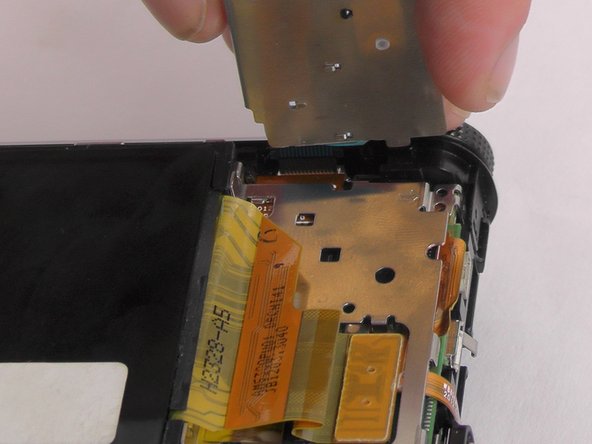
Ce guide donnera à l'utilisateur des instructions étape par étape sur la façon de remplacer l'écran de la caméra.
Ce dont vous avez besoin
-
-
Retirez d'abord la batterie et la carte SD
-
Utilisez ensuite le tournevis pour retirer les 6 vis qui doivent être retirées pour enlever le boîtier extérieur.
-
2 vis sont situées en bas.
-
2 vis sont situées sur le côté gauche (près du port HDMI).
-
2 vis sont situées sur le côté droit (côté opposé du port HDMI).
-
-


Pour remonter votre appareil, suivez ces instructions dans l'ordre inverse.
Pour remonter votre appareil, suivez ces instructions dans l'ordre inverse.
Annulation : je n'ai pas terminé ce tutoriel.
2 autres ont terminé cette réparation.
Merci à ces traducteurs :
88%
[deleted] nous aide à réparer le monde ! Vous voulez contribuer ?
Commencez à traduire ›
Équipe

USF Tampa, Team 12-4, Eyestone Spring 2016 Membre de l'équipe USF Tampa, Team 12-4, Eyestone Spring 2016
USFT-EYESTONE-S16S12G4
4 membres
8 tutoriels rédigés
2 commentaires
I previously mentioned that I had a sticky substance seeping from my camera. I spent quite a long time, using acetone to remove this fluid stuff from the LCD and the clear screen which was stuck to the LCD. It was not an easy task because of the quick evaporation of the acetone. Now, must I stick the LCD and the part/clear lens together? If so, with what glue? The second part to my question is that there was a second plate (?) with a rubbery surface on one side and I did not notice which side faces the lens because it fell out before I noticed it, rubber or plain metal? Any help will be appreciated. :-(
Is it normal from such a renowned company? I even got some instability in installed programs.