Introduction
Ce guide montre comment remplacer l'assemblage électrique d'un Dremel 4000.
Ce dont vous avez besoin
-
-
Commencez par retirer le couvercle du boîtier en le dévissant.
-
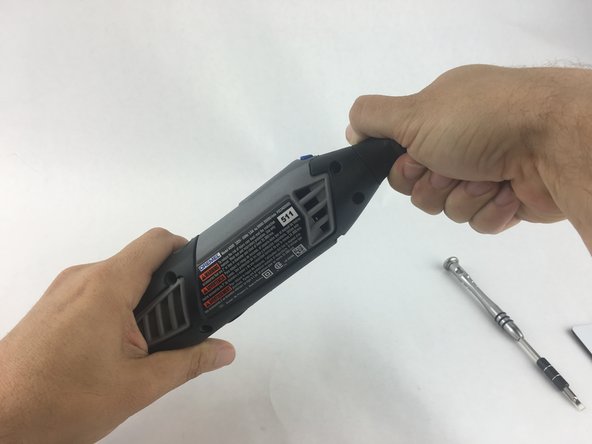
Ensuite, dévissez l'écrou de la pince de serrage maintenant exposé tout en maintenant enfoncé le bouton de verrouillage de l'arbre.
-
-
-
-
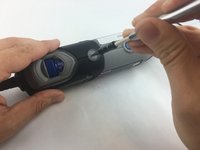
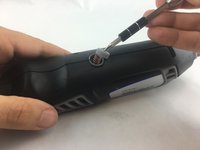
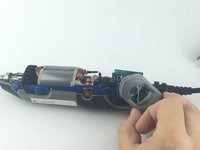
Pour dégager l'accès à l'ensemble électrique, retirez le capuchon du cadran à vitesse variable et le levier d'alimentation bleu, et mettez-les de côté.
-
-
-
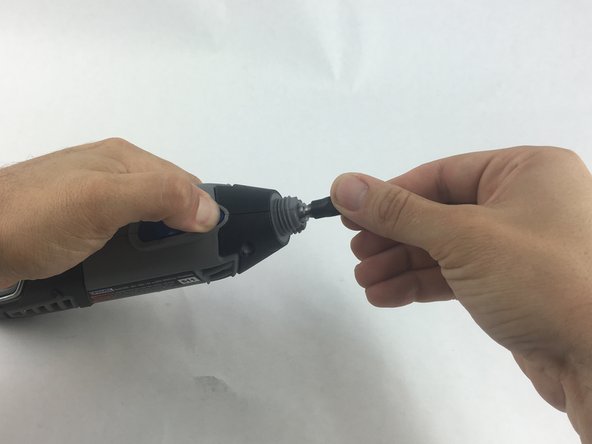
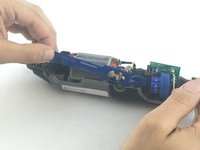
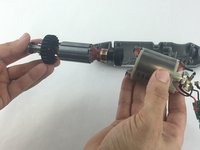
Tirez prudemment sur le puits pour le sortir du boîtier.
-
-
-
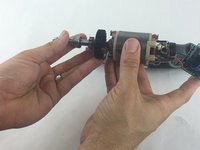
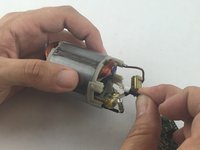
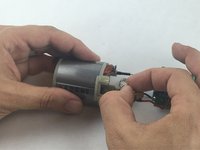
Tenez fermement l'assemblage de terrain dans une main, et tirez doucement sur les fils rouge et noir qui relient l'assemblage électrique à l'assemblage de terrain.
-


Pour remonter votre appareil, suivez ces instructions dans l'ordre inverse.
Pour remonter votre appareil, suivez ces instructions dans l'ordre inverse.
Annulation : je n'ai pas terminé ce tutoriel.
26 autres ont terminé cette réparation.
Merci à ces traducteurs :
100%

Schwarzer nous aide à réparer le monde ! Vous voulez contribuer ?
Commencez à traduire ›
Équipe

USF Tampa, Team 15-4, Remmell Spring 2016 Membre de l'équipe USF Tampa, Team 15-4, Remmell Spring 2016
USFT-REMMELL-S16S15G4
4 membres
13 tutoriels rédigés
15 commentaires
One of the brush holders has a component...small capacitor... ten cent part. If somebody can identify the value of the component, I could fix mine now that I've replaced the control board and still won't start. I shorted across the component and suddenly came to life.
DF110S 110c Thermal Fuse 16A 250V
“Thermal fuse DF is an one shot device, after operating function have to be replaced.”
Anyone with info about the third wire (on mine is blue ending with a small copper clip) serves? This is connected off of the switch, labeled W5 on the circuit board. [Edit. It is a ground] I suspect it is a feed back wire for speed sensor? But where does it attach? Some wear on the abovementioned capacitor crossing one of the brushes. Anny ideas?
You see the copper bushing slot at the top of the picture (next to the guy’s index finger) from step 9? Directly underneath it where the slot sits, there’s a tiny notch in the gray frame. Once you pull off the bushing slot from the frame (if you haven’t already), slide the small copper clip (from your 3rd blue wire) onto that notch. Then you push the bushing slot back onto the frame where it was. Essentially, the copper clip is “grounded” to that bushing slot.
An even better photo in step 11 showing the copper clip on the blue wire located beneath the copper brush holder
D Lee -