Introduction
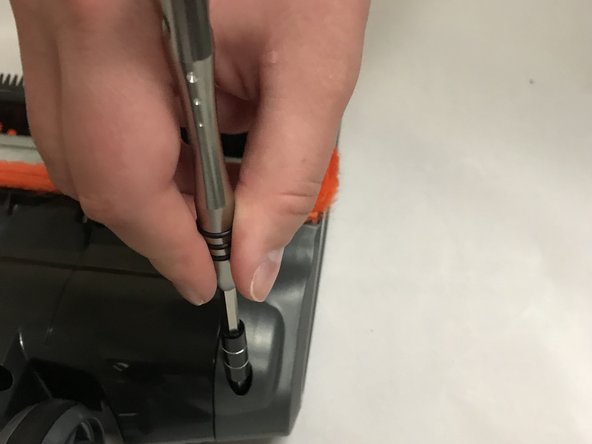
Ce guide de remplacement utilise un spudger en métal, un tournevis Torx T20 et un grand outil d'ouverture en plastique. Ce guide montrera à l'utilisateur comment ouvrir le boîtier de l'appareil, accéder à la bande du rouleau brosse et remplacer la bande.
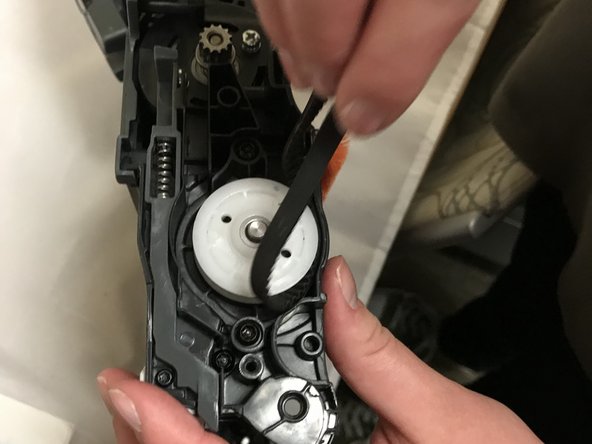
ATTENTION : Soyez prudent lorsque vous utilisez le spudger en métal, car les bords de l'outil sont tranchants et peuvent vous couper si vous ne faites pas attention.
Ce dont vous avez besoin
-
-
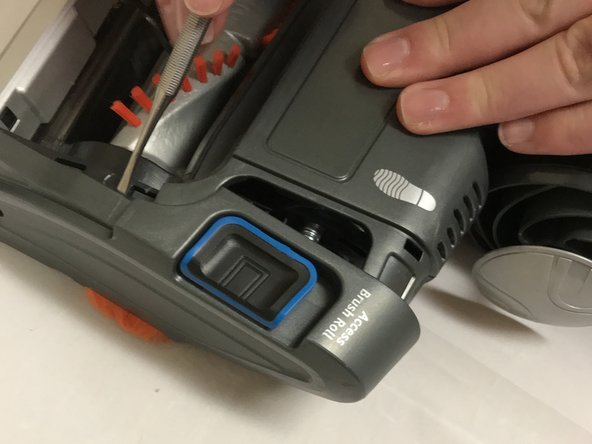
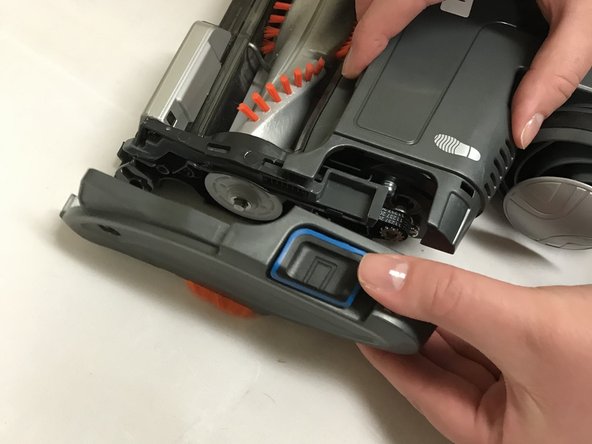
Appuyez et faites glisser les boutons "access brush roll" vers le texte et soulevez le couvercle en plastique du rouleau de brosse.
-
-


Pour remonter votre appareil, suivez ces instructions dans l'ordre inverse.
Pour remonter votre appareil, suivez ces instructions dans l'ordre inverse.
Annulation : je n'ai pas terminé ce tutoriel.
Une autre personne a terminé cette réparation.
Merci à ces traducteurs :
100%
[deleted] nous aide à réparer le monde ! Vous voulez contribuer ?
Commencez à traduire ›

Équipe

Eastern Washington University, Team S4-G1, Crane Fall 2018 Membre de l'équipe Eastern Washington University, Team S4-G1, Crane Fall 2018
EWU-CRANE-F18S4G1
2 membres
15 tutoriels rédigés
3 commentaires
You also forgot one of the most important parts when it comes to taking this apart. Which is taking the top off to get to motor I had solid lights which where the rug and floor lights and the vacuum would turn off which indicates that there is something going on with the motor. Unfortunately you didn’t have a picture on how to do so I had to break some parts to figure it out. So where the lights are its actually a sticker so you peal it off to get to the hidden screws to take the top off to get to the motor. After so long having this vacuum the dust can build up and clog the circuits where the motor is. I took Isopropyl alcohol 99% and used a tooth brush and scrubbed it and dried it and put the battery back in before putting everything back together and it worked perfectly again. Hope this helps out anyone else in the future so much better then buying a new vacuum.