Introduction
Avant de commencer à manipuler votre iMac : débranchez l'ordinateur, puis appuyez sur le bouton de marche et maintenez-le enfoncé pendant dix secondes pour décharger les condensateurs du bloc d'alimentation.
Faites très attention à ne toucher ni les pattes des condensateurs ni les brasages apparents au dos du bloc. Ne touchez que ses côtés.
Ce dont vous avez besoin
-
-
Si la charnière n'est pas bloquée, l'iMac sera mal équilibré et vous aurez du mal à le manipuler. Vous pouvez effectuer une réparation en posant l'iMac à l'horizontale, mais ce sera plus rapide et plus facile avec une cale de maintien pour iMac.
-
Si vous utilisez la cale de maintien en carton iFixit, suivez ces instructions pour la monter.
-
-
-
Posez l'iMac à l'envers sur une table.
-
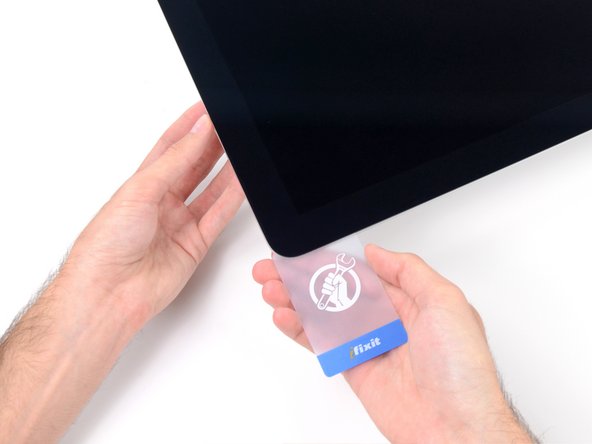
En partant de l'angle supérieur droit de l'iMac, insérez une carte en plastique entre l'écran et le châssis.
-
-
-
-
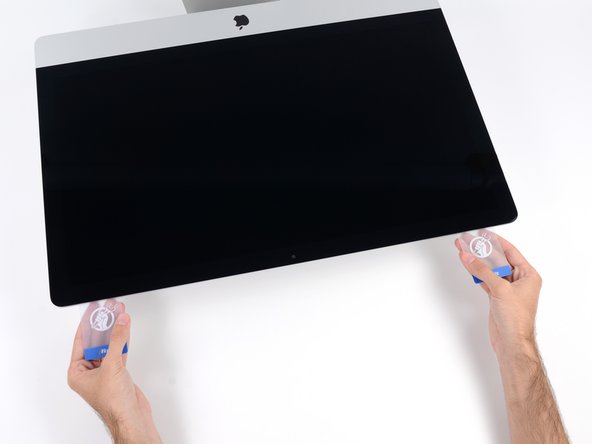
Insérez les deux cartes près des angles de l'iMac, comme illustré, puis tournez-les délicatement pour élargir l'interstice entre l'écran et le boîtier.
-
Si l'écran et le boîtier restent collés à certains endroits, utilisez l'une des cartes pour découper la mousse adhésive et les séparer.
-
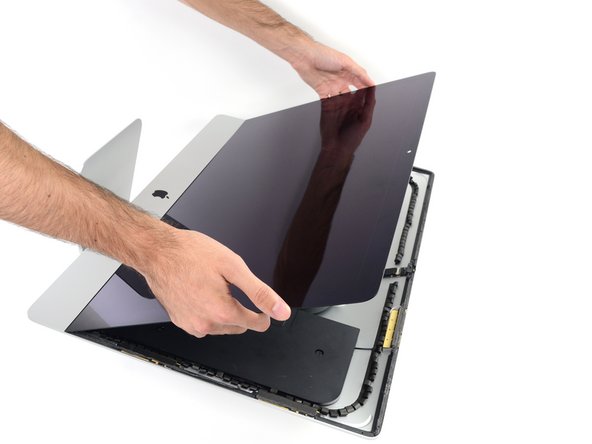
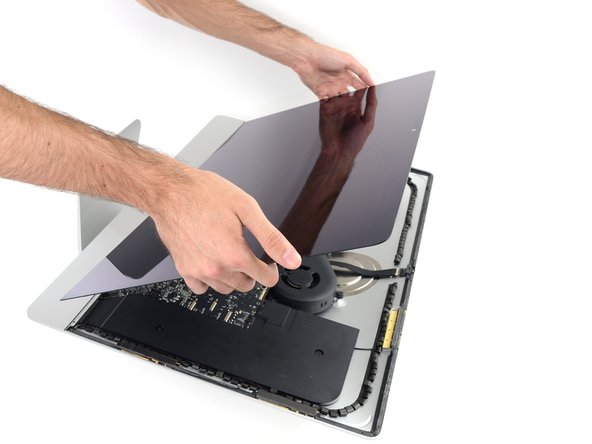
Commencez à soulever le haut de l'écran pour le séparer du châssis.
-
-
-
S'il y a un câble ou une nappe sous le ruban adhésif, retirez toujours le ruban en premier.
-
Si la nappe est collée au châssis, utilisez d'abord un iOpener chauffé ou un sèche-cheveux pour ramollir l'adhésif. Vous pouvez ensuite faire glisser un médiator sous la nappe pour la décoller. Ne tirez jamais directement sur les connecteurs délicats.
-
Faites glisser un médiator sous les coussinets en mousse pour les séparer de l'écran et retirez-les délicatement. Vous devrez peut-être utiliser du ruban adhésif double-face pour les rattacher au nouvel écran.
-
-
-
Tirez le câble de données/alimentation SATA vers le haut pour le débrancher du disque dur.
-
-
-
Débranchez la nappe de commande de l'alimentation du bloc d'alimentation.
-
Pour remonter votre appareil, suivez ces instructions dans le sens inverse et consultez notre tutoriel pour fixer l'écran avec des bandes adhésives.
Déposez vos déchets électroniques dans un centre de recyclage certifié.
La réparation ne s’est pas déroulée comme prévu ? Consultez nos conseils basiques de diagnostic ou notre Forum pour obtenir de l’aide.
Annulation : je n'ai pas terminé ce tutoriel.
58 autres ont terminé cette réparation.
Merci à ces traducteurs :
100%
Ces traducteurs nous aident réparer le monde ! Vous voulez contribuer ?
Commencez à traduire ›
9 commentaires
Hi, great in instructions.. I've had the power supply out for inspection...all looks good. I have NO LED's at all, Is there a way to test the power supply..?
Hi, great instructions thx, I've had the power supply out for inspection all LOOKS good, I have NO LED's at all, is there a way to test the PSU before I order one ans also how would I test the on / off switch just in case.? thx for ANY help
Why isn't there a power supply replacement part for this repair? Need a PSU for this exact machine. Is it because they used the same PSU for a few different years?
Hey Kramek did you find your power supply, I'm looking for the exact same part? Any ideas where I can find one?
This just ended my love affair with Apple. This is the second PSU fault on 2 machines over a 5 year period and in both cases, the machines have (or, in this case, will have to) return to Apple for repair. I'm thankful that Linux has finally reached the point where I can use it daily without having to worry too much. I have a fairly heavy investment in Apple software but that's just going to have to wait until the company makes user-serviceable machines again... right now, Hackintosh looks the way to go for that. I can't abide having a machine that I can't reasonably service with commonly available parts.


